Last Updated: March 2026 • Reviewed for NEC 2026 Compliance

Chart 240V Wiring
Chart 240V Wiring
Wiring a 240V outlet is a critical task for installing high-draw appliances like EV chargers, electric dryers, and ranges. This guide provides a step-by-step, code-compliant process for professional installers and advanced homeowners to ensure a safe and reliable installation. Following these instructions will help you pass inspections, prevent catastrophic failures, and power modern equipment correctly.
⚡ Quick Answer
To wire a 240V outlet: (1) confirm the appliance amperage from the nameplate, (2) install a new double-pole breaker of matching amperage, (3) run appropriately gauged wire (10/3 for 30A, 6/3 for 50A), (4) connect hot wires to the breaker, neutral to the neutral bus, ground to the ground bus, and match the receptacle to the NEMA plug type. Always verify with a multimeter before connecting any appliance.
Key Takeaways
240V Is Not a Simple Upgrade:- It requires a new dedicated circuit — dedicated double-pole breaker, correct wire gauge, and a matched NEMA receptacle. >
- Always size the breaker and wire to the appliance nameplate — never upsize to stop nuisance tripping. >
- New dryer and range circuits must use 4-wire NEMA 14-series outlets — two hots, neutral, and ground. >
- Never assume a correct installation — confirm 120V from each hot to neutral/ground and 240V across both hots before connecting any appliance. >
- A Square D breaker in an Eaton panel is a UL violation even if it physically fits. >
- Aluminum wiring, full panels, and permit requirements are all hard stops for DIY work.
In This Guide
Understanding the Fundamentals of 240V Wiring
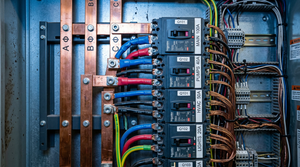
Before touching a wire, it is crucial to understand the core differences between 120V and 240V circuits. A 240V circuit is not a simple voltage upgrade — it is a dedicated, high-power line engineered specifically for appliances that would instantly trip a standard breaker: EV chargers, clothes dryers, water heaters, and electric ranges.
The key difference lies in the main electrical panel. A standard 120V circuit draws power from a single hot bus bar via a single-pole breaker. A 240V circuit uses a double-pole breaker that simultaneously connects to both hot bus bars, doubling the voltage. Consequently, the entire circuit — breaker, wire gauge, and the receptacle itself — must be specified and installed to handle the higher load and comply with the National Electrical Code (NEC).
120V vs. 240V — Key Differences at a Glance
| Feature | 120V Circuit | 240V Circuit |
|---|---|---|
| Breaker Type | Single-pole (1 slot) | Double-pole (2 adjacent slots) |
| Hot Bus Connections | 1 hot bus bar | Both hot bus bars simultaneously |
| Wires Required | Hot, Neutral, Ground (14/2 or 12/2) | Hot, Hot, Neutral, Ground (10/3, 8/3, or 6/3) |
| Typical Amperage | 15A or 20A | 30A, 40A, or 50A |
| Common Loads | Lighting, outlets, small appliances | EV chargers, dryers, ranges, water heaters |
Decoding NEMA Outlet Configurations
Not all 240V outlets are interchangeable. The appliance's plug dictates the specific receptacle required, based on its amperage rating and whether it has internal 120V components (timers, lights, control boards). The National Electrical Manufacturers Association (NEMA) standardizes these configurations to prevent mismatched, dangerous connections.
Pro Tip for Installers: Always verify the appliance's nameplate or installation manual before sourcing any materials. This label specifies the exact amperage (e.g., 30A, 50A) and NEMA plug type. Guessing is the fastest route to a failed inspection and a potential fire hazard.
NEMA 240V Outlet Reference Chart
| NEMA Type | Amperage | Common Application | Wires Required | NEC Status |
|---|---|---|---|---|
| NEMA 6-30 | 30A | Air conditioners, welders | Hot, Hot, Ground | ✅ Current |
| NEMA 6-50 | 50A | Welders, plasma cutters, large compressors | Hot, Hot, Ground | ✅ Current |
| NEMA 10-30 | 30A | Older dryers (pre-1996 only) | Hot, Hot, Neutral — No Ground | ⚠️ Unsafe — No Ground |
| NEMA 14-30 | 30A | Modern electric dryers | Hot, Hot, Neutral, Ground | ✅ Required (post-1996) |
| NEMA 14-50 | 50A | Electric ranges, EV chargers | Hot, Hot, Neutral, Ground | ✅ Required (post-1996) |
⚠️ 3-Wire vs. 4-Wire — Why It Matters
- Two hots + ground. Used for 240V-only loads like welders where no 120V components exist. No neutral needed. >
- Two hots + neutral + ground. Mandatory since the 1996 NEC for dryers and ranges. The separate neutral safely carries current for 120V internal components — timers, clocks, control boards, and interior lights — instead of routing it dangerously through the equipment ground wire. >
- Older 3-wire format with neutral but no ground. Now considered unsafe and prohibited for all new installations.
Gathering the Right Tools and Materials
A successful 240V installation is determined by meticulous preparation. Having the correct, high-quality tools and NEC-compliant materials ready before starting is non-negotiable — both for safety and to avoid mid-project delays that cost time and money.
The Essential Tool Kit
Non-Contact Voltage Tester:
- Your primary safety tool. Confirm the circuit is completely de-energized before any physical contact. Never trust a breaker label alone. >
- For final verification — confirms 120V from each hot to neutral/ground and 240V across the two hot conductors. >
- Must be rated for 10-gauge or 8-gauge NM-B cable to produce clean strips without nicking the copper conductor. >
- Essential for cutting heavy-gauge cable and forming tight terminal hooks on conductors. >
- Flathead, Phillips, and square-drive tips for terminal screws and breaker lugs. >
- Indispensable for pulling new cable through finished walls and conduit runs. >
- For securing NM-B at required intervals per NEC. >
- For boring through studs and joists along the cable route.
📋 Procurement Checklist — 30-Amp Dryer Circuit (NEMA 14-30)
- same brand as your panel (Square D, Eaton, Siemens, etc.) for UL compliance >
- "10" gauge, 3 insulated conductors (black, red, white) + bare copper ground >
- must match the appliance plug exactly >
- new-work or old-work box sized to accommodate 10/3 cable bulk without crowding >
- secures NM-B at the box entry point against physical damage >
- for securing at 12" from boxes and every 4.5 ft along the run
For Procurement & Installers: Never substitute materials to reduce cost. The wrong breaker size or wire gauge will result in a failed inspection requiring costly rework — and poses a serious fire risk. Base your Bill of Materials on the appliance's specified amperage rating, not assumptions.
Breaker and Wire Size Quick-Reference Chart
The appliance's amperage rating (from the nameplate) is the single governing factor for both breaker and wire selection. This chart covers the most common 240V residential and light commercial circuits.
| Appliance Load | Breaker Size | Wire Gauge (Copper) | Cable Type (4-wire) | NEMA Outlet |
|---|---|---|---|---|
| Electric Dryer | 30A | 10 AWG | 10/3 NM-B | NEMA 14-30R |
| Air Conditioner / Welder | 30A | 10 AWG | 10/2 NM-B | NEMA 6-30R |
| Electric Range (40A) | 40A | 8 AWG | 8/3 NM-B | NEMA 14-50R |
| EV Charger / Large Range | 50A | 6 AWG | 6/3 NM-B | NEMA 14-50R |
| Welder / Plasma Cutter (50A) | 50A | 6 AWG | 6/2 NM-B | NEMA 6-50R |

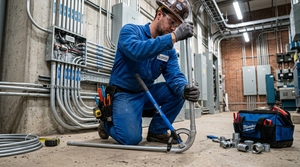
Preparing the Circuit Path and Breaker Panel
With materials sourced, the next phase involves site preparation. Before drilling a single hole, map a complete cable route from the panel to the outlet location — accounting for wall studs, ceiling joists, fire blocks, and any conduit sections in exposed areas. This foresight minimizes drywall damage and simplifies the cable pull significantly.
Installation Workflow — Step by Step
① Read appliance nameplate → confirm amperage and NEMA plug type
↓
② Source correct breaker, wire gauge, and matching NEMA receptacle
↓
③ Flip main breaker OFF → verify dead with non-contact tester
↓
④ Map cable route → drill through stud centers → mount outlet box
↓
⑤ Pull cable from outlet box back to panel → leave 18–24" slack each end
↓
⑥ Staple cable: within 12" of boxes, every 4.5 ft along run
↓
⑦ Snap double-pole breaker into two open adjacent slots
↓
⑧ Wire receptacle: Black/Red → brass; White → silver; Bare → green
↓
⑨ Terminate panel: Black/Red → breaker; White → neutral bus; Bare → ground bus
↓
⑩ Restore power → multimeter verify all 5 voltage readings
De-Energizing the Panel — Critical Safety Protocol
Working inside a live electrical panel can be fatal. This procedure must be followed exactly, every single time.
⚠️ Critical Safety Protocol — Panel De-Energization
- >Flip the
- (100A or 200A) to the OFF position. >Use your
- on the main lugs where utility lines enter the panel — these remain live even with the main breaker off. >Test several individual circuit breakers to confirm the panel interior is de-energized. >
NEC Cable Securing Requirements
- >Secure the cable with a staple within
- of any non-metallic electrical box. >Along the run, staple to studs or joists at least every
- . >When drilling through studs, always drill through the
- — this protects the wire from future drywall screws. >Use a dedicated
- at the panel knockout entry to prevent abrasion at the enclosure edge.
Making the Connections at the Outlet and Panel
With the cable run confirmed and the panel verified dead, precision becomes paramount. Loose connections are a primary cause of electrical fires — never skip the physical tug test on every terminal. This process is divided into two stages: wiring the receptacle first, then terminating at the breaker panel.
Wiring the 240V Receptacle
At the outlet box, strip the outer vinyl sheathing to expose 6–8 inches of the inner wires. Using wire strippers rated for your gauge, remove approximately 3/4 inch of insulation from the black, red, and white conductors. The bare copper ground wire requires no stripping. Bend a small clockwise hook at the end of each stripped conductor using Lineman's pliers.
Terminal Color Code — 4-Wire Receptacle (NEMA 14-30 / 14-50)
- Connect the
- and
- hot wires — order does not matter. >⚪
- Connect the
- neutral wire. >🟢
- Connect the
- ground wire.
For a 3-wire outlet (NEMA 6-50): connect Black and Red to brass screws, bare copper to green screw. No silver screw is present — there is no neutral on a 3-wire 240V-only circuit.
Pro Tip for Installers: After tightening each terminal screw, give every wire a firm, sharp tug. Any movement indicates an insecure connection that must be re-tightened immediately. This simple mechanical check is the difference between a safe installation and a callback for a melted outlet.
Terminating at the Breaker Panel — 4-Wire Circuit
- Connect the
- to one terminal screw on the new double-pole breaker. >Connect the
- to the second terminal screw on the same breaker. >Land the
- on an open slot on the
- (the silver bar carrying all other white wires in the panel). >Land the
- on an open slot on the
- (bonded to the panel enclosure). >Perform a final torque check on all four connections and organize the new wiring neatly inside the panel. >Replace the panel cover carefully — confirm no wires are pinched by the cover edge.
3-Wire Circuit Panel Termination (NEMA 6-30 / 6-50)
- Connect
- and
- to the two breaker terminals. >Connect the
- to the ground bus bar. >The neutral bus bar is
- this circuit has no neutral conductor.
Finalizing the Install and Performing Safety Checks
The physical installation is complete — but the job is not finished. Gently fold the wires into the electrical box using accordion folds to avoid straining the terminal connections. Secure the outlet to the box with its mounting screws, confirm it sits flush and level, and attach the cover plate.
The Non-Negotiable Voltage Verification
At the panel, perform a final visual sweep for tools or debris inside the enclosure. Reinstall the cover. Restore power by flipping the main breaker to ON, then flip the new double-pole breaker to ON. Return to the outlet with your multimeter set to AC voltage (V~) and perform all five required readings.
⚠️ Safety Mandate: Never Skip the Multimeter Test
Assuming a correct installation without multimeter verification is a dangerous shortcut. An incorrectly wired outlet can destroy expensive appliances, trip GFCI protection repeatedly, create shock hazards, or start a fire inside the outlet box. This test protects the equipment, the property, and lives. It takes under two minutes — there is no excuse to skip it.
Required Multimeter Readings — 4-Wire Outlet (NEMA 14-30 / 14-50)
| Test | Probe 1 | Probe 2 | Expected Reading | If Wrong |
|---|---|---|---|---|
| Hot 1 → Neutral | Hot slot 1 | Neutral slot | ~120V AC | Re-inspect neutral connection at panel |
| Hot 2 → Neutral | Hot slot 2 | Neutral slot | ~120V AC | Re-inspect neutral wire termination |
| Hot 1 → Ground | Hot slot 1 | Ground pin | ~120V AC | Re-inspect ground at panel bus bar |
| Hot 2 → Ground | Hot slot 2 | Ground pin | ~120V AC | Re-inspect ground wire at receptacle |
| Hot 1 → Hot 2 | Hot slot 1 | Hot slot 2 | ~240V AC | Re-inspect both hot wires at breaker |

Professional Installation Cost Breakdown
With the proliferation of EV chargers and high-draw appliances, the demand for 240V circuit installations has grown significantly. The average professional cost for a 240V outlet installation is approximately $220–$345, with a typical range of $175 to $400 depending on circuit complexity, panel accessibility, run length, and local permit requirements.

Common Questions — Answered
Can I convert a 120V outlet to 240V?
No — this is not possible and is a serious code violation. A standard 120V circuit uses a single-pole breaker and 14/2 or 12/2 wiring that cannot handle 240V amperage. A brand-new, dedicated circuit must be run from a new double-pole breaker in the panel using correctly gauged wire (e.g., 10/3 or 6/3 NM-B). There are no shortcuts.
What is the real difference between 3-wire and 4-wire 240V?
Code is King: Since the 1996 NEC, 4-wire outlets (NEMA 14-30, 14-50) are mandatory for all new dryer and range installations. The separate neutral provides a safe dedicated return path for 120V appliance components — preventing dangerous neutral current from traveling on the equipment ground wire, which is the primary failure mode that caused the NEC change.
How do I pick the right breaker and wire size?
The appliance nameplate governs everything. The two most common pairings are:
30-Amp circuit:- 30A double-pole breaker + 10-gauge copper (10/3 NM-B for 4-wire) >
- 50A double-pole breaker + 6-gauge copper (6/3 NM-B for 4-wire)
Always match all components to the same amperage rating. Never use a larger breaker than the wire's rated ampacity allows.
Does the breaker brand matter?
Yes — significantly. Circuit breakers are UL-listed to specific panel models. Installing a Square D breaker in a Siemens panel (or vice versa) is a code violation even if it physically fits and snaps in. Always purchase a breaker that matches your exact panel brand and series. When in doubt, check the panel's manufacturer label for the approved breaker model list.
When should I stop the DIY and call a licensed electrician?
Stop and call a pro if any of the following apply:
- You are uncertain about any step in this process — electrical uncertainty is never acceptable. >Your panel has
- for a new double-pole breaker. >You discover
- anywhere in the circuit path. >Your jurisdiction requires a
- for this type of work. >The existing panel appears outdated, damaged, or modified.
Related Resources:
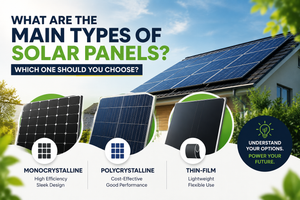
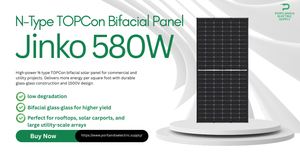
- Best Solar Panels 2026 — Buyer's Guide
- EG4 vs Tesla Powerwall
- Qcells vs Trina vs JA
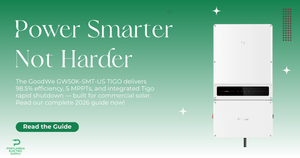
- Solar Inverter Buyer's Guide
- Solar Battery Buyer's Guide
- 5kW Solar Kit
- 10kW Solar + Battery Kit
- Off-Grid Cabin Kit
- EG4 Batteries
- Qcells Solar Panels
- Trina Solar
- JA Solar
- REC Solar
- Mission Solar
- Sol-Ark Inverters
- SolarEdge Inverters
- Generac PWRcell
Calculate how much storage you need with our battery sizing calculator.
Use our free solar system calculator to size your array.
Check out our Solar Panel Comparison Tool. Check out our Inverter Sizing Calculator.
Calculate your solar payback and 25-year savings with our Solar ROI Calculator. Follow our complete DIY solar installation guide for step-by-step instructions. Keep your system running at peak performance with our Solar Maintenance Guide.
Related Resources
- Solar System Calculator
- Battery Sizing Calculator
- Solar Panel Comparison Tool
- Inverter Sizing Calculator
- Solar ROI Calculator
- Solar Installation Guide
- Solar Maintenance Guide
- Solar Permitting Guide
- Battery Installation Guide
- NEC Code Compliance Guide
- Solar Panel Mounting Guide
- Grounding & Bonding Guide
- Solar Incentives by State
- Pro Account — Wholesale Pricing
- PowerLink Network — Contractor Program
Recommended Products


Related:
- Electric Vehicle (EV) Chargers — Level 2 chargers that plug into or hardwire to a 240V circuit
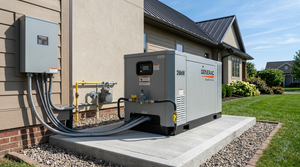
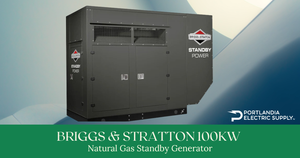
- Standby Generators — 240V generator output for whole-home backup
- Automatic Transfer Switches & Generator Accessories — connect a 240V generator to your panel safely and code-compliantly


📊 Try Our Wire Size Calculator
Calculate the correct AWG wire size for your 240V circuit based on amperage, distance, and voltage drop. Get NEC-compliant results for EV chargers, outlets, and appliance circuits.
Open Wire Size Calculator →Shop by Category
Frequently Asked Questions
What size wire do I need?
Wire sizing follows NEC Table 310.16 based on ampacity. A 20A circuit needs 12 AWG copper, a 30A circuit needs 10 AWG, and a 50A circuit needs 6 AWG.
Do I need a permit for electrical work?
Most electrical work requires a permit. Check with your local AHJ (Authority Having Jurisdiction). PES Supply provides spec sheets for permit submittals.
What is the NEC 125% rule?
NEC 210.19(A)(1) requires continuous loads (3+ hours) to be sized at 125% of the rated load. A 16A continuous load needs a 20A breaker (16 x 1.25 = 20A).
Shop Related Products
PES Supply carries 80,000+ products from 300+ manufacturers. One PO, one invoice, every trade covered.
Need help sizing? Our team can calculate loads, select equipment, and source everything from one PO.
Call (502) 790-0600