If you're an installer, developer, or homeowner evaluating HVAC upgrades, the core question is always the same: what's the real-world cost to install a ductless mini split? There's no fluff here—this guide delivers the actionable data you need to budget, bid, and make informed procurement decisions in today's market.
The all-in price to install a ductless mini-split system ranges from $3,500 for a simple single-zone installation to $20,000+ for a high-performance, multi-zone setup for a whole home. This figure includes both the equipment and the critical professional labor required for a safe, code-compliant, and warrantied installation. For project managers and procurement officers, understanding the breakdown of these costs is essential for accurate bidding and maximizing project ROI.
Your Quick Guide to Mini Split Installation Costs
Understanding the total investment is the first step for any HVAC project. The final invoice will vary based on system capacity (BTUs), brand tier, energy efficiency ratings (SEER2/HSPF2), and site-specific installation complexity. Having a solid baseline is crucial for setting a realistic budget and evaluating contractor quotes.
The adoption of ductless technology is accelerating, driven by rising energy costs, decarbonization goals, and significant government incentives like the IRA. The global market was valued at a massive $17.92 billion in 2025, with North America seeing a major uptick. On average, you can expect the cost to be about $4,944 per ton of cooling capacity, which includes both hardware and installation.
Estimated Ductless Mini Split Installation Costs by System Type
This table provides a real-world cost breakdown for different system configurations, covering both equipment and professional labor. Use this as a starting point for project budgeting and quote comparison.
| System Type | Number of Indoor Units | Typical All-In Cost Range |
|---|---|---|
| Single-Zone System | 1 | $3,500 – $7,500 |
| Dual-Zone System | 2 | $6,000 – $12,000 |
| Multi-Zone (3+ Zones) | 3 or more | $9,000 – $20,000+ |
Ductless mini-splits are a type of air source heat pump, a technology rapidly becoming the standard for high-efficiency heating and cooling. For a broader market comparison, this complete guide to air source heat pump costs provides valuable context. The following sections will detail the factors that shape your final quote—from brands and capacity to critical electrical work and permitting.
Breaking Down Your Quote: Equipment vs. Labor Costs
When you receive a quote for a ductless mini-split, it's comprised of two primary components: the equipment (hardware) and the skilled labor required for installation. Understanding this split is critical for both homeowners budgeting for an upgrade and contractors developing accurate project bids.
The Hardware: What You’re Actually Buying
The equipment cost is driven by the core components—the outdoor condenser and indoor air handler(s)—but a complete, code-compliant installation requires a full bill of materials.
A typical equipment package includes:
- Outdoor Condenser: The heart of the system, responsible for heat exchange. Its capacity and brand directly impact cost.
- Indoor Air Handler(s): The wall-mounted "heads" that deliver conditioned air. The number of heads and their style (e.g., wall-mount vs. ceiling cassette) are major cost drivers.
- Refrigerant Lines (Line Sets): Insulated copper tubing connecting the indoor and outdoor units. Longer runs or complex routing increase material costs.
- Controls: Includes zone remotes and potentially a centralized, Wi-Fi-enabled smart thermostat for integrated system management.
For procurement managers and installers, researching the best ductless mini split systems from brands like Mitsubishi, Daikin, or Fujitsu is key to aligning project specs with budget and performance requirements.
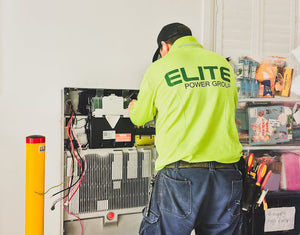
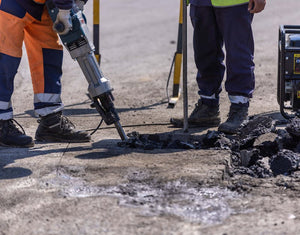
The Labor: Why a Pro Install Is Non-Negotiable
While equipment is a significant portion of the cost, professional labor is a critical investment in the system's performance, safety, and longevity. This is not a DIY project; it requires licensed, certified technicians with specialized tools and knowledge.
Compliance Watchout: A botched installation by an unlicensed individual can cause dangerous refrigerant leaks, create fire hazards from improper wiring, cripple system efficiency, and will immediately void the manufacturer's warranty, putting the entire equipment investment at risk.
A licensed HVAC technician performs a series of complex tasks: securely mounting units, running and pressure-testing refrigerant lines, performing electrical work to NEC standards, and charging the system with the precise amount of refrigerant—a task requiring EPA certification. They then commission the system, verifying all functions to ensure it operates at peak efficiency. For a deeper technical comparison, our guide on heat pumps vs. traditional AC is an essential resource.
Itemized Cost Breakdown for a Typical Single-Zone Installation
Here is a sample cost breakdown to help you analyze quotes and understand where your money is going.
| Cost Item | Example Cost Range | Notes for Buyers and Installers |
|---|---|---|
| Ductless Equipment | $1,500 – $4,000 | Includes outdoor condenser, indoor air handler, and line set. Brand (e.g., Mitsubishi vs. economy tier), efficiency (SEER2 rating), and size (BTU) are major price factors. |
| Professional Labor | $1,500 – $5,000 | Covers installation, system charging, and commissioning. This cost is higher in major metro areas and for more complex installations requiring multiple technicians. |
| Electrical Work | $350 – $1,300 | Includes running a new dedicated 240V circuit, installing a disconnect box, and all necessary wiring and conduit. This is essential for safety and NEC code compliance. |
| Mounting Hardware | $100 – $300 | Covers wall brackets for the indoor unit and a mounting pad or stand for the outdoor condenser. |
| Permits & Inspection | $250 – $500 | Varies widely by municipality. A reputable contractor will handle the entire permitting process as part of their service. |
| Potential Add-Ons | $200 – $1,000+ | Could include a condensate pump if gravity drainage isn't possible, or a line set cover to protect and conceal exterior lines. |
| Total Estimated Cost | $3,900 – $12,100+ | The final price tag depends heavily on your specific site conditions, the equipment you choose, and local labor rates. |
The cost of skilled labor has risen significantly. In 2015, labor for a single-zone install might have cost $800–$1,500. By 2025, that same job now commands $1,500–$5,000. In many U.S. markets, labor now accounts for 40-60% of the total project cost, reflecting high demand for certified technicians who can guarantee a compliant and efficient installation.
Key Factors That Influence Your Final Price
Beyond the equipment-labor split, several key variables will directly impact the final installation cost. For contractors, accurately assessing these factors is critical for creating profitable bids. For buyers, it clarifies why quotes can vary significantly.
System Capacity and Size
System capacity, measured in British Thermal Units (BTUs), is the primary cost driver. Sizing is not a guess; it requires a professional "Manual J" load calculation to ensure optimal performance.
- Undersized System: Runs constantly, failing to reach the set temperature and driving up energy bills.
- Oversized System: Short-cycles frequently, wasting energy, failing to dehumidify properly, and causing premature wear on components.
The Manual J calculation considers square footage, ceiling height, insulation values, window performance, and local climate data. A small bedroom may only require a 6,000 BTU unit, while a large, open-concept living area could need 18,000 BTUs or more. Higher BTU capacity directly translates to a higher equipment cost.
Brand Reputation and Tier
The HVAC market is tiered. Tier 1 brands like Mitsubishi, Daikin, and Fujitsu are known for exceptional reliability, advanced features, and robust warranties. They command a premium price. Mid-tier brands offer a solid balance of cost and performance, while economy brands provide a lower upfront cost, potentially with shorter warranties or fewer features. Brand choice can easily swing the equipment portion of a quote by 15-30%.
Energy Efficiency Ratings
A system's efficiency rating directly impacts both its upfront cost and its long-term operating cost. The two key metrics are:
- SEER2 (Seasonal Energy Efficiency Ratio 2): Measures cooling efficiency. Higher is better.
- HSPF2 (Heating Seasonal Performance Factor 2): Measures heating efficiency. Higher is better.
High-efficiency units cost more initially but generate significant long-term savings on utility bills. Crucially, federal tax credits (like the 25C) and local utility rebates are tied to specific SEER2 and HSPF2 minimums, which can offset the higher initial investment.
Number and Type of Zones
A single-zone system (one outdoor unit, one indoor unit) is the most straightforward and affordable. As you add zones (dual-zone, tri-zone, etc.), both equipment and labor costs increase. Each additional indoor unit requires mounting, wiring, and a separate refrigerant line set, adding hours and materials to the project.
The type of indoor unit also affects the price. Standard wall-mounted heads are the most cost-effective. Ceiling cassettes, floor-mounted consoles, or concealed ducted units are more expensive and require more complex installation.
For Project Managers & Developers: While total project cost increases with each zone, the marginal cost of adding a third or fourth zone is often lower than the first two, as the core electrical and condenser infrastructure is already in place. This is a key metric for optimizing multi-unit bids.
Site-Specific Installation Complexity
No two installations are identical. The unique characteristics of a property can significantly impact labor and material costs.
- Refrigerant Line Set Length: Longer distances between indoor and outdoor units require more materials and labor.
- Structural Requirements: The outdoor condenser needs a stable, level surface, such as a pre-cast concrete pad or a wall-mounted bracket, which adds to the cost.
- Electrical System Upgrades: Many older buildings have electrical panels that cannot support the load of a modern mini-split. This may require adding a dedicated circuit or a full panel upgrade. For a technical overview, see our guide on how to upgrade your electrical service.
- Accessibility: Difficult work environments, such as tight crawl spaces, high exterior walls, or attics, increase labor costs due to added time and safety precautions.
Budgeting for Hidden Costs and Essential Add-Ons
A preliminary quote often doesn't capture the full project scope. The final invoice will include items that are not optional upsells but are required for a safe, compliant, and functional system. Proactive budgeting for these elements is key to avoiding surprise costs.
This infographic illustrates how the total cost is built, from the base equipment to the number of zones and efficiency ratings that influence the final price tag.

As shown, the price layers up. The core system, number of zones, and efficiency create the foundation before required add-ons are factored in.
Navigating Permits and Inspections
Nearly all HVAC installations require a municipal building permit to ensure the work meets local safety codes. A reputable contractor will manage this process, but the fee is a pass-through cost. Permit fees typically range from $250 to $500, but can vary. Skipping this step can result in fines and work-stop orders.
Accounting for Necessary Electrical Work
Ductless mini-splits require a dedicated electrical circuit. This is one of the most common and critical additional costs, especially in older buildings.
- Adding a Dedicated Circuit: A licensed electrician must run a new wire from the breaker panel to the outdoor condenser. This typically costs $350 to $1,300, depending on the length and complexity of the run.
- Installing an Electrical Disconnect: A safety switch near the outdoor unit is required by code in most jurisdictions.
- Full Panel Upgrade: If the existing electrical panel is outdated or at capacity, a full upgrade is necessary. This is a significant expense, ranging from $1,500 to $4,000 or more.
Pro Tip for Installers and Buyers: Always conduct a thorough electrical assessment before finalizing a quote. Identifying the need for a panel upgrade early prevents major project delays and unexpected costs, building trust with the client.
Considering Common System Add-Ons
These components address specific site challenges and enhance system performance and aesthetics.
- Condensate Pump: If gravity cannot drain condensation from an indoor unit (e.g., in a basement), a condensate pump is required. This adds $250 to $500 to the cost.
- Line Set Covers: These protective plastic channels conceal and protect exterior refrigerant lines, wiring, and drain hoses from UV damage and physical impact. A professional finish typically costs $200 to $600.
- Wi-Fi Controllers: Upgrading to a Wi-Fi-enabled controller allows for remote operation via a smartphone app, enhancing convenience and energy management.
DIY vs. Professional Installation: A Cost and Risk Analysis
The temptation to save thousands on labor by installing a DIY mini-split kit is strong. However, this path is fraught with financial and safety risks that can quickly negate any initial savings. A professional installation is an investment in safety, performance, and warranty protection.
The Lure of Savings vs. The Reality of What Can Go Wrong
While labor can represent 40-60% of the project cost, eliminating it introduces a minefield of potential failures. A professional's quote includes expertise, specialized tools, code compliance, and warranty activation.
Key risks of a DIY installation:
- Warranty Invalidation: Virtually all reputable HVAC manufacturers require installation by a licensed technician to activate the warranty. A DIY install immediately voids this protection.
- Dangerous Refrigerant Mishandling: Handling high-pressure refrigerants requires an EPA 608 certification by law. Improper connections can cause leaks that damage the system and the environment, requiring expensive professional repairs.
- Serious Electrical Dangers: Mini-splits require a dedicated 240V circuit. Incorrect wiring presents a significant risk of electrical shock and fire. A professional guide on how to wire a 240V outlet illustrates the complexity involved—this is not a task for amateurs.
- Crippled Performance: Achieving the advertised SEER2 and HSPF2 ratings requires precise installation, including correct line set length, proper unit placement, and an exact refrigerant charge. Errors will drastically reduce efficiency and increase energy bills.
The Real-World Value of a Professional Install
Hiring a certified technician is insurance for your investment, ensuring the system operates safely and efficiently from day one.
A professional installation transforms a ductless mini split from a simple appliance into a high-performance, integrated home comfort system. It guarantees safety, unlocks the manufacturer's warranty, and ensures every dollar you spent on high-efficiency equipment delivers a real return on your energy bills.
Key Benefits of a Professional Install:
- Safety and Code Compliance: Licensed professionals ensure the installation meets all National Electrical Code (NEC) and local building regulations, guaranteeing safety and passing all required inspections.
- Warranty Protection: A professional installation activates the full manufacturer's warranty, protecting you from the cost of premature component failure.
- Peak Performance and Efficiency: Technicians use specialized tools like vacuum pumps, torque wrenches, and refrigerant gauges to commission the system to exact specifications, ensuring you achieve the efficiency you paid for.
- Access to Better Equipment: Top-tier brands like Mitsubishi and Daikin restrict the sale of their premium equipment to certified dealer networks to ensure proper installation and protect their brand reputation.
For contractors, this is your core value proposition. You are selling guaranteed safety, optimal performance, and protected investments. For homeowners seeking qualified installers, our PowerLink contractor network connects you with vetted, licensed professionals.
Getting an Accurate Quote from a Reliable Installer

Securing a detailed, transparent quote is the final critical step. This is not just about price shopping; it's about vetting the quality and professionalism of the installer.
The industry best practice is to obtain at least three quotes from different licensed contractors. This allows you to compare not only the price but also the proposed equipment, scope of work, and professionalism of each company. A vague, one-line quote is a major red flag.
Your Quote Checklist
A professional quote should be fully itemized. Ensure the proposal includes:
- Itemized Equipment List: Exact make and model numbers for the outdoor condenser and all indoor units.
- Total System Capacity: Clearly stated BTU ratings for both heating and cooling.
- Labor Costs: A clear breakdown of all labor charges.
- Electrical Work: Any required electrical work listed as a separate line item.
- Permit Fees: The cost of pulling required permits clearly stated.
- All Materials: A line-item for all materials, including line sets, condenser pad, and brackets.
- Warranty Information: Details on both the manufacturer's parts warranty and the contractor's labor warranty.
Critical Mistake: Accepting a quote with a single lump-sum price is a significant risk. Professional contractors provide transparent, itemized quotes to show you exactly what you are paying for.
Vetting Your Installer
Before signing any contract, perform a quick background check.
- State Licensing: Verify they hold a valid state HVAC contractor license.
- Insurance: Request proof of general liability insurance and worker’s compensation.
- Certifications: Look for EPA 608 certification (legally required) and any manufacturer-specific training credentials.
Taking these steps ensures you partner with a qualified professional. To connect with vetted, licensed installers in your area, use our PowerLink contractor network to get an accurate, transparent quote for your project.
Mini Split FAQs: Your Final Questions, Answered
Here are answers to common questions from both homeowners and industry professionals.
How Much to Tack On Another Zone Later?
Adding an indoor unit to an existing multi-zone system typically costs $1,500 to $3,000 per additional zone. This price includes the new indoor head, line set, wiring, and labor. The final cost depends on installation complexity and, critically, whether your existing outdoor condenser has sufficient capacity to support another head.
Are There Any Good Rebates for High-Efficiency Models?
Yes. Federal, state, and utility incentives can significantly reduce the net project cost. The federal 25C tax credit offers 30% of the project cost, up to $2,000, for qualifying high-efficiency systems. Many state and local utility programs offer additional rebates based on SEER2 and HSPF2 ratings. A knowledgeable installer can help you identify and apply for all available incentives to lower the final cost of your ductless mini split installation.
For Installers & Developers: Highlighting these incentives is a powerful sales tool. Factoring rebates into the ROI calculation makes premium, high-efficiency systems a more compelling investment for clients, shortening the payback period and justifying the upfront cost.
How Long Is My House Going to Be a Construction Zone?
Ductless mini-split installations are relatively non-invasive and quick.
- Single-Zone System: A standard installation can typically be completed by a two-person crew in 4-8 hours, or one full day.
- Multi-Zone System: A more complex system with three or four indoor units generally takes two to three days, particularly if it involves extensive electrical work or difficult line set runs.
At PES Supply, we provide installers, developers, and homeowners with transparent pricing on top-tier ductless brands and the full bill of materials needed for any project. Through our PowerLink network, we can connect you with certified installers who will execute your project to the highest standards.
Explore our complete line of HVAC solutions and request a quote today by visiting us at https://portlandiaelectric.supply.
Related Resources:
- Best Solar Panels 2026 — Buyer's Guide
- EG4 vs Tesla Powerwall
- Qcells vs Trina vs JA
- Solar Inverter Buyer's Guide
- Solar Battery Buyer's Guide
- 5kW Solar Kit
- 10kW Solar + Battery Kit
- Off-Grid Cabin Kit
- EG4 Batteries
- Qcells Solar Panels
- Trina Solar
- JA Solar
- REC Solar
- Mission Solar
- Sol-Ark Inverters
- SolarEdge Inverters
- Generac PWRcell
Calculate how much storage you need with our battery sizing calculator.
Check solar incentives available in your state.
Use our free solar system calculator to size your array.
Check out our Solar Panel Comparison Tool. Check out our Inverter Sizing Calculator.
Calculate your solar payback and 25-year savings with our Solar ROI Calculator. Follow our complete DIY solar installation guide for step-by-step instructions. Keep your system running at peak performance with our Solar Maintenance Guide.
Related Resources
- Solar System Calculator
- Battery Sizing Calculator
- Solar Panel Comparison Tool
- Inverter Sizing Calculator
- Solar ROI Calculator
- Solar Installation Guide
- Solar Maintenance Guide
- Solar Permitting Guide
- Battery Installation Guide
- NEC Code Compliance Guide
- Solar Panel Mounting Guide
- Grounding & Bonding Guide
- Solar Incentives by State
- Pro Account — Wholesale Pricing
- PowerLink Network — Contractor Program