
How to Install Solar Panels on Rooftop: A Professional's Guide
Installing a solar panel system on a rooftop is a multi-stage technical project, not a simple construction job. For solar installers, EPCs, and project developers, success hinges on executing a precise workflow from initial site assessment and structural engineering to meticulous mechanical and electrical installation, culminating in final commissioning and utility interconnection. For homeowners, understanding this process is critical to making informed decisions and ensuring a high-quality, long-lasting investment.
This guide provides a real-world project plan, cutting through the generic fluff to detail the critical steps, compliance requirements, and decision points that define a professional solar installation. The key to a smooth, on-schedule, and on-budget project is meticulous planning—verifying roof integrity, specifying the right components for the site's energy profile, and ensuring every connection complies with the National Electrical Code (NEC) and local Authority Having Jurisdiction (AHJ) standards.
Your Blueprint for a Successful Solar Installation
Whether you are an installer planning your next job or a homeowner vetting contractors, this guide serves as a project partner's overview of what a professional installation truly entails. Success is determined by understanding the critical phases and decision-making frameworks before a single panel is hoisted onto the roof.
The core of any professional installation is a clear, step-by-step process. This infographic provides a high-level view of the foundational stages.
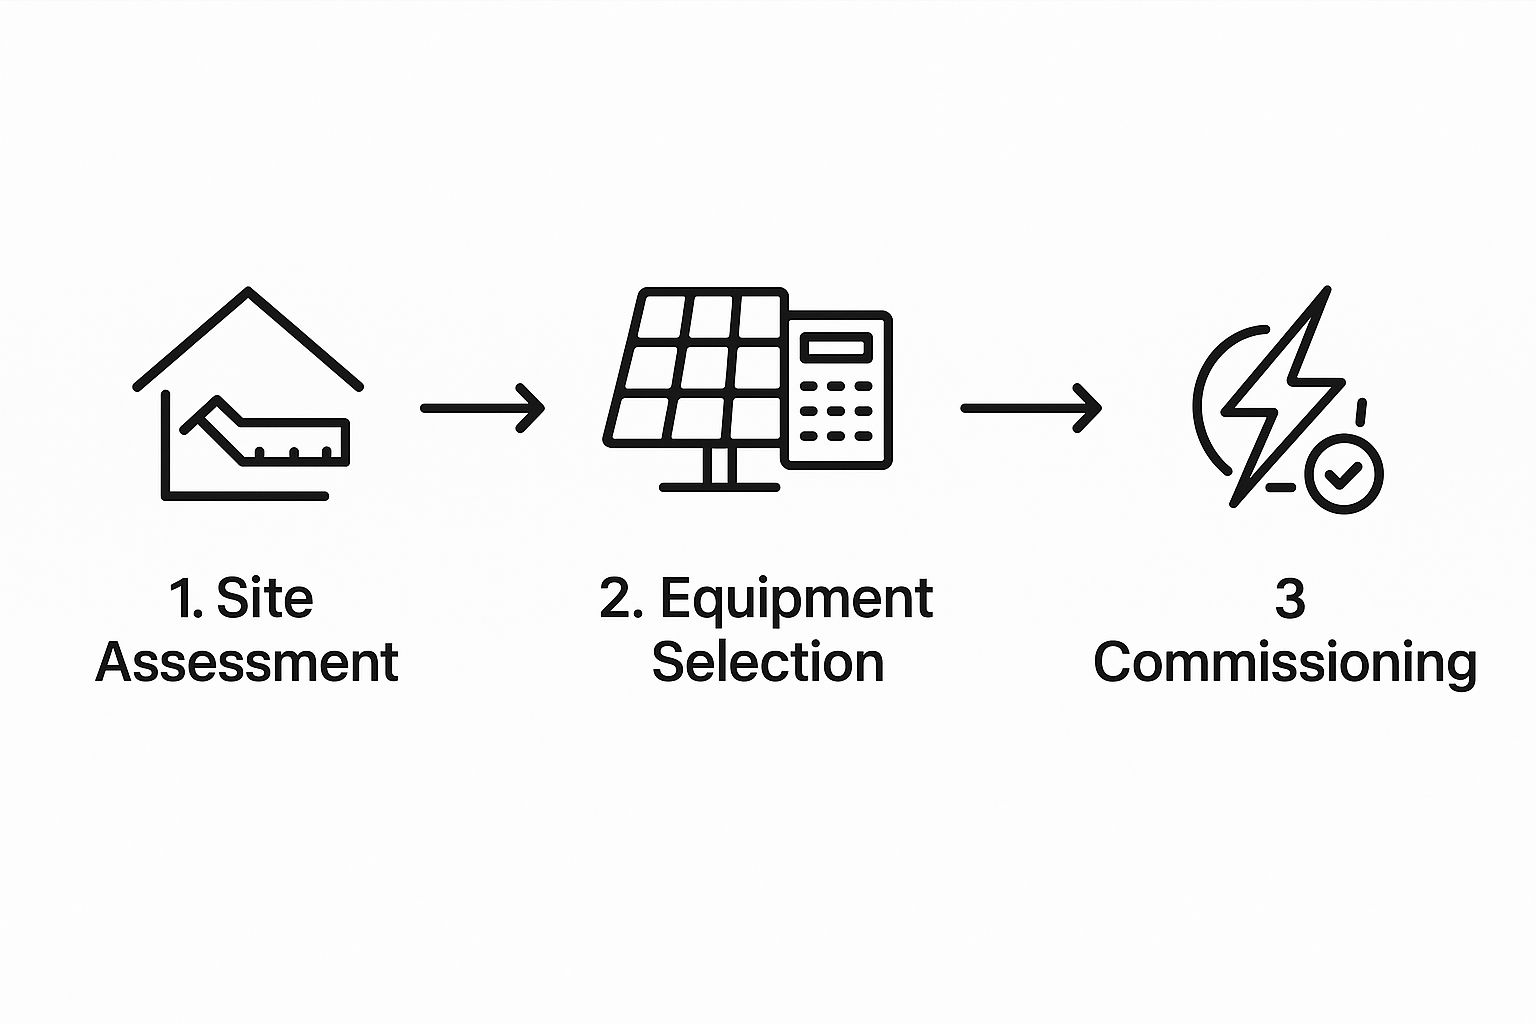
This workflow is non-negotiable. Attempting to skip steps or rush through details is a direct path to expensive project delays, failed inspections, and critical safety risks.
Understanding the Project Lifecycle
A rooftop solar project is a process with distinct phases, each presenting unique challenges that demand specific expertise.
- Initial Assessment and Design: This is the project viability stage. It requires a detailed analysis of the roof's structural condition, a professional shading analysis, and a review of the property's energy consumption data to engineer a system that meets performance and financial targets.
- Permitting and Procurement: Navigating the bureaucracy of local AHJs and utility companies is often the most time-consuming phase. Concurrently, you are sourcing and managing the logistics for all equipment—panels, inverters, racking, and balance-of-system (BOS) components.
- Installation and Commissioning: The physical build phase. This involves the mechanical mounting of racking and panels, followed by the complex electrical wiring. The final step is commissioning—a systematic series of tests to verify system safety and performance before receiving the final inspection and Permission to Operate (PTO).
Critical Mistake: One of the most common pitfalls is underestimating the importance of contractor selection. For homeowners, this decision impacts everything from permit approval speed to workmanship quality. For EPCs, unreliable subcontractors can destroy project margins and timelines.
The global push for renewable energy is accelerating project timelines and technology adoption. The world added a staggering 380 gigawatts (GW) of new solar capacity in the first half of 2023—a 64% increase over the previous year. This rapid growth underscores how quickly solar is becoming the leading source of new electricity generation worldwide.
To provide a clear project roadmap, the table below breaks down the key stages, outlining objectives and critical considerations for both professional installers and homeowners.
Key Stages of a Rooftop Solar Project
| Phase | Objective | Key Considerations for Installers | Key Considerations for Homeowners |
|---|---|---|---|
| 1. Site Assessment & Design | Determine system viability and create an optimized plan. | Accurately measure roof space, assess structural integrity, and analyze shading patterns. | Provide accurate electricity bills and discuss energy goals and aesthetic preferences. |
| 2. Permitting & Procurement | Secure all necessary approvals and order all equipment. | Prepare and submit error-free permit applications and coordinate equipment delivery logistics. | Sign interconnection agreements and understand equipment lead times. |
| 3. Mechanical Installation | Install racking and mount solar panels securely. | Ensure all attachments are properly sealed and flashed to prevent leaks. Follow racking manufacturer specs. | Keep the work area clear and understand the installation timeline. |
| 4. Electrical Installation | Wire panels, inverters, and connect to the main service panel. | Adhere strictly to the National Electrical Code (NEC) and local AHJ requirements for all wiring and grounding. | Be available for potential brief power shutdowns during the final connection. |
| 5. Inspection & Commissioning | Pass final inspection and officially activate the system. | Schedule the inspection with the local authority and be present to answer any technical questions. | Learn how to monitor system production and understand shutdown procedures. |
This table serves as a project management tool, aligning expectations and ensuring all stakeholders understand their roles and responsibilities from inception to activation.
Different Roles, Different Priorities
While the installation process is standardized, stakeholder priorities differ significantly. A successful project accounts for these unique perspectives.
An installer is laser-focused on efficiency, code compliance, and managing their crew. A homeowner, on the other hand, is usually thinking about their return on investment, how the system looks on their roof, and keeping disruption to a minimum. A great project plan accounts for everyone's needs.
- For Installers and EPCs: The primary drivers are minimizing labor hours, ensuring crew safety, and achieving a first-pass inspection. This requires deep knowledge of NEC standards (e.g., Article 690 for PV Systems), efficient logistics management for just-in-time material delivery, and robust system designs that are pre-vetted for local code compliance.
- For Homeowners and Property Managers: The focus is on long-term value and asset protection. This means understanding equipment warranties (e.g., 25-year panel performance vs. 10-year inverter warranty), ensuring the installation method does not void the existing roof warranty, and receiving a realistic forecast of energy savings and payback period. They rely on the installer’s expertise to specify the right equipment, like BYD storage or FranklinWH batteries, for their budget and resilience goals.
Navigating Site Assessments and Permitting
Before any equipment is ordered, the critical groundwork of pre-installation must be completed. A project's success is determined in this phase. This is what separates a smooth, on-schedule build from a project bogged down by costly delays and compliance headaches.
This is a critical diagnostic process involving two key stages: a meticulous site assessment and wading through the often-confusing world of permitting. Skimp on this, and you’re asking for failed inspections, blown budgets, and seriously unhappy clients.
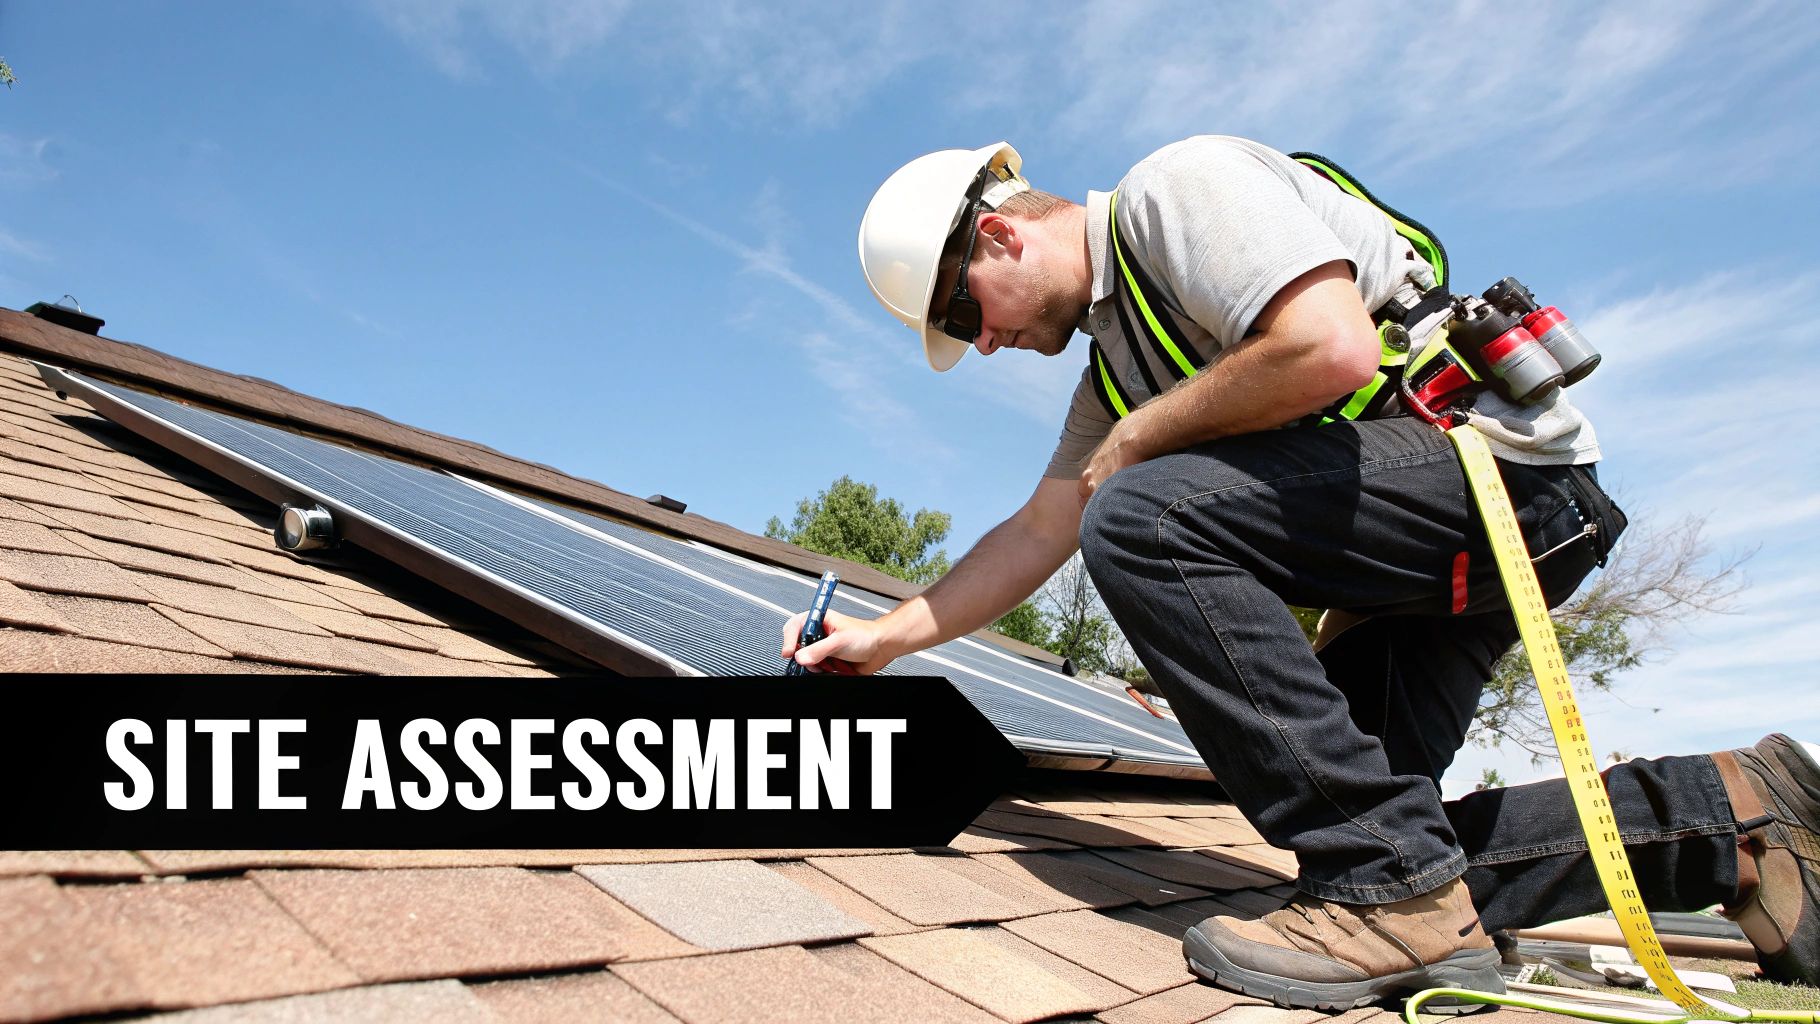
Conducting the Professional Site Assessment
A professional site assessment is far more than a simple roof measurement. You are building a complete data profile of the environment where the system will operate for the next 25+ years.
A proper site assessment digs into a few crucial areas:
- Structural Integrity: A core question: can the roof support the array's dead load? You must verify that rafters and sheathing can support the added weight, typically 3-5 pounds per square foot. For older structures or commercial buildings, a structural engineer's stamped letter is often a non-negotiable permit requirement.
- Roof Condition and Material: Installing a 25-year asset on a 20-year-old asphalt shingle roof is poor project management. The roof's remaining lifespan must be assessed. If replacement is due within 5-7 years, the entire solar array will require costly removal and reinstallation—an avoidable expense.
- Solar Access and Shading Analysis: This determines the system's actual energy production. Using tools like a Solar Pathfinder or drone-based software, you must map the "solar window" and quantify production losses from obstructions. Even minor shading from a vent pipe or chimney can significantly degrade the output of a standard string inverter system.
Expert Tip for Installers: The data from your shading analysis is mission-critical for system design and your Bill of Materials (BOM). It dictates the choice between a standard string inverter and more sophisticated Module-Level Power Electronics (MLPEs) like microinverters or DC optimizers, which are essential for maximizing yield on complex or partially shaded roofs. This choice directly impacts project ROI.
Demystifying the Permitting Maze
With a viable design, the next hurdle is paperwork. This administrative phase can sometimes extend for weeks or even months and typically involves two primary approvals: the local building permit and the utility interconnection agreement.
The solar boom has been heavily influenced by local rules. By the end of a recent year, global photovoltaic (PV) capacity shot past 2.2 terawatts (TW), a huge leap from 1.6 TW the year before. This growth, especially in markets like China, shows just how much local regulations can impact how quickly projects get done.
A comprehensive building permit checklist is an essential tool to prevent costly omissions and application rejections.
Here’s a look at the approvals you'll be managing:
| Approval Type | Key Objective | Common Compliance Standards |
|---|---|---|
| Building Permit | Ensures the install is structurally sound and electrically safe. | National Electrical Code (NEC), local building codes, fire setbacks. |
| Electrical Permit | Verifies all wiring and connections meet safety codes. | NEC Article 690 & 705, UL 1741 for inverters. |
| Utility Interconnection | Gets you official permission to connect the system to the grid. | Utility-specific technical requirements, net metering rules. |
For commercial projects, this process can expand to include zoning approvals and environmental reviews. A single error or missing document can send an application to the back of the queue, jeopardizing the entire project schedule. This is where professional rigor is paramount.
Selecting and Sizing Your Solar Equipment
With the site assessed and permits in process, the focus shifts to hardware specification. This is where you select the components that will form the core of the power system for the next 25+ years. This is not merely equipment selection; it's the engineering of a balanced, code-compliant power plant. For any installer or project manager, perfecting the Bill of Materials (BOM) is a critical responsibility.
Every component choice—from the panel brand and efficiency to the inverter topology—directly impacts kWh production, long-term reliability, and the project's financial viability. For a detailed breakdown of all parts, explore our deep dive on solar panel system components.
Matching Panels and Inverters to the Job
The performance engine of a solar array is the synergy between the panels and the inverter. The optimal pairing is determined by site-specific conditions, energy goals, and budget.
-
Solar Panels (Modules): The market is saturated with options, but for professionals, the decision balances three factors: cost, efficiency, and bankability. Tier 1 brands are specified for a reason—they represent financial stability and a proven manufacturing track record. The module's wattage and physical dimensions are the key variables used to maximize energy density within the available roof area.
-
Inverters: This is the system's brain. A standard string inverter from a reputable brand like Fronius or Sungrow is a robust and cost-effective solution for simple, unshaded roof planes. However, the presence of multiple roof orientations or shading from obstructions necessitates a move to Module-Level Power Electronics (MLPEs). This means specifying microinverters or DC optimizers to allow each panel to operate independently, maximizing total system yield.
Racking and Balance of System
Never treat racking as a commodity. It is the structural foundation of the entire array. A racking failure is a catastrophic event resulting in property damage and significant liability.
The racking system must be engineered to withstand local wind and snow load requirements. It must also be compatible with the specific roof type—asphalt shingle, standing seam metal, tile, or flat membrane. Ensuring every roof penetration is correctly flashed and sealed is not just best practice; it is the only way to prevent water intrusion and preserve the building's roof warranty.
For Procurement Officers: When assembling the BOM, it's the small Balance of System (BOS) components that can derail a project schedule. Wire, conduit, disconnects, lugs, and grounding equipment must be accounted for. Sourcing all BOS components from a single, reliable distributor like Portlandia Electric Supply streamlines logistics and prevents a single missing part from causing costly work stoppages.
Sizing a System: A Real-World Example
System sizing is not guesswork; it is a calculation based on the client's energy consumption and the site's production potential. Here is a typical residential project workflow.
Scenario: A homeowner consumes an average of 1,000 kWh per month (12,000 kWh annually). Their south-facing roof has an unobstructed area suitable for 20 panels. The location receives an average of 4.5 peak sun hours per day.
-
Calculate Daily Energy Target:
- 12,000 kWh / 365 days = 32.9 kWh per day. This is the daily production target.
-
Determine Required DC System Size:
- 32.9 kWh / 4.5 peak sun hours = 7.3 kW DC. This is the minimum system size required to offset 100% of their consumption.
-
Select Panels to Meet Target:
- 7,300 Watts / 20 panels = 365 Watts per panel.
- Procurement Decision: Source a minimum of 20 panels rated at 365W or higher. In practice, you would likely procure 400W panels. This results in an 8 kW system (400W x 20 panels), providing a performance buffer to account for real-world degradation and weather variability.
This calculation provides a clear procurement list. You can now request quotes for a specific quantity of Tier 1 400W modules, a compatible 8 kW inverter, and the racking required for 20 panels. This data-driven approach eliminates ambiguity and ensures the system is engineered to perform.
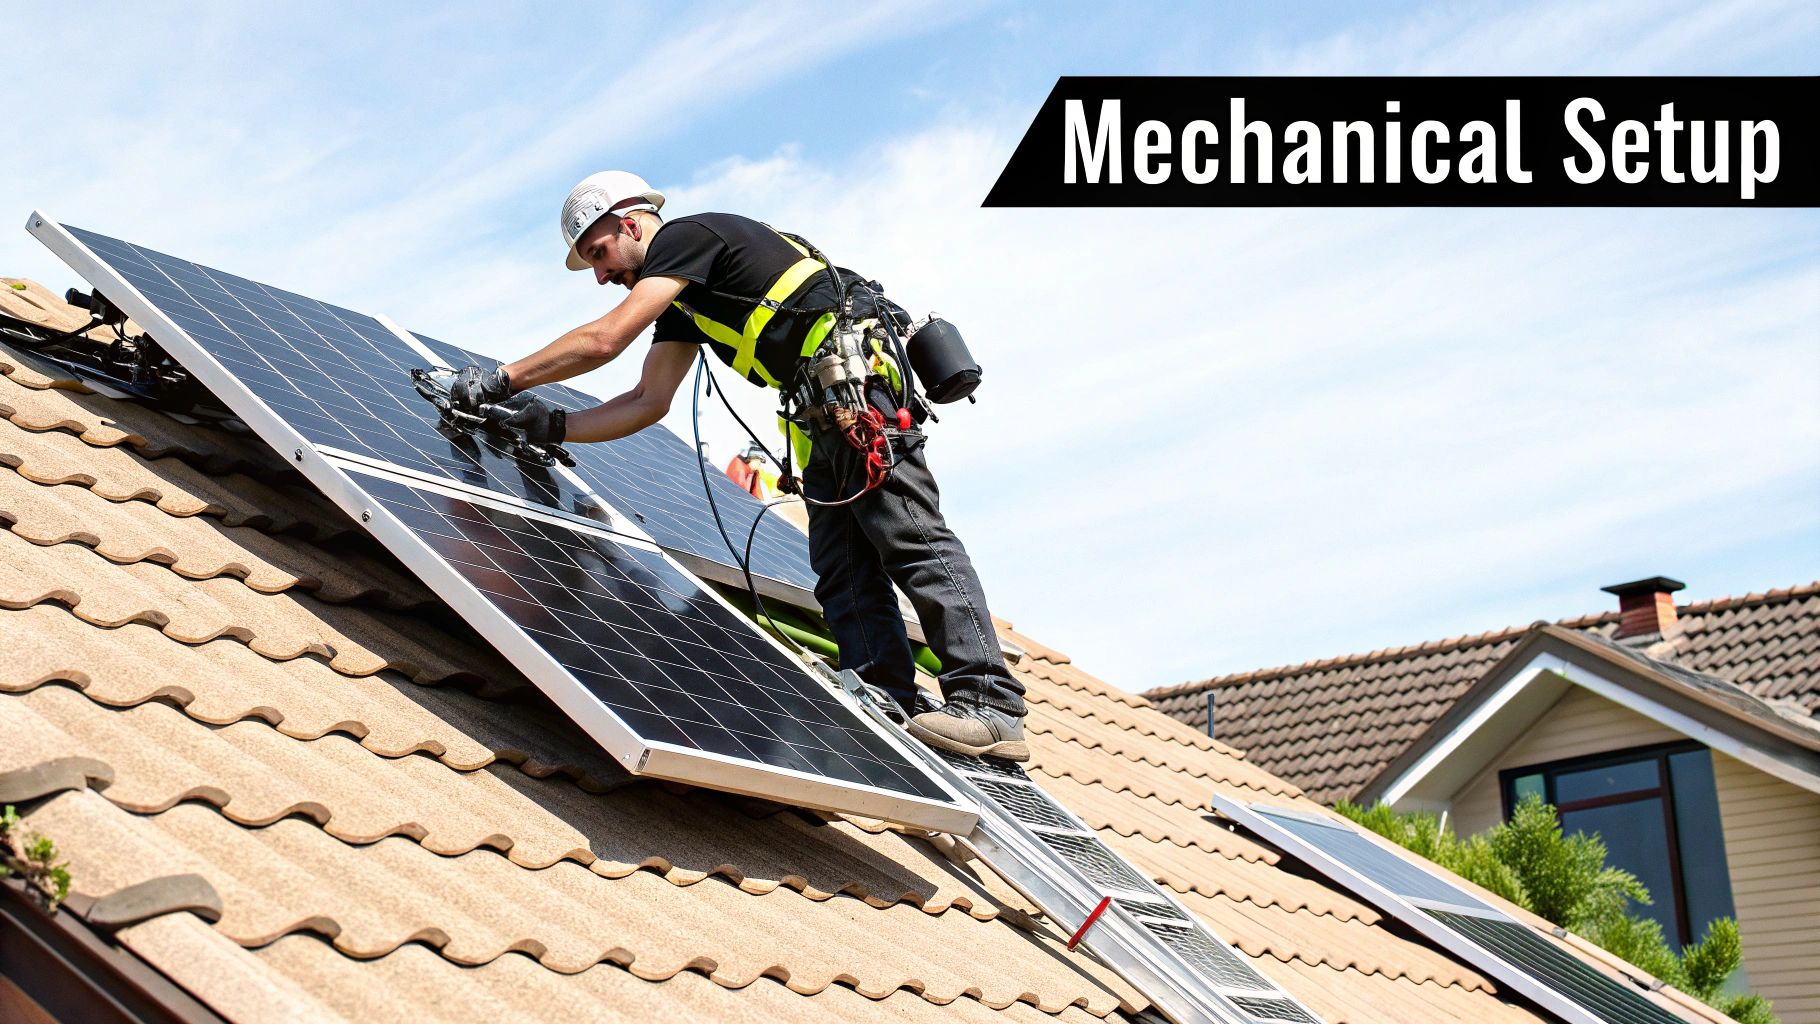
Mastering the Mechanical Installation
With all equipment staged, the project transitions from planning to physical execution. This is the phase where precision, safety, and strict adherence to manufacturer specifications are non-negotiable.
The mechanical installation forms the literal backbone of the solar array. Errors here do not just lead to underperformance; they create risks of catastrophic structural failure and water damage. For professional installers, this phase is a direct reflection of their quality and discipline.
The process begins with the meticulous layout of the racking system, translating approved engineering drawings into precise markings on the roof. Each attachment point must be located accurately over structural members to ensure the array's load is distributed as designed.
Securing the Foundation: Racking Systems
Racking is the engineered skeleton of the solar system. The choice of system is a critical decision driven by roof type, structural capacity, and labor efficiency goals. There is no single "best" system; the selection impacts installation speed, long-term reliability, and project cost.
- Rail-Based Systems: These are the industry standard for their strength and versatility. Long aluminum rails are attached to the roof, creating a robust framework for mounting the panels. Their primary advantage is adjustability, which allows for the creation of a perfectly planar array, even on an undulating roof surface.
- Rail-Less Systems: Gaining popularity for their aesthetics and reduced material usage, these systems use individual mounting pucks or blocks that attach directly to the roof structure. They offer a lower profile but demand a perfectly flat roof and an exceptionally precise initial layout.
Regardless of the system, every roof penetration is a potential point of water ingress. Proper weather sealing is paramount. This requires using high-quality, roof-specific flashing (e.g., for asphalt shingle, standing seam metal, or tile) and appropriate sealants as a secondary barrier.
Pro Tip for Installers: Torque specifications are not suggestions. Every bolt and clamp has a specific torque value provided by the manufacturer—adhere to it without fail. Under-torquing can lead to components loosening and catastrophic failure in high winds. Over-torquing can damage hardware or induce microcracks in the panel frame. A calibrated torque wrench is a mandatory tool on every job site.
Panel Handling and Mounting Best Practices
Solar modules are durable but susceptible to damage from improper handling. Torsional stress can create invisible microcracks in the silicon cells, which degrade panel output and shorten its operational lifespan.
Always handle panels by their frames and avoid stacking them without protective material. During installation, NEC equipment bonding and grounding requirements are critical. Every metallic component—from rails to module frames—must be part of a continuous, grounded electrical path to mitigate shock hazards.
For a deeper dive into this foundational part of the install, check out our complete guide on solar panel racking systems.
Racking System Comparison for Rooftop Installations
The optimal racking choice depends on specific project parameters. This table breaks down the common options, highlighting the trade-offs in cost, labor, aesthetics, and structural considerations.
| Racking Type | Best For | Pros | Cons and Compliance Watchouts |
|---|---|---|---|
| Rail-Based | Most roof types, especially uneven surfaces. | High strength, adjustability, well-understood by inspectors. | More material, can be visually bulkier, requires more penetrations. |
| Rail-Less | Asphalt shingle roofs with a flat, even plane. | Fewer components, faster installation, sleek low-profile look. | Less adjustability, requires precise layout, not suitable for all roof types. |
| Ballasted | Flat commercial roofs where penetrations are undesirable. | No roof penetrations, faster installation on large roofs. | Adds significant weight, requires structural analysis, potential wind uplift issues. |
Ultimately, a professional mechanical installation is defined by respect for the building envelope, adherence to engineering specifications, and an unwavering commitment to safety. Work at height is inherently dangerous; strict fall protection protocols are mandatory for all personnel. A secure, perfectly aligned, and properly sealed mechanical installation sets the stage for a successful electrical integration and decades of reliable performance.
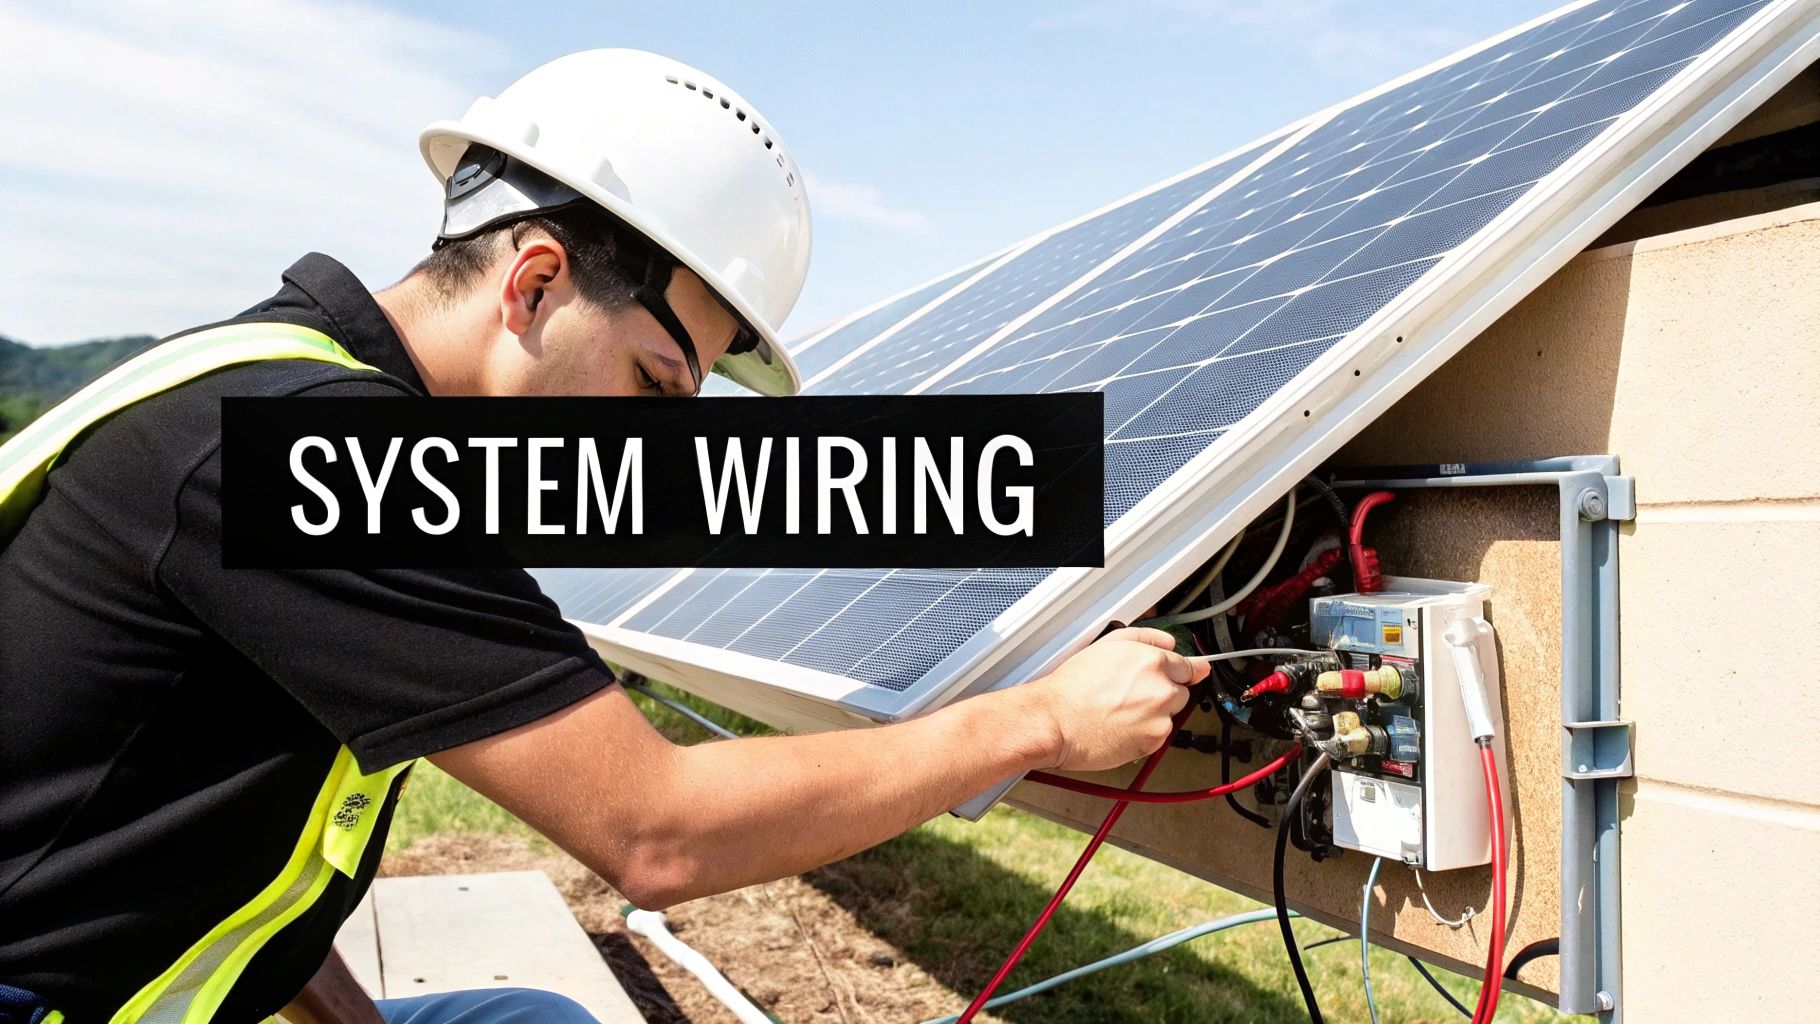
Executing Electrical Wiring and System Commissioning
With the array mechanically secure, the project moves to its most technical phase: transforming the collection of hardware into an operational power plant.
This work must be performed by a qualified electrician or certified solar professional. The entire process is governed by the National Electrical Code (NEC) and stringent local AHJ requirements. A single wiring error can lead to a failed inspection, a catastrophic fire hazard, or a non-operational system.
First, panels are connected in series to form "strings," building the appropriate voltage for the inverter. This involves connecting the pre-installed MC4 connectors. The critical skill here is wire management—securing all cables to the racking to prevent abrasion, weather exposure, and potential damage over the system's lifetime.
From the Roof to the Inverter
Once strings are formed, the DC power must be routed safely to the inverter. These "home run" wires are run through conduit from a rooftop junction box down to the inverter's location.
Every electrical connection is a potential point of failure and requires precision. This is also where critical safety components are installed.
- Rapid Shutdown: An NEC mandate, this device allows first responders to de-energize the array at the module level in an emergency.
- DC Disconnect: A clearly labeled, accessible switch that allows for manual isolation of the array from the inverter for service or maintenance.
- Grounding: The entire system—racking, panel frames, and all metallic components—must be bonded together and connected to the building's grounding electrode system. This is a life-safety requirement to protect against electrical faults and lightning.
The demand for these skills is exploding. Rooftop solar is becoming more common every day thanks to lower costs and supportive policies. Module prices have been dropping in a heavily oversupplied market, which is tough on manufacturers but great for homeowners. We recently saw a new record with over 600 GW of new PV systems commissioned globally in a single year. You can read more on these global solar installation trends over on e360.yale.edu.
The Commissioning Process: A Final Checkpoint
With all wiring complete and every connection torqued to spec, the system is ready for commissioning. This is a methodical series of tests to verify safety and functionality before connecting to the grid.
For NABCEP Professionals: Commissioning is your final quality assurance gate. You must verify that string voltages are within the inverter's operating window, test for ground faults, and confirm that the monitoring platform is online and reporting accurate data. Skipping these steps is a primary cause of post-install service calls.
The commissioning checklist includes several key verifications:
- Voltage and Polarity Tests: Using a multimeter, verify the open-circuit voltage (Voc) of each string and confirm correct polarity. A reversed polarity can destroy an inverter.
- Insulation Resistance Testing: A megohmmeter test is used to identify potential nicks or damage in the wiring that could lead to future ground faults.
- Inverter Wake-Up: The inverter is powered on from the DC side (without the AC grid connection) to verify it boots up, recognizes all strings or optimizers, and shows no errors.
- Monitoring Setup: The system's monitoring hardware is connected to the internet to begin logging production data, which is crucial for performance verification and O&M.
This electrical phase is detail-intensive. For a deeper technical exploration of stringing configurations, reference our guide on solar panel wiring basics.
Upon successful commissioning, the system is ready for the final utility inspection and the ultimate milestone: Permission to Operate (PTO).
Your Top Rooftop Solar Questions, Answered
Every rooftop solar project comes with technical and logistical questions. Whether you're an installer verifying a code requirement or a homeowner evaluating a proposal, clear answers are essential.
Here are direct responses to the most common questions we encounter in the field.
How Do I Know if My Roof Is a Good Candidate for Solar?
A roof's suitability for solar depends on three core factors: structural integrity, solar access (irradiance), and available space.
First, the structure must be able to support the additional dead load of the system, which is typically 3-5 pounds per square foot. A structural assessment by an engineer or qualified contractor is required to confirm this. Older roofs may require reinforcement or replacement prior to installation.
Second is solar access. In the Northern Hemisphere, an ideal site has a large, south-facing roof plane with minimal shading, particularly during peak sun hours from 9 AM to 3 PM. A professional shading analysis using a tool like a Solar Pathfinder is used to quantify any potential energy losses from trees, buildings, or other obstructions.
Finally, you need sufficient unobstructed space to install the number of panels required to meet your energy production goals.
What Are the Biggest Mistakes to Avoid During an Install?
The most costly and dangerous mistakes almost always involve shortcuts on safety, code compliance, or manufacturer specifications.
- Improper Roof Penetrations: Drilling into the roof and applying sealant is insufficient. Every penetration must be sealed with code-compliant flashing designed for the specific roof type to create a durable, watertight seal and prevent leaks.
- Ignoring Electrical Codes: The National Electrical Code (NEC) is law. Failure to properly ground the system, manage wires to prevent abrasion, or install required rapid shutdown devices creates a severe fire hazard and will result in a failed inspection.
- Lack of On-Site Safety: Working at height without proper fall protection (e.g., harnesses and anchors) or failing to follow lockout/tagout procedures when making the final grid connection can have fatal consequences.
- Underestimating Administrative Timelines: Assuming installation can begin as soon as equipment arrives is a common error. The permit and utility interconnection approval processes can take weeks or even months and must be completed before work starts.
For professional installers, one of the biggest "unseen" mistakes is not having a rock-solid supply partner. When a job gets held up for a week because you're missing a few specialized clamps or a specific disconnect, you're not making money.
How Long Does a Rooftop Solar Installation Actually Take?
This question has two different answers: physical installation time and total project duration.
The physical, on-site installation of a standard residential system (approx. 5-10 kW) is typically completed by an experienced crew in just 1-3 days.
However, the entire project lifecycle, from contract signing to receiving Permission to Operate (PTO) from the utility, is much longer. A realistic timeline is 2 to 6 months. The primary delays are administrative: design and engineering (1-3 weeks), AHJ permitting (4-12 weeks), and final utility inspection and PTO issuance (another 2-8 weeks).
What’s the Real Difference: String Inverters vs. Microinverters?
Both devices perform the same essential function: converting the DC electricity from the panels into grid-compliant AC electricity for the property. The key difference is their architecture.
A String Inverter is a centralized, cost-effective solution. It is a single unit that converts the combined DC output from a "string" of multiple panels. This is highly efficient for simple roofs with no shading. Its main drawback is that the entire string's output is limited by the lowest-performing panel. If one panel is shaded, the performance of the entire string is reduced.
Microinverters are a distributed architecture. A small inverter is installed on the back of each individual panel, converting DC to AC at the source. This means the performance of one panel is completely independent of the others, maximizing total energy harvest. They are the superior choice for complex roofs with multiple orientations or intermittent shading, though they carry a higher upfront equipment cost.
At Portlandia Electric Supply, we provide the components, logistical support, and technical expertise to ensure your solar projects are completed efficiently and profitably. From bulk pallet pricing on Tier 1 modules to bundled freight and compliance support, our team is structured to be your project partner.