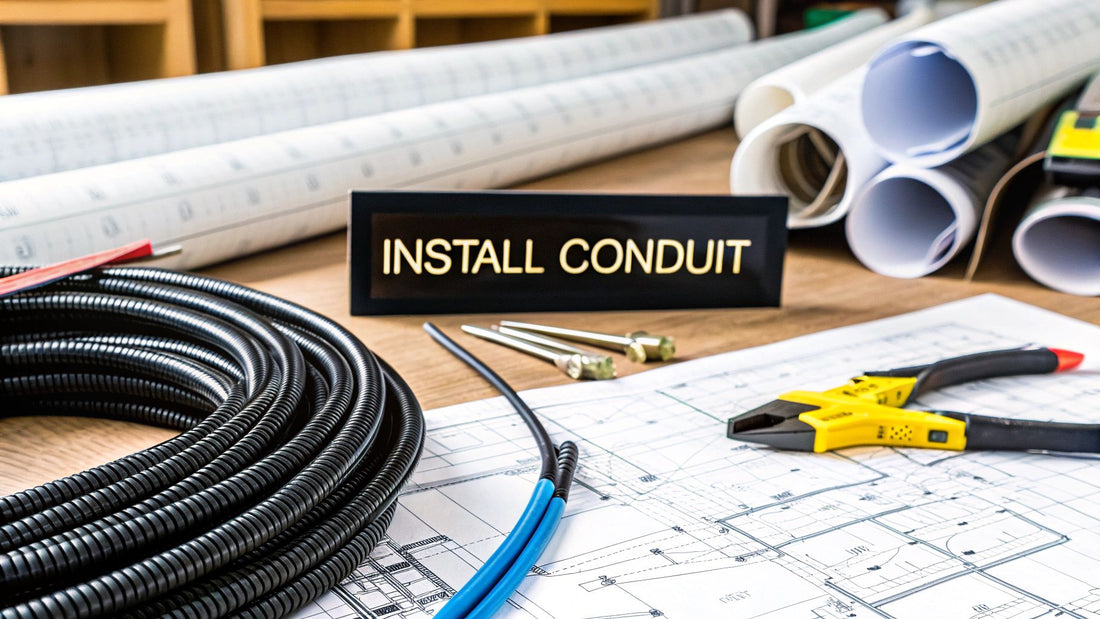
How to Install Electrical Conduit: A Field Guide for Installers & Project Managers
Share
Properly installing electrical conduit is the critical step that ensures an electrical system is safe, durable, and compliant with the National Electrical Code (NEC). For professional installers, EPCs, and project managers, mastering this skill is non-negotiable. It’s not just about running pipe; it’s about protecting wiring from physical damage, moisture, and impact for decades, safeguarding project timelines and budgets from costly rework and failed inspections.
This guide provides a step-by-step framework for selecting, bending, and installing electrical conduit to code, ensuring your projects are executed with precision and efficiency.
Choosing the Right Conduit for Your Project
The success of any electrical job starts with picking the right conduit. This goes way beyond just grabbing what's available—it's a strategic move that affects your timeline, budget, and how well the installation holds up over time. For installers and procurement managers, matching the conduit type to the specific job site and National Electrical Code (NEC) rules is the very first checkpoint.
It’s not as simple as metal versus plastic. You have to think about the real-world conditions. On a commercial job, you'll almost always see Rigid Metal Conduit (RMC) in high-impact zones like warehouse loading docks or exposed mechanical rooms. But for protected runs inside that same building, Electrical Metallic Tubing (EMT) is often the smarter choice because it’s cheaper and faster to work with.
Navigating Material Choices for Different Environments
When you shift to residential work, the game changes. A basement remodel or running power out to a new shed means you’re fighting moisture and potential corrosion. This is where PVC conduit shines. It’s naturally resistant to rust and water, making it the perfect choice for damp locations or underground burial where metal would eventually fail.
With the boom in home construction and remodeling, the residential side of the conduit market has exploded. In 2023, the global residential PVC conduit market was valued at around USD 878 million and is expected to grow at a CAGR of 8.1% through 2032. This shows a clear preference for lightweight, corrosion-proof, and budget-friendly materials like PVC that are easy for both seasoned pros and savvy homeowners to handle.
Conduit Material Comparison for Project Planning
Selecting the right conduit material is crucial for ensuring the safety, durability, and compliance of any electrical installation. This table breaks down the most common options to help you make an informed decision based on the specific demands of your project.
| Conduit Type | Best Use Case | Key Advantage | Primary Consideration |
|---|---|---|---|
| RMC (Rigid Metal Conduit) | Exposed industrial, commercial, and high-impact areas. | Maximum physical protection; can be used as a grounding conductor. | Higher cost and more labor-intensive to install. |
| EMT (Electrical Metallic Tubing) | Indoor commercial and residential runs in protected areas. | Lightweight and easy to bend; cost-effective for large projects. | Not suitable for areas with physical damage risk or wet locations. |
| IMC (Intermediate Metal Conduit) | Similar to RMC but lighter; good for most exposed locations. | Offers strong protection with less weight and cost than RMC. | Thinner walls than RMC, slightly less durable. |
| PVC (Polyvinyl Chloride) | Underground burial, wet/damp locations, and corrosive environments. | Corrosion-resistant and inexpensive; easy to work with. | Requires an extra grounding wire; can be damaged by UV exposure. |
By comparing these factors, you can align your material choice with both the environmental conditions and your project budget, ensuring a reliable and code-compliant installation every time.
A Framework for Selection
Your final choice should always come down to a few key factors. Before you order materials for your next project, run through this mental checklist:
- Environmental Exposure: Will the conduit face moisture, harsh chemicals, direct sunlight (UV), or wild temperature swings? PVC is a champ in wet spots, and properly galvanized RMC holds up well, too.
- Physical Protection: Is the run in a high-traffic area where it could get hit? If so, you need the heavy-duty protection of RMC or Intermediate Metal Conduit (IMC).
- Budget and Labor: EMT and PVC are hands-down more budget-friendly and quicker to install than RMC. They’re great when time and money are tight.
- NEC and Local Codes: This is non-negotiable. Always double-check that your chosen material is approved by the NEC and any local rules for your specific type of installation.
Expert Tip for Procurement: For large commercial or utility-scale jobs, bundle your conduit order with other major components like panelboards, switchgear, and transformers. At Portlandia Electric Supply, we can consolidate freight and provide bundled kit pricing, significantly reducing your total project cost and logistical headaches. For a deeper dive, check out this comprehensive Electrical Conduit Installation Guide for more pro tips.
Your Essential Toolkit and Site Prep Checklist
You can't pull off a professional, to-code conduit installation without the right gear and a properly prepped workspace. It's that simple. Getting your tools together and prepping the site isn't just about ticking boxes—it's the foundation that prevents headaches, avoids costly rework, and keeps everyone on the job safe.
I've seen it happen too many times: a crew rushes the prep, and even the best-laid plans go sideways. Suddenly, you're fighting crooked runs, wasting material, and looking at a failed inspection. Let's make sure that doesn't happen.
Having the right equipment is the difference between a smooth, efficient job and a frustrating grind. If you're working with metal conduit like EMT or RMC, a quality bender is an absolute must-have. That's your ticket to getting those precise, kink-free bends that make pulling wire a breeze later on.
Assembling Your Non-Negotiable Toolkit
Before you even think about making a cut, get your toolkit in order. A true pro has more than just the basics; they've got specialized tools ready to go for whatever the job throws at them.
Here's what should be in your core kit:
- Conduit Bender: For smaller EMT (up to 1-1/4 inch), a hand bender is your go-to. On bigger commercial jobs with RMC or larger EMT, a hydraulic bender is a game-changer. It gives you the power for clean bends without killing your back.
- Hacksaw or Power Saw: A hacksaw with a fine-tooth blade gives you precise control. But for high-volume work, a portable band saw or a chop saw with a metal-cutting blade will speed things up dramatically.
- Conduit Reamer/Deburring Tool: This is a critical safety tool, not an optional one. After a cut, the inside edge of the conduit is razor-sharp and will absolutely shred wire insulation. A reamer smooths that edge out, protecting the conductors.
- Fish Tape and Pull Line: You'll need these to get wires through the finished run. A steel or fiberglass fish tape helps you navigate the bends, and you'll attach a sturdy pull line (or string) to actually pull the conductors through.
- Measuring Tools: A good tape measure is obvious, but don't forget a level (a small torpedo level is perfect for tight spots) and a chalk line or laser level for marking those long, perfectly straight runs.
- Drill and Bits: You'll need a powerful cordless drill with the right bits to secure straps and mounting hardware into wood, concrete, or metal studs.
Setting Up for Success: Site Preparation
Once your tools are laid out, it's time to prep the installation area. This is where your plan moves from paper to the real world, and precision is everything. Rushing this part is a sure-fire way to end up with crooked runs and misaligned boxes.
First, clear the pathway where the conduit will run. Get rid of any obstacles, trash, or stray materials that could get in your way. A clean path isn't just for convenience—it's a massive safety boost that reduces trip hazards.
Next, grab your measuring tools and mark the exact spots for your junction boxes, outlets, and support straps right from the plan. Double-check every single measurement. A classic rookie mistake is forgetting to account for the thickness of a fitting or the radius of a bend, which can throw off your entire run.
Pro Tip for Commercial Installers: I always set up a dedicated "bending station" on site. Just lay down a sheet of plywood to create a stable, flat surface for your bender. This little trick helps you produce consistent, accurate bends every time and keeps your conduit from getting scratched up on rough concrete floors.
Before you mount anything, do one last check of all your dimensions against the electrical drawings or blueprints. This final walkthrough ensures your planned route is clear and won't clash with any plumbing, HVAC, or other systems going in. This methodical approach is what separates sloppy work from a professional, code-compliant installation.
Mastering Conduit Bends and Offsets
Bending conduit is where the real craftsmanship of an electrical installation shines through. This is more art than science sometimes, and it's what separates a professional job from an amateur one. It’s not just about getting a pipe to change direction; it’s about creating a perfect, friction-free path for your wires while staying within the strict guidelines of the electrical code.
One bad bend can wreck the insulation on a wire during a pull, get you red-tagged by an inspector, and force you to tear out a whole section of your work. It's a costly mistake.
Think about a real job site. You're running EMT down a long warehouse wall and, boom, there's a big I-beam right in your path. This is exactly where an offset bend comes in. You'll create a neat "jog" in the conduit to get around it and then continue your run perfectly straight. Or maybe you need to cross over another pipe that’s already in place. A clean saddle bend lets you hop right over it without messing up either run.
As you can see, cutting and prepping the conduit is ground zero. Before you even think about putting the pipe in a bender, you need a clean, square cut and a reamed edge. Skipping this step is a rookie mistake that guarantees problems later.
The Three Foundational Bends
You'll encounter all kinds of weird situations, but if you can master these three basic bends, you'll be set for about 90% of the work you'll ever do. Each one has a specific job, and getting them right comes down to a few key calculations.
- 90-Degree Stub-Up: This is your bread and butter. It’s for turning conduit from a wall up into a junction box or turning down from a ceiling. The secret is knowing the "take-up" of your bender—that's the amount of pipe the bend itself consumes. You have to subtract this value from your desired stub height to know where to make your mark.
- Offset Bend: An offset is just two equal, opposing bends (usually 30 degrees) that let you shift the run over to clear an obstacle. The make-or-break measurement here is the distance between those two bends, which you calculate based on how deep the offset needs to be.
- Saddle Bend: Think of this as a little bridge. A saddle bend is used to hop over a round obstacle like another piece of conduit. It requires a center mark right over the obstruction, followed by two other marks for the bends on either side.
Field Tip: Don't use a pencil to mark your conduit. It'll rub right off. A permanent marker is your best friend. If you're doing a bunch of identical bends, do yourself a favor and make a quick jig on a scrap of plywood. It ensures every single piece is a perfect match.
Calculations and Avoiding Common Pitfalls
If you want perfect bends, you have to embrace the math. It's all about take-up and gain. We mentioned take-up—the length of conduit the bend itself "eats up." Gain is the opposite; it's the distance you "save" because the conduit cuts the corner on a 90-degree bend instead of following the sharp angle. If you forget to account for these, your runs will end up too long or too short, and nothing will line up.
The rulebook here is the National Electrical Code (NEC). It lays out everything from how deep conduit needs to be buried to how many wires you can cram inside. When it comes to bending, the rules are ironclad. You're generally not allowed more than 360 degrees of total bends in a single run, and the code specifies the minimum bending radius for different conduit sizes to prevent damage. To learn more about how these rules impact the industry, you can check out reports on the global electrical conduit pipe market.
Want to avoid failing an inspection? Steer clear of these classic mistakes:
- Kinking the Conduit: This is the number one sign of an amateur. It happens when you apply pressure too fast or don't have the pipe seated correctly in the bender's shoe. A kinked pipe is garbage—it’s a code violation and makes pulling wire a nightmare.
- Over-Bending a Run: The NEC says no more than 360 degrees of bends between pull points (like two boxes). That means four 90s is your absolute limit. Go over, and you'll never get the wire through without damaging it.
- "Dog Legs": This is a subtle but unprofessional-looking flaw. It’s a slight, unintentional bend or twist in what should be a perfectly straight section of pipe. It looks sloppy and shows you were rushing.
It takes practice, but once you get a feel for the bender and start nailing your measurements, your work will look clean, professional, and—most importantly—safe and compliant.
Securely Mounting and Supporting Conduit Runs
A beautifully bent conduit run is worthless if it's sagging off the wall. Properly mounting and supporting your work isn't just about appearances—it's a core safety requirement of the National Electrical Code (NEC). Get this wrong, and you're looking at a failed inspection.
Loose conduit puts serious stress on connectors and fittings, which can damage wires and create major hazards down the road. This is one of the first things an inspector will look for, and a well-supported run instantly signals a professional, high-quality job. It also makes pulling wire a whole lot easier.
Understanding NEC Support Spacing Requirements
The NEC doesn't offer suggestions here; it gives hard rules on how often your conduit needs to be strapped down. These requirements are non-negotiable and vary depending on what kind of conduit you're running.
Here’s a quick breakdown of the essentials:
- Support Within 3 Feet of a Box: No matter the type, you must have a support strap within 3 feet of every junction box, panel, or other termination point. This takes the physical strain off the connectors.
- EMT Support Intervals: Standard Electrical Metallic Tubing (EMT) needs to be supported at least every 10 feet after that initial strap.
- RMC and IMC Intervals: The heavier, tougher stuff like Rigid Metal Conduit (RMC) and Intermediate Metal Conduit (IMC) also gets strapped down every 10 feet.
- PVC Conduit Intervals: PVC is a different animal. It's flexible and can sag badly with heat. The rules are much tighter. For common 1/2-inch to 1-inch PVC, you need a support strap every 3 feet.
Pro Tip for Installers: When in doubt, add another strap. An extra support is cheap insurance against sagging, potential damage, and a red tag from the inspector. If a section looks vulnerable, secure it.
Selecting the Right Supports and Fasteners
The strap you use is just as critical as the spacing. Your choice comes down to the mounting surface and the conduit itself. Using a drywall screw to hold a strap on a concrete wall is a recipe for failure.
For simple runs on wood studs or joists, a classic one-hole or two-hole strap does the job perfectly. They're cheap, strong, and fast to install.
But for commercial jobs or mechanical rooms with multiple parallel runs, you'll want to step up to a strut channel system like Unistrut. This is the industry standard for a reason. It creates a clean, strong, and adjustable framework for organizing complex raceways. You can mount strut directly to a wall or hang it from the ceiling with threaded rods, then secure your conduit with matching strut straps. The trick is making sure the strut itself is anchored securely to the building's structure.
For specialized jobs, like rooftop installations, the entire approach has to change to handle the elements. You have to secure everything without damaging the roof, a topic we cover in our guide on installing a rooftop junction box, which deals with many of the same challenges.
Ensuring Plumb and Level Runs
Finally, let's talk about craftsmanship. A perfectly plumb (vertical) and level (horizontal) run is the mark of a true professional. A crooked run might pass inspection if the spacing is right, but it looks sloppy and can create friction points that make wire pulling a nightmare.
This is easy to get right. Use a level on every straight section. For longer runs, a chalk line or a laser level is your best friend. Snap a reference line on the wall or ceiling, then install your straps right along it before you even hang the conduit. A few extra minutes of prep work here separates the amateurs from the pros and ensures your work looks as good as it performs.
Pulling Wire and Finalizing Your Connections
Alright, you've wrestled with the bender, mounted your straps, and the conduit run is officially in place. Now for the moment of truth: getting the wire through it. This is where all that careful work pays off. A smooth pull means your planning was solid; a tough one tells you something went wrong earlier—too many bends, a kink you missed, or you're trying to stuff too much wire into the pipe.
Getting this right isn't just about making your life easier. It's about protecting the wire's insulation from nicks and tears that can create serious hazards down the road.
Techniques for a Smooth Wire Pull
Your best friend for this job is a good fish tape. It's a simple tool—just a long, flexible strip of steel or fiberglass that you feed through the empty conduit. Once it pops out the other end, you attach your wires and pull them back through.
Friction is your enemy, especially on long runs or those pushing the 360-degree bend limit set by the NEC. This is where wire-pulling lubricant becomes essential. Don't skip it. A quality pulling gel makes a world of difference, letting the wires glide through instead of grinding against the conduit walls, which can easily damage the insulation.
To get the wires attached, create a solid pulling head. I like to stagger the wire ends, strip back about six inches on each one, and then loop them through the eye of the fish tape. A tight wrap with quality electrical tape creates a smooth, tapered head that won't snag on couplings or inside a bend.
Don't Ignore Conduit Fill Limits
This is one of the most common code violations I see in the field: conduit fill. The NEC has strict rules about how many wires you can safely pack into a conduit. If you have just one wire, you can fill up to 53% of the space. But as soon as you add a second, the limit drops, and for three or more conductors, you can only fill 40% of the conduit's cross-sectional area.
This isn't just an arbitrary rule to make your job harder. The 40% fill rule is there for two critical safety reasons: it prevents you from damaging the wire insulation during the pull, and more importantly, it allows heat to dissipate. Wires generate heat, and if they're packed in too tightly, they can't cool down. This leads to insulation breakdown, short circuits, and a serious fire risk.
Failing to respect these limits is a fast track to a failed inspection. Before you pull a single wire, use a conduit fill calculator or double-check your plan against NEC Chapter 9, Table 1.
The NEC provides clear guidelines to ensure conductors have adequate space within a conduit. This prevents overheating and makes pulling the wires much easier and safer.
| Number of Conductors in Conduit | Maximum Allowable Fill (%) |
|---|---|
| 1 Conductor | 53% |
| 2 Conductors | 31% |
| Over 2 Conductors | 40% |
Following this table is non-negotiable for a safe, code-compliant installation. It's a fundamental aspect of professional electrical work.
Terminating Conduit and Making Final Connections
The last piece of the puzzle is securing the conduit to your electrical boxes. This connection is both mechanical and electrical, providing physical support and a path to ground for metal systems. You'll use specific fittings, like EMT connectors or PVC terminal adapters, to lock the conduit into the box's knockouts. Make sure these are wrench-tight on metal conduit; a loose connection compromises the ground path.
Inside the box, always install a bushing on the end of the conduit. It's a simple plastic or metal ring, but it's crucial. It covers the sharp, cut edge of the conduit and protects your wires from abrasion as they enter the box. We dive deeper into selecting the right enclosures in our guide on choosing a Cantex electrical box for optimal safety.
The demand for safe, professionally installed electrical systems is growing. The global electrical conduit market was valued at around USD 7.9 billion in 2024 and is expected to hit USD 15.14 billion by 2033. This surge is driven by increasingly strict building codes that recognize the importance of protecting wiring. By taking care of these final details, your work will be safe, compliant, and built to last.
Common Conduit Installation Questions
No matter how well you plan, questions always come up on the job. Let's tackle some of the most frequent ones we hear from installers and homeowners to help you button up those final details and troubleshoot with confidence.
Can You Mix Different Types of Conduit?
Absolutely, but you have to do it by the book. You can’t just jam a piece of PVC into an EMT coupling and call it a day.
The right way is to use specific, UL-listed transition fittings. A common scenario is running PVC underground and switching to EMT where it comes above ground. The proper fitting ensures the entire raceway maintains its ground connection and stays physically secure, just as the National Electrical Code (NEC) requires.
What Are the Rules for Outdoor Installations?
Running conduit outdoors brings a new set of challenges, mostly centered around moisture and physical abuse. Everything you use—fittings, boxes, supports—must be rated for wet or damp locations.
A few key NEC rules to keep in mind for any outdoor work:
- Burial Depth: How deep you dig depends on the conduit. PVC needs at least 18 inches of cover, but tough Rigid Metal Conduit (RMC) only requires 6 inches.
- GFCI Protection: This is non-negotiable. Almost every outdoor receptacle needs Ground-Fault Circuit Interrupter (GFCI) protection to prevent dangerous shocks.
- Weatherproof Enclosures: Outdoor boxes demand "in-use" weatherproof covers. These are the bubble-style covers that keep connections dry even when a cord is plugged in.
When Should You Use Flexible Conduit?
Flex conduit, like FMC or the beefier Liquidtight (LFMC), is your problem-solver for those short, awkward connections where bending rigid pipe just isn't practical. Think about connecting to a motor that vibrates or making that final hookup to an HVAC unit on a rooftop.
Expert Tip: I always use flexible conduit for the "last mile" of a run. It’s perfect for hooking up machinery, navigating a tight corner inside a wall, or wiring up a light fixture. Just remember, it doesn't offer the same physical protection as rigid pipe and needs more support, so it’s not the right choice for long, exposed runs.
How Do You Run Conduit Underground?
Trenching conduit requires careful planning to make sure you only have to do it once. The typical process involves digging down to the code-required depth, laying your conduit (usually PVC for its awesome corrosion resistance), and backfilling.
Before you even think about putting a shovel in the ground, remember these critical steps:
- Call 811: This is a must. Hitting a buried gas or power line is a disastrous and expensive mistake. Let the "Call Before You Dig" service mark all the utility lines first.
- Use Sweeping Bends: Where the conduit turns to come up a wall, use large-radius, sweeping elbows. They make pulling wire through later a thousand times easier than fighting it around a sharp 90-degree bend.
- Backfill with Care: The first layer of dirt you put back in the trench should be clean fill—no sharp rocks or debris that could puncture your conduit. I recommend using sand or fine soil for the first six inches of cover to protect your hard work.
Nailing these common details is what separates a professional, durable installation from a shoddy one that fails inspection.
Ready to get your next project wired? Portlandia Electric Supply has the in-stock conduit, fittings, and expert support you need to do it right. Whether you need bulk pallets of EMT for a commercial build-out or specific PVC fittings for a home project, we offer fast quotes and nationwide delivery. Request a quote today and let our team of experts handle your material sourcing.