Updated September 2026 — refreshed against the live PES catalog; product pricing verified 2026-09-26.
2026 product line update
| Product | Class | Price |
|---|---|---|
| Canadian Solar 710W TOPCon Bifacial Solar Panel | 710W | $340.80 |
| Hyundai 640W 156-Cell TOPCon Bifacial Solar Panel | 640W | $220.78 |
| Thornova Solar TS-BGT72(600) 600W Bifacial Solar Panel | 600W | $165.76 |
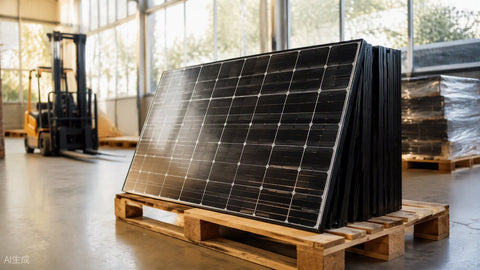
| Thornova Solar 595W Solar Panel 144 Cell Bifacial TS-BGT72(595) Wholesale 31 panels per pallet | 595W | $164.64 |
| ZNShine Solar 585W 144-Cell Bifacial Solar Panel | 585W | $246.99 |
| Hyundai HiS-S585OJ 585W Clear on Transparent156 Half-Cell Bifacial Solar Panel | 585W | $195.86 |
Live prices verified 2026-09-26. The current pallet line tops out at 550–640W, plus the Canadian Solar 710W TOPCon flagship panel.
On a retrofit job in Spokane a few years back, the homeowner had been quoted two designs for the same roof: one crew wanted panels on the south plane, the other wanted to split the array east-west "because the roof looks better that way." Same panels, same inverter, $600 difference in racking — and a 14% difference in annual production, worth about $3,800 over the system's life. Orientation is the cheapest performance you'll ever buy in solar, and the most expensive to fix after the rails are bolted down. This guide is the field version: what azimuth and tilt actually do to your kilowatt-hours, the math for your latitude, when breaking the rules makes sense, and how shading and racking interact with all of it.

If you're still picking hardware, our 2026 most-efficient panels guide and the what direction should solar panels face primer are the companion reads.
The Two Angles That Run the Whole Calculation
Why Solar Panel Orientation Is a Critical First Step
Common Questions About Solar Panel Orientation
Orientation is two numbers. Azimuth is the compass direction the panel face points, measured in degrees — 180° is true south in the northern hemisphere, 90° is east, 270° is west. Tilt is the angle off horizontal — 0° is flat on a commercial roof, 90° is a vertical wall. Every production estimate you'll ever run, from PVWatts to a installer's proposal software, is fundamentally a function of these two numbers plus your location's solar resource.
The physics in one paragraph: a panel produces the most when sunlight hits it square-on. Over a year, true south at a tilt near your latitude maximizes total annual energy in the northern hemisphere because it averages the sun's seasonal swing. But "most total energy" is not always "most valuable energy" — and that gap is where smart design happens.
What Deviating From South Actually Costs
Here's the part most sales proposals skip: orientation losses are asymmetric and smaller than people assume in one direction, brutal in another. These are typical annual-production factors for the continental US, tilt near latitude, relative to a perfect due-south array at 100%:
| Azimuth | Direction | Annual Production Factor (typical CONUS) | Loss vs Due South | Field Verdict |
|---|---|---|---|---|
| 180° | True south | 100% | — | The reference; maximizes annual kWh |
| 165°–195° | SSE / SSW | 98–100% | 0–2% | Effectively free — chase the best roof plane |
| 135°–225° | SE / SW | 94–97% | 3–6% | Fine; SW often beats S under time-of-use rates |
| 90° / 270° | East / West | 80–88% | 12–20% | Viable on the right rate plan or with cheap panels |
| East + West split array | Dual plane | 82–90% (combined) | 10–18% | Flattens the day; great for self-consumption |
| 0°–45° | North-facing | 55–75% | 25–45% | Avoid; only low-tilt near-flat north roofs are borderline |
Notice what that table says: missing true south by 30° costs you almost nothing. I've talked more than one customer out of ugly racking gymnastics to "correct" a 195° roof plane that was leaving 1% on the table. East-west splits deserve respect too — they produce less annually but spread it across morning and evening, which can be worth more money than raw kWh under time-of-use rates where 4–9 PM power costs triple. Run the rate schedule before you run the azimuth.
Tilt: Latitude, Seasons, and When Flat Wins
The classic rule — tilt equals latitude — maximizes annual production and it still holds as a starting point. Portland sits near 45.5°N, Phoenix near 33.5°N, Miami near 26°N. But real roofs have their own pitch, and the penalty for matching the roof instead of the ideal is gentler than most people think:
| Latitude Band | Ideal Annual Tilt | Production at Roof Pitch 4:12 (~18°) | Production at Roof Pitch 7:12 (~30°) | Winter-Optimized Tilt (lat + 15°) | Summer-Optimized Tilt (lat − 15°) |
|---|---|---|---|---|---|
| 25–30°N (FL, TX Gulf, SoCal deserts) | 25–30° | ~97% | ~100% | 40–45° | 10–15° |
| 30–35°N (AZ, NM, GA, SoCal) | 30–35° | ~95% | ~99% | 45–50° | 15–20° |
| 35–40°N (TN, CO, KS, NorCal) | 35–40° | ~92% | ~97% | 50–55° | 20–25° |
| 40–45°N (PNW, Midwest, NY) | 40–45° | ~89% | ~95% | 55–60° | 25–30° |
| 45–50°N (MT, MN, ME) | 45–50° | ~87% | ~93% | 60–65° | 30–35° |
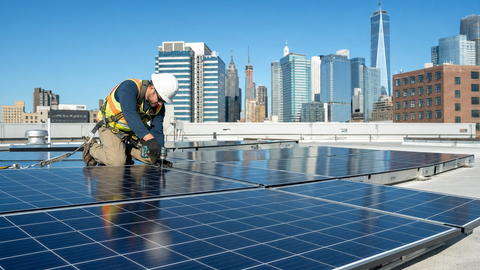
Three cases where we deliberately deviate from "tilt equals latitude." First, off-grid systems: winter is the binding constraint, so we tilt latitude + 15° and accept the summer surplus we can't use — December production is what sizes the battery bank, and our off-grid battery sizing guide walks through that interaction. Second, flat commercial roofs: 5–10° tilt racking beats 30° tilt on row-spacing economics alone — tighter rows mean more total watts on the roof, and more watts at 92% per-panel production beats fewer watts at 100%. Third, snow country: steeper tilts shed snow, and a 45° array that self-clears by noon beats a 25° array wearing a white blanket until March.
The Rate-Plan Effect: When West Beats South
Optimizing For Time-of-Use Rates And Seasonal Shifts
Here's the scenario that flipped our default advice in California and Arizona: under time-of-use rates with evening peaks, a kilowatt-hour at 6 PM can be worth two to three times a kilowatt-hour at noon. A southwest-to-west azimuth shifts production later, sacrificing maybe 5–8% of annual kWh to capture 20–40% more bill value. Add a battery and the calculus shifts again — store the noon surplus, discharge at peak, and orientation returns to maximizing total energy. Our storage economics coverage and the battery runtime calculator help quantify the second case.
The honest rule for 2026: if you're grid-tied on flat-rate net metering, face south at roof pitch and stop optimizing. If you're on time-of-use, model southwest and west before committing. If you're off-grid, optimize for December, not for the year.
One more design input people forget until change-order time: future expansion. If there's any chance you'll add panels in five years — an EV, a heat pump conversion, a shop building — orient and lay out today's array so tomorrow's array gets the same treatment. Leave the best roof plane's remaining rows contiguous, size conduit and combiner capacity with headroom, and record the azimuth and tilt you used in the project file. We've retrofitted too many systems where the original array sprawled diagonally across the best plane and left only the junk orientations for phase two. The system components overview is a good checklist for thinking a whole system through before the first rail is cut, and our guide to reading installation quotes shows where orientation decisions hide in a proposal's line items.
Shading: The Variable That Trumps Both Angles

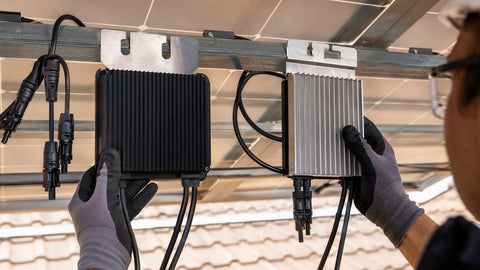
A perfectly oriented array with a fir tree shadow crawling across it from October to March will lose to a mediocre-oriented array in full sun, every time. Shade losses are non-linear — thanks to bypass diode architecture, shading 5–10% of a string's cells can cut string output by 30–50%. This is where module-level power electronics earn their cost: microinverters or DC optimizers confine shade losses to the shaded module instead of letting one chimney poison a whole string. The trade-offs are mapped in our inverter types guide and the Enphase vs SolarEdge comparison.
Field practice: run a shade analysis (a Solar Pathfinder, a drone scan, or your designer's software) at winter solstice sun angles, not summer. Summer shade lies to you. And look at the neighbor's lot — we've measured arrays that were shade-free at install and 20% shaded five years later by the fastest-growing arborvitae in the county. Trees grow; arrays don't move.
Racking, Roofs, and Getting It Physically Right
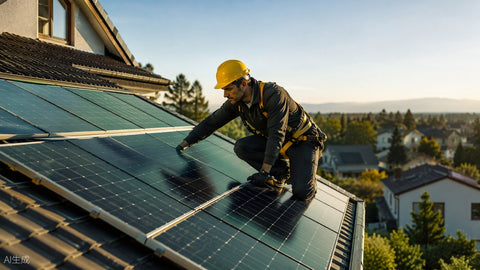
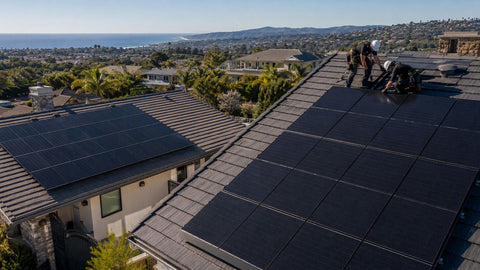
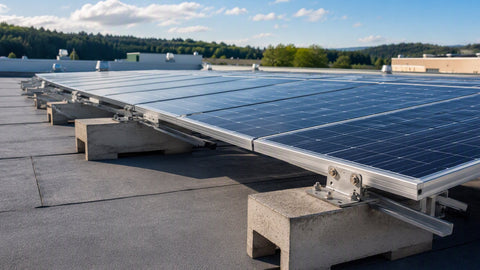
Orientation decisions become racking decisions, and racking is where orientation plans meet physics and code. Flush-mounted rail systems follow the roof's pitch and azimuth — your orientation choice is really a roof-plane choice, which is why the design conversation starts with a roof map, not a compass. Tilt-up legs on flat roofs buy you any azimuth you want at the cost of ballast, wind loading, and row spacing. Ground mounts buy you perfect orientation and tilt, seasonal adjustability, and easy cleaning, at the cost of trenching, fencing, and land.
Structural code is not optional reading here. Racking must be listed to UL 2703, attachments engineered for local wind and snow loads (ASCE 7), and roof penetrations flashed correctly — a leak in year four erases a lot of orientation gains. The racking brands we trust and stock are covered in depth: IronRidge, Unirac, SnapNrack, and Quick Mount PV for the waterproofing-critical attachments. Our racking systems overview compares the architectures.
Understanding Azimuth and Tilt for Peak Performance
One install detail we check on every job: row-to-row shading on tilted flat-roof arrays. The inter-row spacing formula — row spacing ≥ 3 × panel height × cos(azimuth deviation) at winter solstice — gets rounded down by software when roof area is tight, and December performance pays for it. When in doubt, sacrifice panel count, not spacing.
Tracking and Adjustability: Worth It?
Before we get to trackers, a word on the low-tech version: seasonal tilt adjustment. Ground mounts and some flat-roof systems let you change tilt two or four times a year — steep (latitude + 15°) for winter, shallow (latitude − 15°) for summer. Done faithfully, seasonal adjustment recovers 4–8% more annual energy than a fixed compromise tilt, which on a 10 kW array is 400–1,000 kWh a year — real money, for twenty minutes of wrench work per season. The catch is human: systems get set once and never touched again. If you know yourself and know the wrenches will stay in the garage, fix the tilt at latitude and take the guaranteed number over the theoretical one.
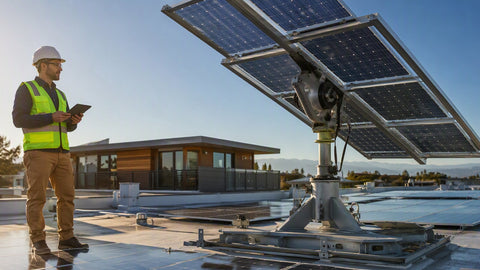
Single-axis trackers add 15–25% annual production over fixed tilt, and dual-axis trackers add 30–40% — numbers that made sense when panels cost $4/watt and mostly don't at $0.30/watt. Today, for residential, adding 20% more panels to a fixed array is cheaper, more reliable, and maintenance-free compared to motors, actuators, and wind-stow failures in a tracker. Trackers still pencil for large commercial and agricultural sites with land to spare and O&M budgets. For everyone else: fix the tilt, spend the savings on modules. If you're weighing panel tiers for that fixed array, the Tier 1 panel list and our 400W vs 500W comparison sort the options.
Ground Mount vs Roof Mount: The Orientation Trade-Offs in Hardware
The Foundation: Choosing the Right Racking
When the roof won't cooperate — steep north planes, shade, a membrane roof the roofer won't warranty with penetrations — the ground mount is the orientation problem's final answer. Perfect azimuth, ideal tilt, seasonal adjustability if you want it, and no racking warranty fights with your roofing contractor. The costs are real: trenching the DC or AC run back to the service, a concrete or driven-pile foundation, permitting as a separate structure in many jurisdictions, and simply owning the land. Our rooftop system walkthroughs and the ground-mount kit listings in our catalog price the delta concretely.
| Factor | Flush Roof Mount | Tilted Flat-Roof Mount | Ground Mount |
|---|---|---|---|
| Orientation control | None — follows roof plane | Full azimuth, limited tilt range | Full azimuth and tilt |
| Typical installed racking cost / W | $0.10–$0.18 | $0.15–$0.25 | $0.25–$0.45 |
| Production vs ideal | Roof-dependent (85–100%) | 90–95% (row spacing losses) | 100% (plus seasonal adjust option) |
| Maintenance access | Poor — roof work | Moderate | Excellent — cleaning and snow removal easy |
| Snow shedding | Roof-pitch dependent | Poor at low tilt | Excellent at 40°+ tilt |
| Permitting complexity | Standard | Standard + structural | Higher — structure, trench, sometimes setback rules |
We've installed all three architectures in every season the Pacific Northwest offers. Roof mounts win on cost whenever the roof is even marginally suitable. Ground mounts win on everything else — production per panel, cleaning, snow, expansion — and for off-grid customers where December kWh are the binding constraint, the ability to run 55–60° winter tilt is often what makes the whole system pencil. The rooftop installation guide covers the attachment and flashing discipline that keeps a roof-mounted array from becoming a leak map.
What the Same Array Produces in Different Cities
Orientation percentages are location-independent; absolute production is not. A 10 kW array at due south and latitude tilt produces wildly different annual energy depending on where it sits — and the penalty for a bad orientation compounds with a weak resource. Approximate annual production for a 10 kW fixed array, south-facing at latitude tilt, versus the same array split east-west:
| Location | South @ Latitude Tilt (kWh/yr) | East-West Split (kWh/yr) | Split Penalty | Notes |
|---|---|---|---|---|
| Phoenix, AZ | ~17,500 | ~15,200 | ~13% | Best resource in CONUS; orientation forgiving |
| Denver, CO | ~15,000 | ~13,000 | ~13% | High altitude, snow-shedding tilt matters |
| Kansas City, MO | ~13,500 | ~11,700 | ~13% | Mid-continent average |
| Portland, OR | ~11,000 | ~9,800 | ~11% | Cloudy winters; off-grid needs winter tilt |
| Seattle, WA | ~10,500 | ~9,400 | ~10% | Weak winter resource favors steep tilt + storage |
The pattern to internalize: in high-resource desert country, orientation mistakes cost percentage points of a large number. In the cloudy Northwest, the same mistake costs percentage points of a small number — and if you're off-grid, it costs them in December, the month that sizes your battery bank. That's why our design conversations in this region start with the winter month and work backwards, not with the annual average and forward.
Frequently Asked Questions
What is the best direction for solar panels to face?
True south (180° azimuth) in the northern hemisphere maximizes annual production. However, deviations up to 30° east or west of south cost only 2–6% of annual output, and southwest or west-facing arrays can earn more money than due-south arrays under time-of-use rates with evening peak pricing. North-facing planes should be avoided — they sacrifice 25–45% of production.
What angle should solar panels be tilted at?
Tilt equal to your latitude maximizes annual production — about 45° in Seattle, 34° in Phoenix, 26° in Miami. Matching an existing roof pitch within 10–15° of ideal costs only 3–8% annually and is usually the right call. Off-grid systems should tilt latitude plus 15° to maximize winter production, when the array is the binding constraint on the whole system.
Is it worth putting solar panels on an east- or west-facing roof?
Yes, in most cases. East and west planes produce 80–88% of what a south plane delivers annually, and with panels under $0.40/watt the economics still work — you simply install more capacity for the same energy. East-west split arrays also flatten the production curve across the day, which improves self-consumption and reduces evening grid purchases on time-of-use plans.
How much does shading reduce solar panel output?
Far more than the shaded fraction suggests. Shading 5–10% of a string's cells can cut the entire string's output by 30–50% because unshaded cells drive current through shaded ones. Microinverters or DC optimizers confine losses to the shaded module alone. Always run a shade analysis at winter solstice sun angles — summer-only analysis misses the worst shadows.
Are solar trackers worth the extra cost for homes?
Rarely. Single-axis trackers add 15–25% annual production, but with panels now under $0.40/watt, adding 20% more modules to a fixed array is cheaper, maintenance-free, and more reliable than motors and actuators exposed to wind and weather. Trackers still make economic sense for large commercial and agricultural sites with land and maintenance budgets.
Do solar panels work if they face north?
They work, but poorly in the continental US — north-facing arrays at typical roof pitches produce 55–75% of an equivalent south-facing array, with the worst penalty in winter when the sun stays low. Near-flat north roofs (under 10° pitch) are the exception, losing only 10–15%. On steep north planes, the money is almost always better spent on a ground mount or a different structure.
Need pricing or availability on anything in this guide?
Portlandia Electric Supply dropships direct from the manufacturer — most items Ship Direct with lead times stated up front, no surprises.
Get a quote from PESBulk, pallet and contractor pricing available.