For solar installers, EPCs, and project developers — and I've been pulling wire on roofs since 2019 —, wiring solar panels in series is the foundational skill for nearly all grid-tied projects in the U.S. Connecting the positive terminal of one panel to the negative of the next increases the system's total voltage while keeping the current constant. This isn't just theory; it's the critical first step in building a high-performance, code-compliant system that maximizes energy harvest and minimizes costs.
This guide provides the real-world calculations, job site best practices, and troubleshooting steps needed to design and execute series wiring flawlessly, ensuring your projects meet NEC standards and hit performance targets.
Mastering series wiring is a core competency for any solar professional. It directly impacts system efficiency, component selection, and project profitability. While the concept is simple—connecting panels end-to-end to add their voltages—the real-world implications for system design and ROI are massive.
Higher Voltage, Better Performance
Modern grid-tied systems are built around series wiring for one primary reason: Maximum Power Point Tracking (MPPT). Inverters from leading brands like Sungrow, Fronius, and FranklinWH are engineered to operate most efficiently at higher DC voltages.
By stringing panels in series, you create a high-voltage, low-current circuit that perfectly matches the operational sweet spot of these inverters. This allows them to extract more energy throughout the day, especially during the critical low-light periods of early morning and late afternoon, maximizing the kilowatt-hours delivered.
Before diving deeper, let's clarify the fundamental differences between series and parallel wiring.
Series vs Parallel Wiring At a Glance
This table breaks down the core electrical outcomes of each wiring strategy. It's a quick reference for project managers and installers to decide which approach fits a specific project's needs.
| Wiring Method | Voltage Effect | Current (Amperage) Effect | Best For |
|---|---|---|---|
| Series | Voltages add together (V_total = V1+V2+V3) | Current stays the same (I_total = I1=I2=I3) | Most grid-tied systems, long wire runs, and maximizing inverter efficiency. |
| Parallel | Voltage stays the same (V_total = V1=V2=V3) | Currents add together (I_total = I1+I2+I3) | Off-grid systems with lower voltage batteries, or managing partial shading. |
As you can see, series wiring is purpose-built for creating the high-voltage DC needed for today's grid-tied inverters.
It's Also About Saving Money
The financial benefits are just as important. High voltage is your best friend regarding minimizing power loss over distance. Thanks to physics (specifically, I²R losses), a higher voltage circuit loses far less energy to heat.
This allows you to use smaller, more cost-effective 10 AWG PV Wire instead of thicker, expensive copper cables. On a large residential job or any commercial installation, the savings on wire alone can add up to thousands. Stringing just 10 standard solar panels together can easily produce 300-400 volts, a level that makes power transmission dramatically more efficient.
Expert Tip: When designing a string, always aim for a voltage that sits comfortably in the upper range of your inverter's MPPT window, but stay safely below its absolute maximum input voltage. This is the key to maximizing your energy harvest without ever risking damage to the equipment.
Solar technology's benefits don't just stop at the meter, either. A well-designed system can improve a home's overall energy efficiency. For example, a simple solar attic fan can significantly reduce cooling costs by using the sun's power to regulate attic temperature. It's a great example of how solar can be applied in more ways than one.
Ultimately, mastering series wiring is about building smarter, more efficient, and more profitable solar energy systems from the ground up.
This is where a good solar project becomes a great one. Before you pull wire or crimp a single connector, precise calculations are non-negotiable for system safety, NEC compliance, and maximizing energy yield. Getting this wrong can lead to catastrophic inverter damage; getting it right unlocks the true potential of your system.
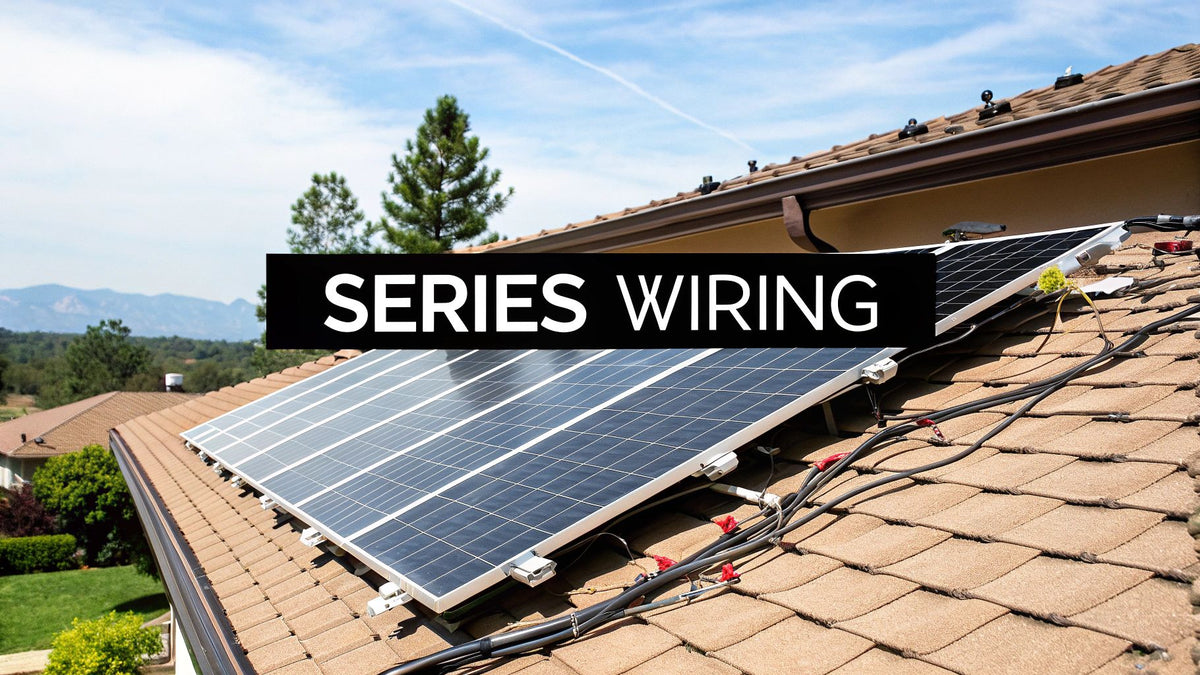
This graphic lays out the basic principle of series wiring—daisy-chaining panels to build a single, higher-voltage circuit.

The main idea here is that every panel you add to the string bumps up the total voltage, which is key for sending power down to the inverter efficiently.
The Most Critical Calculation: Your Open-Circuit Voltage
Every panel's spec sheet lists its Open-Circuit Voltage (Voc). This is the panel's absolute maximum voltage potential when disconnected. When you string panels in series, their Voc values add together.
The critical mistake that fries inverters is forgetting that solar panels produce higher voltage in cold weather. The Voc on the spec sheet is measured at a standard 25°C (77°F). On a frigid winter morning, the actual Voc of your array will spike significantly. Ignoring this risks "over-volting" the inverter—a catastrophic failure that voids the warranty.
Compliance Watchout: The National Electrical Code (NEC) Section 690.7 mandates that you calculate the maximum circuit voltage based on the coldest expected ambient temperature for the site. This is a non-negotiable rule for a safe, legal, and insurable system.
A Real-World String Sizing Example
Let's run the numbers for a project where the record low temperature is -10°C (14°F).
Here's our Bill of Materials (BOM):
- Solar Panels: Qcells Q.PEAK DUO BLK ML-G10+ 400W (Voc = 45.05 V)
- Inverter: Fronius Primo 8.2-1 (Max DC Input Voltage = 1000 V)
- NEC Table 690.7(A): This table provides the voltage correction factor for the record low temp. For -10°C, that factor is 1.14.
Now, let's do the math.
-
Find the Corrected Voc for a Single Panel: Calculate the panel's max voltage on the coldest day.
- 45.05 V (Voc) * 1.14 (Correction Factor) = 51.36 V per panel (at -10°C)
-
Determine the Maximum Number of Panels per String: Calculate how many cold-weather panels the inverter can handle.
- 1000 V (Inverter Max) / 51.36 V (Corrected Voc) = 19.47 panels
You can't install 0.47 of a panel, so you always round down. The absolute maximum for this string is 19 panels. Attempting to install 20 panels creates a direct risk of exceeding the 1000V limit on a cold day—a bet you will eventually lose.
Optimizing for the MPPT Window
Staying below the max voltage is about safety. Hitting the inverter's Maximum Power Point Tracking (MPPT) window is about performance. This is the voltage range where the inverter operates most efficiently, converting DC from your panels into usable AC.
Let's stick with our example:
- The Fronius Primo has an MPPT operating range of 270 V to 800 V.
- Our Qcells panel has a Maximum Power Voltage (Vmp) of 37.31 V. This is the panel's typical operating voltage under load.
Let's see what a string of 18 panels looks like (a safe number, just under our max of 19):
- 18 panels * 37.31 V (Vmp) = 671.58 V
That 671.58 V operating voltage sits perfectly in the sweet spot of the inverter's 270-800V MPPT range. This design is not just safe and code-compliant; it’s optimized to harvest the most energy possible.
This two-step process—calculating the cold-weather Voc for safety, then checking the operating Vmp for performance—is the blueprint for every professionally designed series string system. And while voltage is a huge piece of the puzzle, it's also important to see how it all fits together. For a deeper dive, check out our guide on how to convert kilowatt-hours to amps to better understand the relationship between energy and current.
NEC 690.7(A) Temperature Correction Factors for Voc
The coldest temperature at your site determines the maximum voltage your array can produce. Use NEC Table 690.7(A) to calculate the corrected Voc before sizing strings.
| Ambient Temp (°C) | Ambient Temp (°F) | Correction Factor | Example: 45V Panel → Corrected Voc |
|---|---|---|---|
| 24 to 20 | 75 to 68 | 1.02 | 45.9V |
| 19 to 10 | 67 to 50 | 1.06 | 47.7V |
| 9 to 0 | 49 to 32 | 1.10 | 49.5V |
| -1 to -10 | 31 to 14 | 1.14 | 51.3V |
| -11 to -20 | 13 to -4 | 1.18 | 53.1V |
| -21 to -40 | -5 to -40 | 1.25 | 56.3V |
String Sizing by Inverter Voltage and Module Voc
| Inverter Max DC (V) | Module Voc (V) | Correction Factor | Max Panels/String | Safe Design (panels) |
|---|---|---|---|---|
| 600V | 45V | 1.14 (@-10°C) | 11.7 → 11 | 10 |
| 600V | 50V | 1.14 | 10.5 → 10 | 9 |
| 1,000V | 45V | 1.14 | 19.5 → 19 | 18 |
| 1,000V | 50V | 1.14 | 17.5 → 17 | 16 |
| 1,500V | 45V | 1.14 | 29.2 → 29 | 28 |
| 1,500V | 50V | 1.18 (@-20°C) | 25.4 → 25 | 24 |
Real-world example: We designed a 15 kW array in Bend, Oregon last winter. Record low is -22°C. Using Qcells with 45.05V Voc: corrected Voc = 45.05 × 1.18 = 53.16V. Fronius Primo 1,000V max: 1,000 / 53.16 = 18.8 → max 18 panels. We strung 17 to leave margin. On the coldest morning, the array peaked at 903V — safely under the 1,000V limit with room to spare.
Common Inverter MPPT Windows and Optimal String Voltages
| Inverter Model | Max DC Input (V) | MPPT Range (V) | Start Voltage (V) | Optimal String Vmp |
|---|---|---|---|---|
| SolarEdge SE7600H | 480V | 200–480 | 90 | 350–400V |
| Fronius Primo 8.2 | 1,000V | 270–800 | 200 | 500–650V |
| SMA Sunny Boy 7.7 | 600V | 150–480 | 125 | 300–400V |
| Enphase IQ8+ | 60V (per micro) | 27–45 | 22 | 35–40V (1–2 panels) |
| Sol-Ark 15K | 500V | 150–425 | 100 | 300–375V |
Arriving at the job site with the correct, high-quality gear is critical for safety, NEC compliance, and building a solar array that will last 25+ years. This is the field-tested checklist for everything you'll need to wire solar panels in series. A solar installation is only as strong as its weakest link—and that link is often the wire, connectors, or cable management.

Essential Wiring and Connection Components
Every component in a series string must be rated for high DC voltages and harsh outdoor conditions. This is not a place to cut corners.
-
PV Wire (USE-2 or RHW-2): This is the workhorse wire for module-to-module connections and homeruns. It's built with thick, cross-linked polyethylene (XLPE) insulation to withstand UV rays, moisture, and extreme temperatures from -40°C to 90°C. Explore our deep dive on solar PV wire and its 600V options to nail your voltage drop calculations.
-
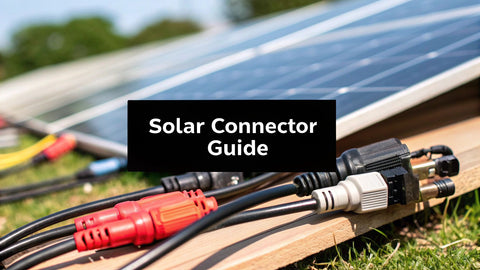
MC4 Connectors: The industry standard for a reason. Critical Mistake to Avoid: Never mismatch brands for male and female connectors. This creates poor connections, allows moisture ingress, and can cause arc faults—a major fire hazard.
-
Proper MC4 Crimping Tool: Do not use standard pliers. A dedicated MC4 crimper is the only way to achieve a mechanically solid, electrically sound, and weatherproof seal. This single tool often separates a 25-year connection from one that fails within a year.
The global solar cable market is set to grow at an 8.1% CAGR, highlighting the importance of these components. As you build higher-voltage series strings, these cables must manage significant environmental stress. Modern PV wire is engineered with advanced UV shielding for this reason.
Safety Gear and Testing Equipment
High-voltage DC is unforgiving. Ensure you and your crew have the right safety and testing equipment before starting work.
Job Site Safety Protocol: Treat every solar string as live, even on an overcast day. Always use proper PPE and follow lockout/tagout (LOTO) procedures at the inverter and disconnects before touching any conductors.
- High-Voltage Multimeter: You need a CAT III or CAT IV rated multimeter capable of handling up to 1000V DC (or 1500V for commercial jobs). Use this to verify string polarity and measure the final open-circuit voltage (Voc) to confirm it matches your design.
- Insulated Gloves and Tools: Class 0 or 00 electrical gloves are your first line of defense. Using screwdrivers, wrenches, and pliers with certified insulation adds another critical layer of protection.
- Lockout/Tagout (LOTO) Kit: Before connecting homeruns, de-energize and lock out all relevant disconnects. A LOTO kit ensures no one can accidentally energize the circuit while you're working.
Cable Management for Longevity
Proper wire management is not just for aesthetics; it's an NEC requirement to protect conductors from physical damage.
- UV-Resistant Zip Ties: Standard zip ties become brittle and fail in the sun. Use ties specifically rated for outdoor UV exposure to secure wiring to the racking.
- Solar Wire Management Clips: These metal clips are a critical advantage. They snap onto the panel frame or racking, keeping PV wire tucked away and off the hot roof surface. This prevents insulation damage from sharp edges or heat, adding years to the life of your wiring.
With calculations done and materials on site, it's time to build the array. This section details the hands-on techniques for creating a rock-solid system that is safe, weatherproof, and up to code. The core concept of wiring solar panels in series is daisy-chaining them—connecting the positive lead of one panel to the negative lead of the next. However, professional execution is in the details.

The First Rule of DC Wiring: Safety
Before a single connector clicks, address the live DC voltage. A single panel in the sun generates power. Last month we had a crew forget to cover a string on a cloudy morning — by the time they clicked the third connector, they were working with 180V DC. Respect the voltage., and as you string them together, the voltage rapidly rises to dangerous levels.
This is non-negotiable: Before making your first connection, cover the first panel in your string with its cardboard box or an opaque blanket. This simple step effectively "turns off" the panel, preventing voltage from building while you work. Only remove the cover when the entire string is wired and you are ready to test.
This practice de-energizes the circuit and dramatically reduces the risk of electric shock.
Making the Physical Connections
With the first panel covered, you can begin building the string. Each panel has a positive and negative wire lead, typically with factory-installed MC4 connectors.
Here’s the field-tested workflow:
- Position the Panels: Lay out modules on the racking as planned, ensuring wire leads can reach between panels without being stretched.
- Start the Chain: Take the positive (+) lead from the first covered panel.
- Link to the Next Panel: Connect that positive lead to the negative (-) lead of the second panel.
- Listen for the "Click": Push the connectors together until you hear and feel a solid 'click'. This confirms the internal locking tabs have engaged, creating a secure, waterproof seal. If it doesn't click, it's not a valid connection.
- Repeat Down the String: Continue connecting positive to negative down the line until you reach the last panel.
When finished, you will have an open negative lead on the first panel and an open positive lead on the last one. These are your "homerun" connections.
Building and Managing Your Homerun Wires
Homeruns are the main cables carrying the combined power from your string to the inverter or combiner box. You'll build these using PV wire and MC4 connectors.
A Quick Tip from Experience:
When crimping MC4s onto homerun wires, a dedicated MC4 crimping tool is essential. A bad crimp is a major failure point that allows moisture ingress and corrosion, eventually killing production. A proper crimp is critical for a low-resistance, long-lasting connection. For more details, see our guide on solar cable connectors.
After connecting the homeruns, the final job on the roof is wire management. This is a key NEC requirement that separates professional work from amateur.
- Secure Everything: Use high-quality, UV-resistant zip ties or purpose-built solar wire clips to fasten every wire neatly to the racking. Nothing should be drooping.
- Avoid Pinch Points: Ensure no wires are crushed between a panel frame and the rail. Keep them off the hot roof surface to protect the insulation.
- Add a Drip Loop: Where homeruns leave the array, create a small downward loop in the cable. This uses gravity to ensure rainwater drips off the loop instead of following the wire into electrical connections.
Following these steps creates a robust, safe, and efficient power plant built to perform for 25+ years.
The installation isn't complete until the system is commissioned. This phase separates professional, bankable solar projects from future service nightmares. Here, you test your work, verify calculations, and catch small mistakes before they become large, expensive problems. This process is about safety, quality assurance, and ensuring the system performs as designed.
Verifying String Voltage and Polarity
Before connecting any homerun to an inverter or combiner box, you must run two critical tests. This is a non-negotiable safety and quality control step.
Using your CAT III or IV rated multimeter:
-
Test for Open-Circuit Voltage (Voc): Set your multimeter to DC volts. Place the red probe on the positive homerun lead and the black probe on the negative. The voltage should be nearly identical to the cold-weather Voc you calculated. A reading within 5% confirms that all panels are connected and functional.
-
Confirm Polarity: A positive voltage reading means your leads are marked correctly. If you see a negative number, your leads are reversed. Stop and fix this immediately. Connecting a reverse polarity string can instantly destroy expensive inverter components.
Critical Field Check: A Voc reading that matches your calculations is the single best indicator of a healthy, correctly wired string. If the number is off, do not connect the string to any equipment until you identify the issue.
Troubleshooting Common Wiring Problems
If your Voc reading is wrong, a methodical approach will pinpoint the problem quickly.
The Zero Voltage Problem
A reading of zero volts (or close to it) indicates an open circuit.
- Check MC4 Connections: The most common culprit is a loose or improperly seated MC4 connector. Re-check every connection, pushing firmly until you hear and feel the "click."
- Inspect Homerun Connections: Examine the MC4 connectors you crimped onto the homeruns. A bad crimp is a frequent source of open circuits.
- Look for Damaged Cables: Visually inspect all wiring for physical damage, such as a wire pinched under a rail, nicked by a tool, or chewed by wildlife.
The Low Voltage Problem
This is trickier. If you expect 400V but only read 360V, one panel in your string is likely bypassed or has failed.
- Isolate the Issue: Use a divide-and-conquer strategy. Disconnect the string in the middle and test the Voc of the first half. If it reads correctly, the problem is in the second half. Continue splitting the problem section to find the faulty panel or connection.
- Bypass Diode Failure: Panels have internal bypass diodes that activate when a panel is shaded or fails. A low voltage reading could mean a diode is permanently engaged, removing that panel's voltage from the total.
- Mismatched Panel: While rare for experienced crews, accidentally installing a lower-voltage panel in the string will reduce the total Voc. Double-check the model numbers on all panels.
This commissioning framework turns potential callbacks into a repeatable quality check, ensuring the system you deliver is safe, compliant, and ready to generate power for decades.
Let's tackle some of the most common questions from installers to clarify the finer points of series wiring.
What Happens if One Panel in a Series String is Shaded?
Shading is the ultimate bottleneck for a series string. When part of a single panel is covered, it chokes the current for the entire string. The output of all other panels instantly drops to match the low output of the shaded one.
Modern panels use bypass diodes to mitigate this. These diodes automatically create a detour for the current, routing it around the underperforming shaded cells. While helpful, it's not a perfect solution. The string's total voltage is still reduced by the voltage of the bypassed panel, resulting in a noticeable power loss.
Can I Mix Different Solar Panel Types in a Series String?
The answer is a hard no. It's a terrible practice that will sabotage your system's performance. When you wire panels in series, the current (amperage) of the entire string is limited by the single panel with the lowest current rating.
If you connect a string of 10-amp panels but include one 8-amp panel, the entire string will only produce 8 amps. You've just lost 20% of your potential power. For optimal performance, always use identical panels—same brand, model, and wattage—in a single series string.
How Many Panels Can I Connect in a Single String?
This isn't a fixed number; it's a critical calculation based on two factors:
- Your Inverter's Maximum DC Input Voltage: This is a hard limit you can never exceed.
- The Coldest Temperature at Your Site: Panel voltage spikes in the cold. You must use NEC temperature correction factors to calculate the panel's true maximum Voc on the coldest possible day.
To get your number, divide the inverter's max voltage by the temperature-corrected Voc of one panel and always round down.
Expert Tip: Never design a string that redlines the inverter's voltage limit. A smart, durable design leaves a healthy buffer to ensure reliability. The sweet spot for peak energy harvest is a string that operates in the upper-middle of the inverter's MPPT window.
As your solar project ages, it's also smart to think about what happens at the end of its life. For guidance on responsible disposal, you can find resources on sustainable solar panel recycling and disposal services.
From initial design to final commissioning, having the right components and expertise is key. PES Supply provides the Tier 1 modules, inverters, and BOS you need, backed by in-house design support and nationwide logistics.
Request a Bulk Quote for Your Next Project
Related Resources:
- Best Solar Panels 2026 — Buyer's Guide
- EG4 vs Tesla Powerwall
- Qcells vs Trina vs JA
- Solar Inverter Buyer's Guide
- Solar Battery Buyer's Guide
- 5kW Solar Kit
- 10kW Solar + Battery Kit
- Off-Grid Cabin Kit
- EG4 Batteries
- Qcells Solar Panels
- Trina Solar
- JA Solar
- REC Solar
- Mission Solar
- Sol-Ark Inverters
- SolarEdge Inverters
- Generac PWRcell
Calculate how much storage you need with our battery sizing calculator.
Use our free solar system calculator to size your array.
Check out our Solar Panel Comparison Tool. Check out our Inverter Sizing Calculator.
Calculate your solar payback and 25-year savings with our Solar ROI Calculator. Follow our complete DIY solar installation guide for step-by-step instructions. Keep your system running at peak performance with our Solar Maintenance Guide.
Related Resources
- Solar System Calculator
- Battery Sizing Calculator
- Solar Panel Comparison Tool
- Inverter Sizing Calculator
- Solar ROI Calculator
- Solar Installation Guide
- Solar Maintenance Guide
- Solar Permitting Guide
- Battery Installation Guide
- NEC Code Compliance Guide
- Solar Panel Mounting Guide
- Grounding & Bonding Guide
- Solar Incentives by State
- Pro Account — Wholesale Pricing
- PowerLink Network — Contractor Program