Updated September 2026 — refreshed against the live PES catalog; product pricing verified 2026-09-26.
2026 product line update
| Product | Class | Price |
|---|---|---|
| Canadian Solar 710W TOPCon Bifacial Solar Panel | 710W | $340.80 |
| Hyundai 640W 156-Cell TOPCon Bifacial Solar Panel | 640W | $220.78 |
| Thornova Solar TS-BGT72(600) 600W Bifacial Solar Panel | 600W | $165.76 |
| Thornova Solar 595W Solar Panel 144 Cell Bifacial TS-BGT72(595) Wholesale 31 panels per pallet | 595W | $164.64 |
| ZNShine Solar 585W 144-Cell Bifacial Solar Panel | 585W | $246.99 |
| Hyundai HiS-S585OJ 585W Clear on Transparent156 Half-Cell Bifacial Solar Panel | 585W | $195.86 |
Live prices verified 2026-09-26. The current pallet line tops out at 550–640W, plus the Canadian Solar 710W TOPCon flagship panel.
Why Series Connections Are the Backbone of Solar Design
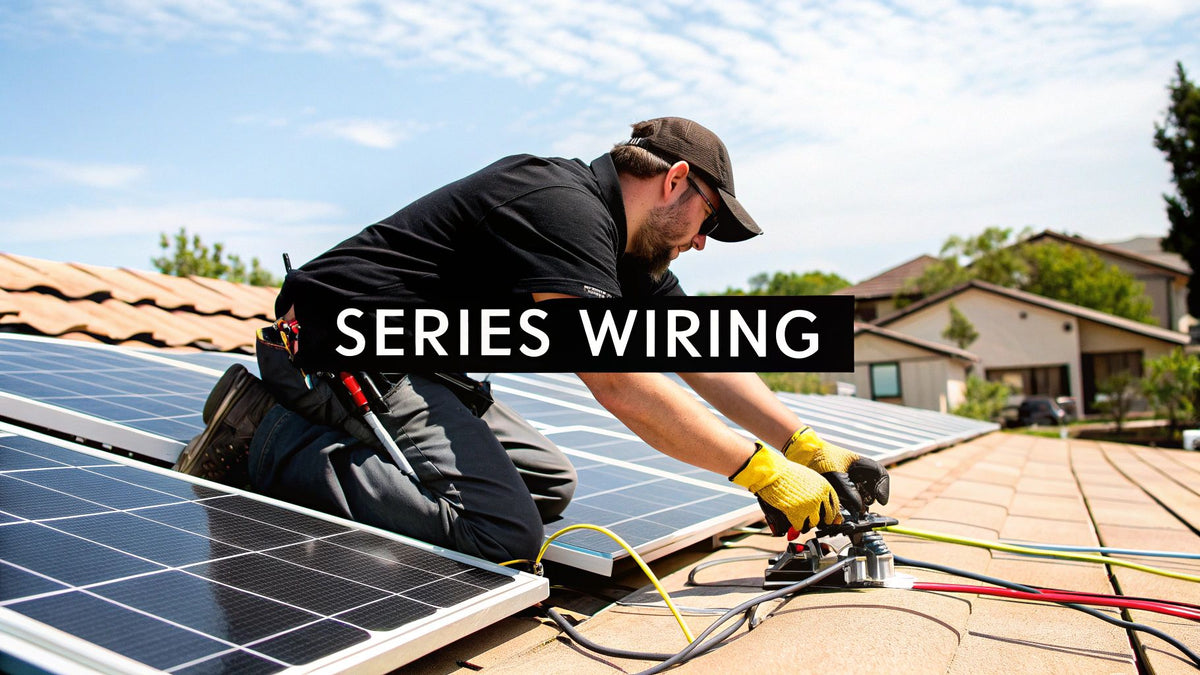
Wire two solar panels together and you have two choices: series or parallel. Series — positive of one panel to negative of the next — stacks voltage while current stays constant. Parallel stacks current while voltage stays constant. Nearly every modern rooftop array is built on series strings, and the reason is simple: higher voltage means lower current for the same watts, lower current means smaller wire, smaller voltage drop, and less heat. Power is volts times amps; move the work into volts and everything downstream gets cheaper and cooler.

The numbers make the point. A 12-panel string of 400W modules is 4,800 watts of array. Wired as one series string at roughly 370V, it pushes about 13 amps — comfortable in 12 AWG PV wire with trivial losses over a 60-foot run. Wired in parallel at 31 volts, the same array needs 155 amps: busbar-thick conductors, huge fuses, and voltage drop that eats real watts. Nobody builds it the second way. I've terminated both, and the parallel lash-up was on an RV where 12V forced the issue — everywhere else, series wins.
Series wiring also matches how modern electronics want to be fed. String inverters have MPPT input windows, commonly 80–500V or wider, and they convert most efficiently in the middle-to-upper part of that window. A string that wakes the inverter at dawn at 200V and cruises at 350–400V all day is doing exactly what the hardware was designed for. Our string inverter sizing guide covers the inverter side of this matching exercise.
Key Advantages for Installers and System Designers
- Lower current, smaller wire: 10–15A strings run happily on 10–12 AWG PV wire; see our MC4 wire gauge guide for connector-side limits.
- Less voltage drop: losses scale with current squared — halve the amps and you quarter the I²R heating.
- Cleaner home runs: one string is one positive and one negative pair back to the inverter or combiner.
- Fewer overcurrent devices: single strings below the fuse threshold often need no string fusing at all (NEC 690.9).
The tradeoff is shade sensitivity and the cold-weather voltage ceiling — both covered in depth below, because both are manageable with math rather than avoided with superstition. One orientation note before we start: this guide assumes crystalline silicon modules on a fixed roof, which covers the overwhelming majority of what we sell and what inspectors see. Thin-film and portable panels follow the same electrical rules with different datasheet numbers — the procedure is identical, only the constants change.
Gearing Up for a Pro-Level Series Connection
The Must-Have Components and Hardware
A series string is only as good as its weakest termination. The shopping list for a code-clean string run:
| Component | Spec to Check | Field Note |
|---|---|---|
| PV modules | Voc, Vmp, Imp, Voc temperature coefficient from the datasheet | All modules in a string should share Imp within ~5% — mixed modules drag to the weakest |
| PV wire (USE-2 or PV Wire) | 10 or 12 AWG, 90°C wet-rated, sunlight resistant | PV Wire's thicker insulation survives conduit and raceway duty; see our PV wire vs. USE-2 vs. THHN guide |
| MC4-class connectors | Matched brand pairs, crimped with the die the manufacturer specifies | Mixing connector brands is the #1 cause of rooftop arc faults we troubleshoot |
| String fuses (when required) | 1.56 × Isc minimum, per NEC 690.9 | Required when 3+ strings parallel into one MPPT input |
| DC disconnect | PV-rated, 600V class | The MidNite MNEPV breakers handle combiner-duty overcurrent protection |
| Rapid shutdown hardware | NEC 690.12 compliance — module-level devices for rooftop | Non-negotiable on dwellings since the 2017 code cycle |
Field-Tested Tools of the Trade
A proper MC4 crimper with the correct die set, a clamp meter that reads DC amps, a multimeter rated CAT III 1000V, and — the tool that separates pros from dabblers — an insulation resistance tester for commissioning megger checks. Skip the crimper and use pliers on MC4 pins and you'll build a string that passes on day one and arcs on day four hundred. We have replaced the connector pairs on enough of those to have opinions. Budget reality for the kit: a quality crimper runs about the cost of one service call, and it pays for itself the first time it prevents one.
A Field Guide to Wiring Panels in Series
Step 1: Plan Your Wire Runs
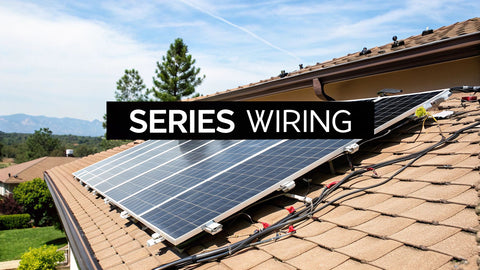
Lay the string out so the positive of module one sits near the negative of module two, daisy-chaining down the row. "Leapfrog" or "skip" wiring — jumping every other module so the return lead lands back at the start of the row — keeps both string homeruns at one end of the array and slashes wire use on long rows. Draw the string map on the racking plan before anyone climbs a ladder; five minutes with a pencil beats an hour of re-dressing leads on a hot roof.
Step 2: Make Secure, Code-Compliant Connections
Every MC4 gets crimped, seated until it clicks, and tug-tested. Every run gets secured with UV-rated clips or ties off the roof surface — wire management under arrays is a real NEC requirement (690.31) and a real fire-safety issue, not aesthetics. Keep positive and negative pairs together to minimize induction loops. Label both ends of every string: "STRING 3 (+)" saves the next technician — possibly you, two years from now, on a service call — from metering eight identical pairs to find the one that's open.
Step 3: Verify Before Energizing
Before any string lands on an inverter input: measure open-circuit voltage at the homerun and compare against the calculated cold-weather maximum (next section); verify polarity with the meter, not with memory; and confirm continuity through each module. A reversed string fed into a parallel combiner is a dead short between two power sources — exciting in the worst sense. Polarity checks take ninety seconds. I've watched a crew skip them and weld a combiner fuse holder into modern art.
Calculating String Voltage for Inverter Compatibility
Here is the part of series design where the NEC has one job: keep the coldest-possible string voltage under the equipment's absolute maximum input rating. Solar cells produce higher voltage as they get colder, and a string sized to the inverter's 600V limit at room temperature will sail past it on a January dawn. NEC 690.7 exists because rooftops learned this the hard way.
Step 1: Find the Key Specs
From the module datasheet: open-circuit voltage (Voc) and the Voc temperature coefficient (typically −0.24 to −0.30 %/°C for crystalline silicon). From climate data: the record low or ASHRAE extreme low for the site. The inverter's absolute maximum input voltage is on its nameplate — 600V for residential string units, 1,000V or 1,500V for commercial.
Step 2: The NEC-Compliant Calculation in Action
Corrected Voc = Voc × [1 + (25°C − record low °C) × |temp coefficient| ÷ 100]. Then: maximum modules per string = inverter max input voltage ÷ corrected Voc, rounded down. Never round up — a fraction of a module doesn't exist, and the ceiling is absolute.
Sample String Voltage Calculation (NEC 690.7)
| Parameter | Value/Calculation | Notes |
|---|---|---|
| Panel Voc | 49.8V | From the manufacturer's spec sheet |
| Record Low Temp | −10°C | Based on ASHRAE data for the install location |
| Temp. Difference | −10°C − 25°C = −35°C | Calculation based on NEC standard test temp of 25°C |
| Temp. Coefficient | −0.25%/°C | From the panel's spec sheet |
| Voltage Correction | −35°C × −0.25%/°C = 8.75% | The percentage the voltage will increase in the cold |
| Corrected Panel Voc | 49.8V × 1.0875 = 54.16V | A single panel's max voltage at the record low temp |
| # of Panels | 12 | The number of panels planned for the series string |
| Max String Voltage | 54.16V × 12 = 649.9V | The critical number for inverter matching |
Now the judgment call the original version of this guide glossed over: 649.9V exceeds the 600V ceiling that applies to one- and two-family dwellings under NEC 690.7(C), and it would smoke a 600V-max residential inverter on the coldest morning of the year. The fix is one module removed: 54.16V × 11 = 595.8V — inside both limits with a hair of margin. This is why we always run the correction before ordering racking, not after. The fast version of this math lives in NEC Table 690.7(A) correction factors:
| Ambient Temperature (°C) | Voltage Correction Factor (crystalline Si) |
|---|---|
| 24 to 20 | 1.02 |
| 19 to 15 | 1.04 |
| 14 to 10 | 1.06 |
| 9 to 5 | 1.08 |
| 4 to 0 | 1.10 |
| −1 to −5 | 1.12 |
| −6 to −10 | 1.14 |
| −11 to −15 | 1.16 |
| −16 to −20 | 1.18 |
| −21 to −25 | 1.20 |
| −26 to −30 | 1.21 |
| −31 to −40 | 1.23–1.25 |
Cross-check: the datasheet method above gave 1.0875 for −10°C against the table's conservative 1.14. The table is deliberately padded; the datasheet method is more precise and 690.7(A) allows it. When they disagree, the datasheet value usually buys you one more module per string — worth the arithmetic.
String Lengths for Real Inverter Windows
The 600V ceiling is only the top of the window. The bottom matters too: an MPPT that drops out below 120V means a too-short string goes to sleep on hot afternoons, when module voltage sags 10–15% with cell temperature. Design targets for common hardware, using 400W-class residential modules (Voc ≈ 37V, Vmp ≈ 31V):
| Inverter Class | MPPT Window / Max Input | Typical String Length (400W-class modules) | Watch Out For |
|---|---|---|---|
| Residential string (e.g., SMA Sunny Boy 5.0, SolarEdge HD-Wave without optimizers) | ~100–480V MPPT / 600V max | 8–13 modules | Cold-climate Voc ceiling sets the max; hot-day Vmp sag sets the min |
| Hybrid residential (Sol-Ark 8K class) | ~150–425V MPPT / 500V max | 7–10 modules | Narrower window — check both ends carefully |
| Commercial three-phase (Fronius Symo 15.0-3 class) | ~200–800V MPPT / 1,000V max | 16–22 modules | Longer strings, fewer home runs — the commercial efficiency case |
| Microinverter (microinverter systems) | Module-level, no strings | 1 module each | Series math disappears; shading math disappears with it |
That last row is the honest alternative: if the roof is chopped into shaded fragments, series strings fight the site and module-level electronics end the argument. Arrays on clean, open planes belong on strings — cheaper, fewer electronics, easier service.
Shading, Bypass Diodes, and What One Chimney Does to a String

Series strings share one current, so the weakest module sets the pace for all of them. A 20% shadow on one panel can clip a string's output by far more than 20% — except that modern modules carry three internal bypass diodes that route current around shaded cell-strings, converting catastrophe into a proportional loss. Diodes help; they don't perform miracles. The durable fixes are layout (keep the string out of the shadow's path) and electronics (optimizers or micros on the affected modules). For ground-fault and lightning protection on the same array, our grounding and bonding guide picks up where this one leaves off.
Troubleshooting Common Series Connection Issues
Diagnosing Underperforming Panels
A string producing 15% low on a clear noon has a short list of suspects: one module with a failed bypass diode (hot spot visible on a thermal camera), shading you missed, or a module degraded past its siblings. Measure string Vmp and Imp against the string next to it — twin strings on the same plane should match within a few percent. Isolating the bad module means metering Voc module by module; the dead one reads low or zero.
Hunting Down High-Resistance Connections
Heat is the tell. A high-resistance MC4 — mixed brands, bad crimp, cross-threaded coupling — runs warm under load, and warm becomes charred. Thermal imaging on a sunny afternoon finds these in minutes. Without a camera, feel along the string wiring after an hour of good sun (carefully — connectors run hot legitimately; you're hunting for the one that's dramatically hotter). Voltage-drop testing under load works too: more than a volt or two across any single connection means resistance that doesn't belong.
| Symptom | Likely Cause | Fix |
|---|---|---|
| String Voc ~40–50V low at open circuit | One module disconnected or a failed diode | Meter module-by-module; reseat or replace the open connection |
| String voltage normal, current near zero | Blown string fuse or tripped PV breaker | Find why it blew before replacing — usually a ground fault or reverse-polarity event |
| Output collapses on hot afternoons only | String too short for MPPT minimum at high cell temp | Design error — restring with more modules or move to another MPPT |
| One connector warm to the touch | High-resistance termination | De-energize, cut out, re-crimp with matched-brand connector and proper die |
| Inverter reports insulation fault | Moisture in a connector or nicked wire jacket to ground | Megger the string; inspect wire management for abrasion points |
When Parallel Belongs in the Design Instead
Series is the default, not the law. Parallel wiring earns its place in three situations: 12/24/48V battery-based systems where the charge controller needs array voltage near battery voltage (small off-grid — see connecting solar panels to a battery bank); sites with unavoidable multi-orientation shading where strings would fight each other; and arrays on microinverters, where each module is its own island. Parallel's cost is current: every amp you add needs copper, fusing per NEC 690.9, and bigger conduit — our conduit fill chart keeps the raceway side honest. Most residential rooftops still answer "series," with parallel used only at the combiner level to merge strings into one MPPT.
Series-Parallel Hybrids: How Real Rooftop Arrays Are Actually Built
A 24-panel roof is never one 24-panel string — the cold-voltage ceiling forbids it. Real designs are series strings wired in parallel at the inverter or combiner, and the discipline is symmetry: strings sharing an MPPT must be the same length and module type, because paralleled strings force a common voltage and mismatched string voltages simply hand energy to the weaker string's losses.
Worked layout for that 24-panel job on a dual-MPPT residential inverter, 400W modules with 49.8V Voc at a −10°C site:
| Design Element | String A | String B | Why |
|---|---|---|---|
| Modules per string | 11 | 11 | Cold-corrected max was 11 (595.8V) — two modules go to a third string or the array drops to 22 |
| String Voc (cold) | 595.8V | 595.8V | Inside the 600V dwelling ceiling |
| String Vmp (operating) | ~340V | ~340V | Squarely in the MPPT sweet spot |
| String current | ~10A | ~10A | One MPPT per string — no string fuses required |
| Homerun wire | 12 AWG PV wire | 12 AWG PV wire | 10A continuous × 1.56 = 15.6A ampacity needed; 12 AWG covers it with room |
Two strings, four conductors home, one inverter, zero string fuses — clean, serviceable, and every number defensible at inspection. The solar installation guide carries this layout through racking and attachment, and the permitting guide shows how the string map appears on plan sets.
Voltage Drop on String Homeruns: The Quiet Production Tax
String voltage is high, so drop is rarely dramatic — but on long runs from detached garages or ground mounts, it still costs harvest. Target under 2% at operating current:
| One-Way Run (ft) | String Current | Wire | Voltage Drop at 340V | Verdict |
|---|---|---|---|---|
| 40 | 10A | 12 AWG | 0.9% | Standard residential case — fine |
| 80 | 10A | 12 AWG | 1.8% | Acceptable |
| 80 | 10A | 10 AWG | 1.1% | Better harvest, small cost delta |
| 150 | 10A | 10 AWG | 2.1% | Marginal — ground-mount territory, check carefully |
| 150 | 10A | 8 AWG | 1.3% | The right call on a 150-foot run |
Compare those percentages with what a parallel 30V array would suffer on the same run — losses north of 10% — and the economic case for series strings makes itself. Wire ampacity for these runs cross-references the NEC ampacity chart; PV wire in rooftop raceways hits ambient temperatures that make the derating columns relevant, not optional.
One more field habit worth stealing: we record the as-built string Voc and Imp on the inside of the inverter door with a paint marker. Two years later, when output looks soft, the commissioning numbers are right there telling you what "normal" was — no ladder required to start the diagnosis.
Safety Layers Around the String: Grounding, Rapid Shutdown, and Arc Protection
A series string at 400–600V DC deserves respect — DC arcs don't self-extinguish at zero-crossings the way AC does, which is why the NEC wraps rooftop arrays in three protective layers. Equipment grounding bonds every module frame and rail back to the grounding electrode system (NEC 690.43 and Article 250). Rapid shutdown (690.12) drops conductors inside the array boundary to 30V or less within seconds of initiation, so firefighters can cut vent holes without standing in a live 500V field. And arc-fault protection (690.11), built into listed inverters, watches the string's current signature for the noise pattern of a series arc and shuts down before the arc becomes a fire. All three layers exist because of lessons learned the expensive way; none of them is optional on a dwelling, and all three get inspected. Details live in our grounding, bonding, and lightning protection guide.
Cold-climate crews get one more reminder: schedule the megger test for a dry morning, not after overnight frost. Moisture film inside a connector that will be perfectly fine at operating temperature can fail an insulation test at dawn and send you chasing a fault that evaporates by ten o'clock. Ask me how I know.
Frequently Asked Questions
What happens if you mix different solar panels in a series string?
The string's current is limited by the lowest-Imp module, so a 9A module in a string of 10A modules drags the entire string down to 9A — losing roughly 10% of the array's power. Match modules by Imp within about 5%, or put the odd module on its own MPPT or microinverter.
How does shading affect a series-connected solar array?
All modules in a string share the same current, so shade on one module throttles the rest. Internal bypass diodes route around shaded cell-strings and limit the damage to roughly the shaded portion, but layout and module-level electronics are the real cures.
When should I choose parallel connections instead of series?
Choose parallel for low-voltage battery systems (12–48V) where array voltage must stay near battery voltage, or when shading forces module independence. Otherwise series wins: lower current, smaller wire, less loss, simpler protection.
What is the maximum number of solar panels I can wire in series?
Divide the inverter's absolute maximum input voltage by the cold-corrected module Voc, and round down. For dwellings, NEC 690.7(C) additionally caps system voltage at 600V — so even a 1,000V-rated inverter is limited to the 600V class on a house.
Do series strings need fuses?
One or two strings in parallel per MPPT usually need no string fuses because a faulted string can't be over-driven by one healthy sibling. Three or more strings in parallel do require per-string overcurrent protection sized per NEC 690.9 — typically 1.56 × Isc, rounded to the next standard rating.
Can I add a panel to an existing series string later?
Only if the cold-weather string voltage stays under the inverter's maximum and the added module matches the string's Imp. In practice, re-check the NEC 690.7 math first — most strings are already near the voltage ceiling by design.
Need pricing or availability on anything in this guide?
Portlandia Electric Supply dropships direct from the manufacturer — most items Ship Direct with lead times stated up front, no surprises.
Get a quote from PESBulk, pallet and contractor pricing available.