Updated September 2026 — refreshed against the live PES catalog; product pricing verified 2026-09-26.
2026 product line update
| Product | Class | Price |
|---|---|---|
| Canadian Solar 710W TOPCon Bifacial Solar Panel | 710W | $340.80 |
| Hyundai 640W 156-Cell TOPCon Bifacial Solar Panel | 640W | $220.78 |
| Thornova Solar TS-BGT72(600) 600W Bifacial Solar Panel | 600W | $165.76 |
| Thornova Solar 595W Solar Panel 144 Cell Bifacial TS-BGT72(595) Wholesale 31 panels per pallet | 595W | $164.64 |
| ZNShine Solar 585W 144-Cell Bifacial Solar Panel | 585W | $246.99 |
| Hyundai HiS-S585OJ 585W Clear on Transparent156 Half-Cell Bifacial Solar Panel | 585W | $195.86 |
Live prices verified 2026-09-26. The current pallet line tops out at 550–640W, plus the Canadian Solar 710W TOPCon flagship panel.
How a Solar Panel and a Battery Actually Become a System
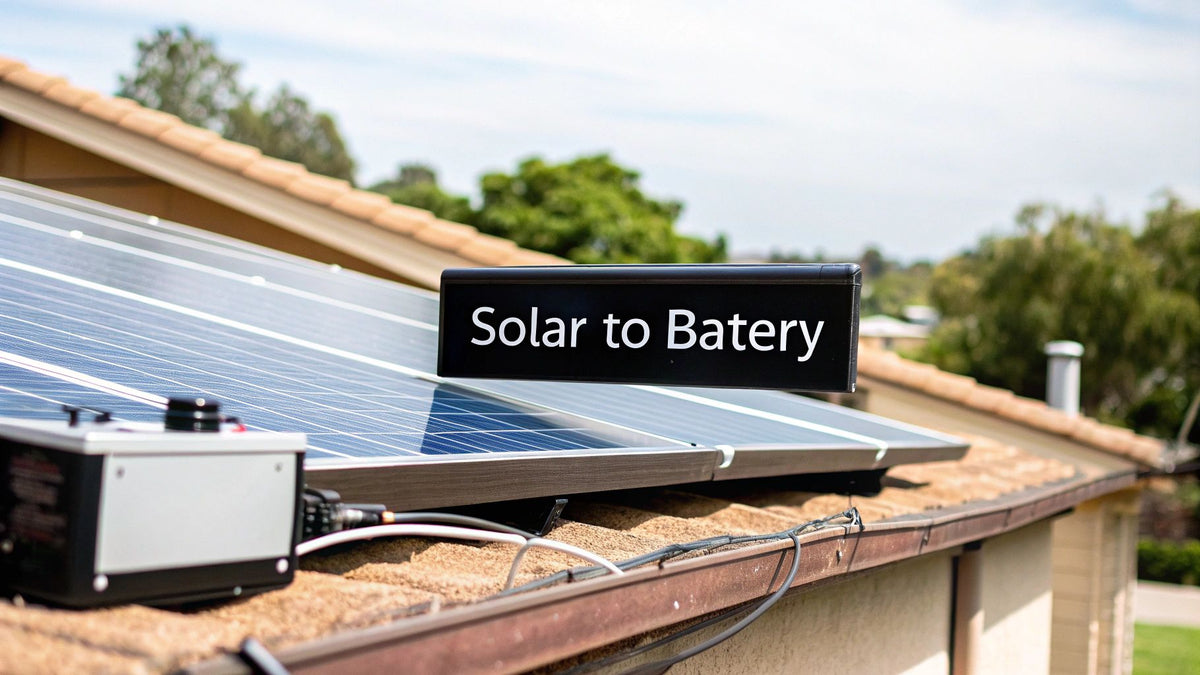
One solar panel, one battery, and the box in between that keeps them from hurting each other — that's the smallest real solar power system there is, and it's the foundation under every RV setup, boat house bank, shed light, and gate opener we've ever sold parts for. Get this single-panel build right and the big systems stop looking mysterious: they're the same three components with bigger numbers.

The mistake that ruins this project before it starts is skipping the middle box. A solar panel is not a battery charger; it's a raw DC source whose voltage swings with sunlight and temperature. Connect it straight to a battery and on a bright day it will overcharge the battery past its limits — boiling electrolyte in lead-acid, tripping protection in lithium, and in the worst cases starting a fire. The charge controller exists because panels and batteries speak different languages, and the controller translates.
The Core Components and Their Roles
| Component | Primary Function | Key Specification to Check | For Installers: Critical Decision Point |
|---|---|---|---|
| Solar Panel(s) | Convert sunlight into DC electricity | Voltage (Vmp) and Current (Imp) to match the charge controller's input limits | Ensure panel array's max voltage (Voc) doesn't exceed controller's max input, especially in cold weather |
| Charge Controller | Regulates power flow to prevent battery overcharging | Max Input Voltage and Amperage Rating — must handle the panel array's total output | Choose PWM for small, budget-sensitive jobs or MPPT for higher efficiency and ROI on larger systems |
| Battery Bank | Stores the generated energy | Nominal Voltage (12V, 24V, 48V) and Chemistry (Lithium, AGM) | Match battery voltage to the inverter and system design; verify the controller's charge algorithm supports the chemistry |
| Inverter | Converts stored DC power into usable AC power | Wattage Rating and Input Voltage (must match battery bank voltage) | Size the inverter for the peak AC load, not just battery capacity |
| Fuses/Breakers | Overcurrent protection on every circuit | Amperage rating per NEC sizing | Non-negotiable: between battery and controller, and between panels and controller |
| Wiring | Moves the power safely | Gauge sized for amps and run length | Undersized wire is the silent efficiency thief of small systems |
Assembling Your Tools and Safety Gear
An hour of preparation saves the classic mid-build hardware store run. Everything below fits in one bucket; the bucket goes up the ladder with you.
Your Essential On-Site Checklist
This is a hand-tool job: wire strippers, a crimper for ring terminals, a multimeter that reads DC volts and amps, a wrench set for battery lugs, and heat-shrink for every joint you want to survive humidity. The one power tool worth dragging along is a step-bit for clean pass-through holes in RV roofs and shed walls — ragged holes leak, and leaked roofs rot.
Personal Protective Equipment (PPE)
Twelve volts sounds harmless until you short a 100Ah battery across a wedding ring — the ring wins the argument and your finger loses it. Safety glasses for any battery work (lead-acid vents hydrogen; a spark at the wrong moment is an explosion), gloves when wrestling lugs, and a strict habit of removing metal jewelry before touching a battery bank. A 12V battery can dump hundreds of amps into a short circuit. Respect the current, not the voltage. Keep a box of baking soda within reach around flooded batteries — acid spills happen during transport and first fills, and neutralizing them immediately is the difference between a wipe-up and a corroded tray.
Sizing Your Charge Controller for Peak Performance

The controller is the brain of the whole build and the component most often undersized. Buy for the system you'll have in two years, not the one on the bench today — the price step from a 20A unit to a 30A unit is trivial compared to replacing a maxed-out controller later.
PWM vs. MPPT: The Real-World Decision
PWM (pulse-width modulation) controllers are simple switches: they clip panel voltage down to battery voltage and throw away the difference as unused potential. MPPT (maximum power point tracking) controllers are DC-to-DC converters: they take the panel's higher voltage and convert the excess into extra charging current. The price gap decides most small builds, but the efficiency gap decides big ones:
| Factor | PWM Controller | MPPT Controller |
|---|---|---|
| Harvest efficiency | ~70–80% of panel rating | ~93–98% of panel rating |
| Panel voltage requirement | Panel Vmp must roughly match battery voltage (18V "12V panels" for 12V banks) | Panel voltage can far exceed battery voltage — series strings allowed |
| Cold-weather gain | None | 10–30% winter harvest boost |
| Typical cost (20–30A class) | $25–$80 | $100–$300+ |
| Best fit | 100–200W single-panel builds where budget rules | Anything 300W+, lithium banks, series arrays, cold climates |
The full engineering breakdown lives in our MPPT vs. PWM comparison. Short version from the counter: on a lithium battery the MPPT pays for itself in recovered watts inside two seasons, which is why we steer every LiFePO4 build that direction.
Calculating Your Controller Size
Controller amps = panel watts ÷ battery voltage × 1.25 safety margin. A 200W panel on a 12V bank: 200 ÷ 12 × 1.25 = 20.8A → a 30A controller. A 400W array on a 24V bank: 400 ÷ 24 × 1.25 = 20.8A → same 30A controller, twice the watts — the argument for 24V systems the moment your array passes about 400W. The charge controller sizing guide runs these numbers for larger arrays, and the charge controller collection has both technologies in stock — from compact PWM units to Victron SmartSolar MPPTs like the 100/50 and 150/100 and the MidNite line including the MN3024DIY.
The Wiring Sequence for a Safe Connection
Order of operations is not a suggestion here — it's how you avoid welding your tools. Controller to battery FIRST, panels LAST. The controller needs battery voltage present to know what system it's regulating; connect panels first and some controllers configure themselves for the wrong voltage, or fault, or — on cheap units — fail.
Step 1: Connecting the Charge Controller to the Battery
Fuse the positive lead within 7 inches of the battery terminal — the fuse protects the wire, and the wire starts at the battery. Size the fuse to the wire and controller (a 30A controller on 10 AWG gets a 30–40A fuse). Land negative first or positive first, arguments exist both ways; what matters is that the fuse goes in before anything downstream of it, and that every connection is torqued. A loose battery lug is an arc waiting for a bump in the road — I've cleaned carbonized posts off more than one RV battery tray where a finger-tight lug spent a season slowly welding itself.
Step 2: Connecting the Solar Panels to the Controller
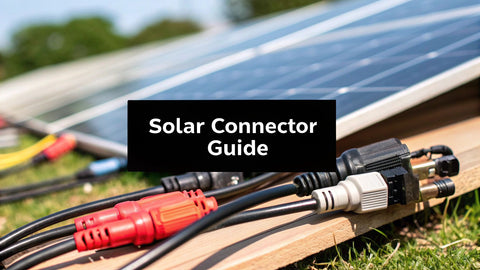
Cover the panel or work at dusk — a live panel in sun is always producing, and there's no off switch on the sun. Run the panel positive through its own fuse or breaker, then to the controller's PV terminals. Verify polarity with the meter before landing anything: reversed PV polarity is the fastest way to buy a new controller. The full connector craft — crimping, strain relief, roof pass-throughs — is covered in our MC4 and wire gauge guide.
Step 3: Attaching Your DC Loads or Inverter
Small DC loads can come off the controller's load terminals if it has them — the bonus is low-voltage disconnect protection that saves the battery from deep discharge. Anything with real appetite (an inverter, a compressor fridge) goes directly to the battery through its own fuse; load terminals typically cap at 20–30A and an inverter laughs at that number. Inverter selection and wiring gets its own treatment in the battery installation guide and our solar inverter overview.
Wire and Fuse Sizing for Small Systems
The two calculations that keep 12V systems alive: ampacity (can the wire carry the amps without cooking) and voltage drop (do the amps arrive with enough volts left to matter). At 12 volts, drop is brutal — the same 10-foot run that loses nothing at 120V loses meaningful charging power at 12V:
| Circuit | Current | Run (round trip) | Minimum Wire | Why Not Smaller |
|---|---|---|---|---|
| 200W panel → 12V controller | ~11A (Imp) | 20 ft | 12 AWG (10 AWG better) | 14 AWG loses ~4% of harvest to drop |
| Controller → battery | ~17A max charge | 6 ft | 10 AWG | Drop directly slows charging voltage rise |
| Battery → 1,000W inverter | ~90A at full tilt | 6 ft | 2 AWG | 4 AWG at 90A loses 5%+ and runs warm |
| Battery → 2,000W inverter | ~180A | 6 ft | 2/0 AWG | This is why big inverters belong on 24/48V banks |
Fuses follow the wire: every positive conductor leaving the battery gets overcurrent protection sized to the conductor, close to the source. The NEC wire ampacity chart covers the formal numbers, and our solar wire guide covers which insulation types belong where.
Firing It Up: Commissioning and Troubleshooting Your System

The Initial Power-On Check
Sequence: battery connected and fused → controller wakes and displays battery voltage → set the battery chemistry (this step gets skipped constantly, and a lithium bank charged on an AGM profile lives a short, sulfated-equivalent life — AGM profiles simply undercharge lithium) → panels connected last → confirm charging amps flowing. Then program the charge parameters from the battery manufacturer's sheet: for LiFePO4 typically 14.2–14.6V absorption, 13.6V or disabled float, and equalization OFF — permanently off. Equalization is a lead-acid ritual; applying 15.5V to a lithium bank is how BMS units get exercised and warranties get voided.
What to Do When Things Go Wrong
| Problem | Likely Cause(s) | How to Fix It |
|---|---|---|
| Charge controller won't turn on | Reversed polarity on battery terminals; blown fuse; loose battery connection | Disconnect panels. Verify battery connections are positive-to-positive and negative-to-negative. Check and replace the fuse if blown. Torque terminals. |
| Battery is not charging | Loose connection; panel shaded; blown PV fuse | Ensure panels are in direct sun. Re-check and torque all wiring terminals from panels to controller. Verify PV input voltage with a multimeter. |
| Controller shows a fault code | Over-voltage from panels; incorrect battery settings | Cover panels immediately. Verify array Voc against the controller's max input limit. Confirm battery type setting matches the installed battery. |
| Charging amps far below expectations | Panel hot (normal 10–20% loss), flat-mount shading, PWM clipping | Compare against realistic expectations: panel watts × 0.75 ÷ battery voltage ≈ honest amps |
| Battery dies overnight | Phantom loads, undersized bank, or an inverter left on idle | Audit with a meter; inverter idle draw of 20–40W eats 0.5–1 kWh nightly |
How Much Panel Does Your Battery Actually Need?
The reverse sizing question — you have the battery, how much panel keeps it happy: daily usable energy ÷ sun hours ÷ 0.75 real-world factor. A 100Ah 12V lithium bank cycled 50% nightly needs 640 Wh back each day; at 4.5 sun hours that's 640 ÷ 4.5 ÷ 0.75 ≈ 190W of panel — one 200W module, tight but workable, two in cloudy country. The dedicated walkthrough for exactly this pairing is how long a 200W panel takes to charge a 12V 100Ah battery, and the battery sizing calculator scales the method up to cabin-sized banks like the Fortress eFlex 5.4 kWh rack units.
Understanding the Four Charge Stages Your Controller Manages
The controller isn't a switch — it's a four-stage charging computer, and knowing the stages explains ninety percent of "weird" behavior you'll ever see on the display:
| Stage | What the Controller Does | What You'll Observe |
|---|---|---|
| Bulk | Maximum available current until battery reaches absorption voltage | Full charging amps on the display; voltage climbing steadily |
| Absorption | Holds voltage constant (14.2–14.6V lithium; ~14.4V AGM); current tapers | Amps falling slowly over 1–3 hours — this is normal, not a fault |
| Float | Drops to a maintenance voltage (~13.6V) to hold full charge | Small amps, full battery; lithium prefers float disabled or minimal |
| Equalization | Controlled 15V+ overcharge to de-sulfate flooded lead-acid | Lead-acid only — never enable on lithium or sealed AGM |
The absorption taper fools beginners weekly: amps dropping from 15A to 3A as the battery fills is the physics working, not the system failing. Likewise, a controller showing near-zero amps at noon with a full battery isn't broken — it's done. Read voltage and stage together and the display stops being noise.
Building the Bank: Series, Parallel, and the Cable Discipline Nobody Mentions

When one battery isn't enough, batteries combine the same way panels do — series stacks voltage, parallel stacks capacity:
| Configuration | Result | When to Use It | The Rule That Matters |
|---|---|---|---|
| 2 × 12V 100Ah in parallel | 12V, 200Ah (2.56 kWh) | Keeping a 12V system with more runtime | Identical batteries, identical cable lengths to a common bus — imbalances cook the weaker unit |
| 2 × 12V 100Ah in series | 24V, 100Ah (2.56 kWh) | Stepping up to a 24V system | Batteries must be the same age, model, and state of charge when joined |
| 4 × 12V 100Ah (2S2P) | 24V, 200Ah (5.12 kWh) | Cabin-scale banks | Balance each string; fuse each parallel leg |
| Purpose-built 48V rack modules | 48V, 100Ah per module (5.1 kWh) | Anything past ~5 kWh — the modern answer | Manufacturer interconnects handle balancing internally |
The cable-length rule in row one is the one that separates banks that die in two years from banks that die in twelve: unequal cables mean unequal resistance, unequal resistance means one battery does more work, and the hardworking battery ages fast enough to drag its sibling down with it. Use a busbar, equal lengths, and a torque wrench. Our battery longevity guide covers the maintenance calendar that keeps the investment alive.
Mounting, Ventilation, and Where the Hardware Lives
Placement kills more small systems than bad math. The controller wants a vertical wall, dry air, and arm's reach of the battery — its voltage sensing is only as honest as its cable run. Flooded lead-acid batteries need ventilation (hydrogen is real); AGM and LiFePO4 don't vent in normal use but both hate heat, and lithium adds a hard cold-charging limit: below 32°F, a lithium BMS will or should refuse charge, because charging frozen lithium plates metallic dendrites that short cells permanently. Garages and RV battery boxes in cold country need heated batteries or charge-source management — our 20–80 charging guide covers the operating habits that extend cycle life in every climate.
The panel side is simpler: unshaded, angled within 20° of latitude if it's fixed, and mounted to survive the wind your zip code actually gets. A panel that slides off a shed roof in a March gale was never a bargain. Orientation matters more than tilt for small systems — a panel pointing true south at a lazy angle beats a perfectly tilted panel staring at a fence line, and portable panels earn their keep by being re-aimed at four o'clock when the afternoon sun is the only sun left.
A Complete Worked Build: The 200W Shed System, Parts List and All
Theory is easier with a shopping cart attached. Here's the exact 12V system we specced last month for a customer's pump house — lighting, a small pump, and tool charging, about 600 Wh of daily use:
| Slot | Component Chosen | Why This One |
|---|---|---|
| Panel | 1 × 330W-class module | Oversized vs. the 190W minimum — headroom for winter and bad weeks |
| Controller | 30A MPPT (Victron SmartSolar 100/50 class) | MPPT harvest on a lithium bank; room for a second panel later |
| Battery | 1 × 12V 100Ah LiFePO4 (1.28 kWh) | Two days of the 600 Wh budget at 50% daily cycling |
| Battery fuse | 40A ANL within 7 in. of the terminal | Protects the 10 AWG controller run |
| Wiring | 10 AWG controller run; 12 AWG panel run | Drop under 2% on the actual lengths |
| Loads | 12V LED lighting direct; small 400W inverter fused at battery | Tool batteries and the pump stay DC-friendly where possible |
Total hardware cost lands around $700–$900 depending on brand choices — less than a year of the generator-and-gas habit it replaced. Build time for a careful first-timer: one Saturday, including the roof mount. The mistakes available in this build are all the ones covered above: skip the chemistry setting, skimp the fuse, or wire panels-first, and the system teaches you the lesson at its own pace. I've fielded the Sunday phone calls; do it in order and there is no Sunday phone call.
Grounding the Small System: The Step Most DIY Builds Skip
Even a one-panel system earns a ground: module frame and racking bonded to earth, and the DC negative bonded per the controller manufacturer's instructions (some want it grounded, some forbid it — read the manual for your unit, because both designs exist). A ground rod at the shed, 6 AWG bonding wire, and ten minutes of work is the difference between a static discharge or lightning-induced surge finding earth and finding your controller instead. RVs ground through the chassis; boats have their own rules entirely (ABYC, not NEC). When a small system grows into something permitted, the full treatment is in our solar grounding and bonding guide — the physics doesn't scale down just because the array did.
Common Questions, Answered
Can I just hook a solar panel straight to a battery?
No. An unregulated panel will overcharge the battery on any sustained sunny day — boiling lead-acid electrolyte or forcing a lithium BMS into constant protective disconnects. Even a tiny 5W maintainer panel is the edge case, not the rule. Always use a charge controller.
What if I wire the panels to the controller before the battery?
Many controllers boot from battery voltage and auto-detect 12V vs. 24V system voltage at that moment. Panels-first risks wrong auto-configuration, fault codes, and on some units, damage. Battery first, panels last — every time, including after maintenance.
How do I pick the right wire size?
Size for amps first (ampacity), then check voltage drop for the run length and upsize until drop stays under ~3%. At 12V, drop usually forces you one to two gauges above the ampacity minimum — that's normal, not overbuilding.
Do I really need a fuse between the panel and controller?
For a single panel on a small system, the panel's own short-circuit current is below most wiring's capacity — but the battery-to-controller fuse is non-negotiable, and any parallel panels change the math per NEC 690.9. Cheap insurance either way; fuse it.
Can I add more panels to this system later?
Yes, if the controller has amperage headroom — this is the argument for buying the 30A controller when the 20A would do. Check controller max PV input voltage before adding panels in series, and stay within one panel type per array where possible.
What's the difference between a 12V and 24V system?
Same energy, half the current. Doubling system voltage halves every wire's amps, halves the controller current needed for the same watts, and halves voltage-drop losses. Past roughly 400W of array or 1,000W of inverter, 24V stops being optional and starts being correct.
Keep Building
The single-panel system is chapter one. When the shed becomes a cabin and the bank grows past one battery, the wiring decisions multiply — series strings, parallel banks, bigger controllers — and our guide to connecting full solar arrays to battery banks picks up right there. Everything on this page — panels, controllers, LiFePO4 batteries, fusing, wire — ships from the solar and storage shelves, and the off-grid cabin kit shows what the grown-up version looks like pre-engineered.
Need pricing or availability on anything in this guide?
Portlandia Electric Supply dropships direct from the manufacturer — most items Ship Direct with lead times stated up front, no surprises.
Get a quote from PESBulk, pallet and contractor pricing available.