Updated September 2026 — refreshed against the live PES catalog; product pricing verified 2026-09-26.
2026 product line update
| Product | Class | Price |
|---|---|---|
| Canadian Solar 710W TOPCon Bifacial Solar Panel | 710W | $340.80 |
| Hyundai 640W 156-Cell TOPCon Bifacial Solar Panel | 640W | $220.78 |
| Thornova Solar TS-BGT72(600) 600W Bifacial Solar Panel | 600W | $165.76 |
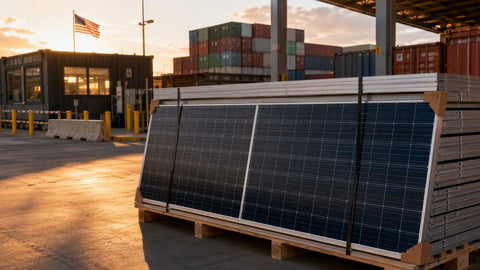
| Thornova Solar 595W Solar Panel 144 Cell Bifacial TS-BGT72(595) Wholesale 31 panels per pallet | 595W | $164.64 |
| ZNShine Solar 585W 144-Cell Bifacial Solar Panel | 585W | $246.99 |
| Hyundai HiS-S585OJ 585W Clear on Transparent156 Half-Cell Bifacial Solar Panel | 585W | $195.86 |
Live prices verified 2026-09-26. The current pallet line tops out at 550–640W, plus the Canadian Solar 710W TOPCon flagship panel.
After a decade of watching solar installations from the supply side — and getting on roofs with our installer customers when a job goes sideways — I can tell you the panels are the easy part. What separates a system that produces for 30 years from one that leaks, underproduces, or fails inspection is everything that happens before the first module lands on the rails: load calculations, structural checks, permitting, and honest conversations about what solar can and cannot do for a specific address.

This guide covers the full installation arc for residential and light-commercial PV: planning and sizing, equipment selection, the physical install, electrical integration, and commissioning. For pricing context, see commercial solar installation costs; for the numbers on your own roof, start with our solar system calculator and system size calculator.
Understanding Solar Panel Installation
A grid-tied PV system is five subsystems bolted together: the array (modules + racking), the DC wiring, the inverter, the AC integration (breaker, disconnects, possibly a service upgrade), and monitoring. Each has its own code article — 690 for PV, 705 for interconnection, 250 for grounding, 310 for the conductors — and each has failure modes we've seen in the field:
| Subsystem | Key Components | Governing NEC Article | Most Common Field Failure |
|---|---|---|---|
| Array | Modules, racking, flashing, attachments | 690, 690.43 grounding | Roof leaks from improperly flashed penetrations; modules clamped outside manufacturer zones |
| DC wiring | PV wire, connectors, string fusing, conduit | 690.31, 690.9 | Mismatched connector brands (a UL-recognized fire risk), unsupported wire resting on shingles |
| Inverter | String, micro, or hybrid inverter; rapid shutdown | 690.12, 690.15 | Undersized for DC input, poor ventilation derating output, missing RSD compliance |
| AC integration | Breaker, disconnect, interconnection method | 705.12, 240 | Exceeding the 120% busbar rule, missing line-side tap engineering |
| Monitoring | Gateway, CTs, communications | — | Never configured; underproduction goes unnoticed for years |
Planning Your Solar Installation
Planning is 70% of the job. The steps, in the order we walk customers through them:
- Establish the load. Pull 12 months of utility bills and find annual kWh. A home using 10,800 kWh/year averages 900 kWh/month. For the conversion math, our guides on power consumption and how many watts power a home walk through it.
- Convert load to array size. Divide annual kWh by your location's production ratio (kWh per kW per year). At a typical 1,400 kWh/kW/yr in the mid-Atlantic, that 10,800 kWh load needs about a 7.7 kW array — call it 8 kW with degradation headroom.
- Check the roof. Orientation (south best, west fine, east acceptable), tilt, shading from 9 a.m. to 3 p.m. solar time, and structural condition. If the roof has less than 10 years of life left, re-roof first — removing and reinstalling an array costs $1,500–$3,000+ later.
- Check the service. The 120% rule (705.12) limits a backfed breaker: on a 200A bus with a 200A main, you can add up to 40A of PV. Bigger systems need a main breaker derate, a line-side tap, or a service upgrade — see our service upgrade guide.
- Permits and interconnection. AHJ building/electrical permits plus the utility interconnection agreement. Timelines run 2–8 weeks; start before ordering equipment.
| Annual Usage (kWh) | Production Ratio (kWh/kW/yr) | Array Size Needed | Modules @ 450W | Roof Area (approx.) |
|---|---|---|---|---|
| 6,000 | 1,400 | 4.3 kW | 10 | ~220 sq ft |
| 9,000 | 1,400 | 6.4 kW | 15 | ~330 sq ft |
| 12,000 | 1,400 | 8.6 kW | 20 | ~440 sq ft |
| 15,000 | 1,400 | 10.7 kW | 24 | ~530 sq ft |
| 12,000 | 1,100 (cloudy NE) | 10.9 kW | 25 | ~550 sq ft |
| 12,000 | 1,700 (SW desert) | 7.1 kW | 16 | ~350 sq ft |
Equipment Selection: Panels, Inverters, Racking
Modules: The residential market has consolidated around 430–470W mono N-type panels. Bigger isn't automatically better — match module count to usable roof area and string voltage windows. Browse current inventory in solar panels, 400–459W panels, and residential panels. Our best solar panels of 2026 roundup compares the current field, and the panel kit buyer's guide explains what should come bundled.
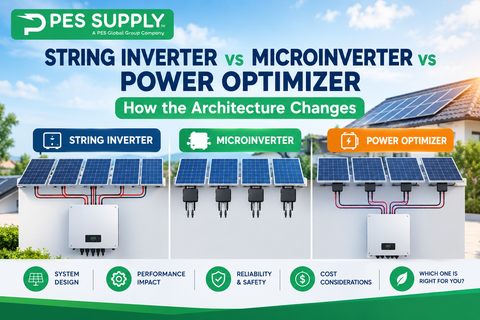
Inverters: Three architectures, three different jobs:
| Architecture | Best For | Strengths | Weaknesses |
|---|---|---|---|
| String inverter | Unshaded, single-plane roofs | Lowest cost per watt; single service point; easiest maintenance | One shaded module drags the string; no panel-level monitoring without optimizers |
| String + DC optimizers | Partial shade, complex roofs | Panel-level MPPT and monitoring; NEC 690.12 rapid shutdown built in | Higher cost; more roof-mounted electronics |
| Microinverters | Complex roofs, phased expansions | True per-panel independence; no DC strings on the roof; 25-year warranties common | Highest equipment cost; harder service access; AC trunk cable limits |
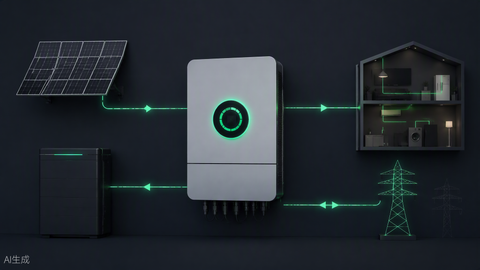
| Hybrid inverter | Systems with batteries now or later | Integrated battery management; backup capability; grid-interactive features | Premium pricing; battery compatibility lists matter |
We stock all three paths: string inverters, microinverters (Enphase, Hoymiles), power optimizers (SolarEdge, Tigo), and hybrid inverters. Our solar inverter explainer and hybrid inverter guide go deeper, and the inverter sizing calculator handles the DC/AC ratio math.
Racking: Match the racking to the roof — comp shingle flashings for asphalt, tile hooks or replacement tiles for tile, clamps for standing-seam metal, ballasted or attached systems for flat roofs. We carry IronRidge, Unirac, SnapNrack, and Roof Tech; the racking systems guide compares them.
The Physical Installation Sequence
Here's the actual order of operations on a residential rooftop job, compressed from our installer customers' playbooks:
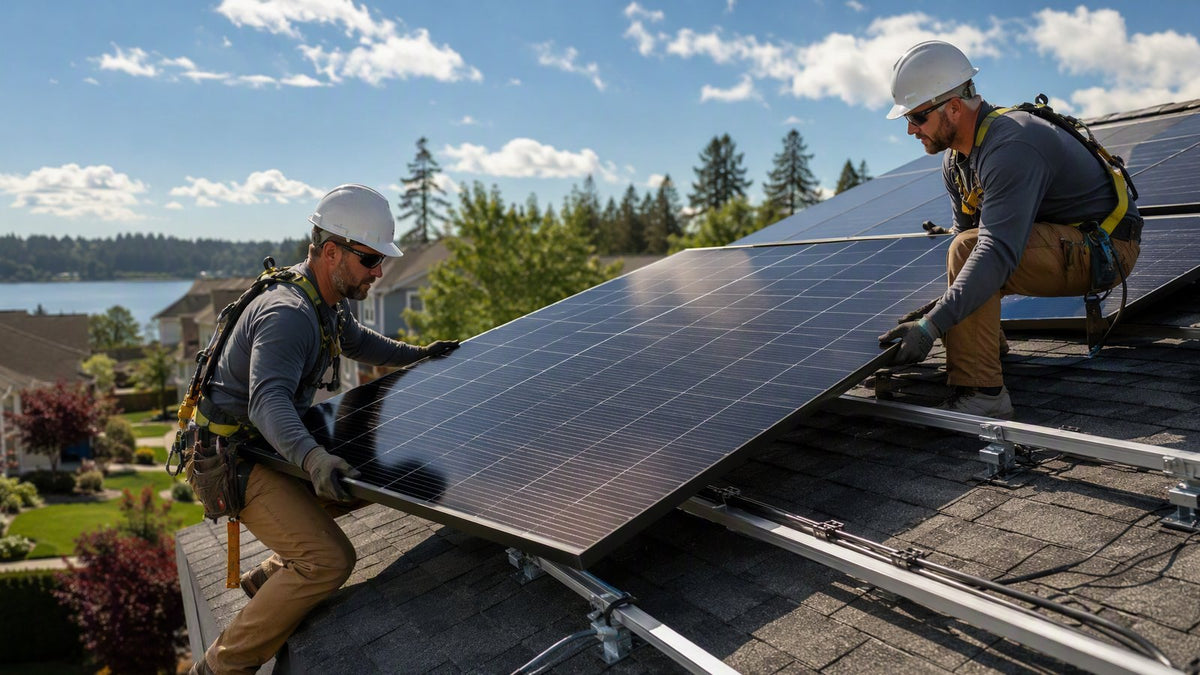
- Layout: Snap chalk lines for the array, locate rafters (not just the sheathing — hit structure), and stage materials. Attachments typically land every 4 feet horizontally per racking engineering letters.
- Attachments and flashing: Lag bolts into rafter centers with flashed standoffs. Butyl or manufacturer-specified sealant under every flashing. This is the step that determines whether the roof outlives the array.
- Rails and splices: Level rails, torque to spec (typically 80–120 in-lb on residential rail hardware — read the manual, not your impact driver's mood).
- MLPE mounting: Microinverters or optimizers mount to the rail before modules. Label each with its module position.
- Modules: Clamp within the manufacturer's clamping zones (usually specified as a range along the frame), torque mid/end clamps to spec, manage wire with clips as you go — no loops resting on shingles.
- DC homeruns: PV wire in UV-rated conduit where exposed, transitioning to EMT down the wall per conduit installation practice. Keep string polarity verified at every junction.
- Grounding: Bond every module frame and rail segment per 690.43 with listed lugs or integrated bonding hardware. Details in our solar grounding and bonding guide.
- Inverter and AC: Mount in shade with manufacturer clearances, land the AC on a correctly sized breaker, install the AC disconnect and DC/OCP devices per NEC 690 where required.
- Commissioning: String voltage and polarity checks, insulation resistance test, inverter setup, monitoring pairing, then utility PTO (permission to operate) before flipping the AC breaker for real.
Wire selection for both sides of the inverter is covered in PV wire vs USE-2 vs THHN, and string wiring topology in solar panel wiring basics.
DIY Solar Panel Installation: An Honest Assessment
We've supplied hundreds of DIY installs and we'll say it plainly: a competent DIYer with electrical experience can install a code-compliant system, but three things consistently separate success from regret:
- Permitting and interconnection. Most utilities will not interconnect a system without inspected permits, and most AHJs require stamped plans. Budget the engineering letter ($300–$800 for residential) and expect 4–10 weeks of process.
- The roof work is the dangerous work. Falls, not electricity, are the #1 installer injury. Fall protection, ladder discipline, and knowing when your roof pitch says "hire this out."
- The electrical work must be perfect. A backfed breaker sized wrong, an unbonded rail, or a mismatched MC4-mate connector is a fire risk you built yourself. If any part of Article 690/705 is unfamiliar, hire a licensed electrician for the AC tie-in at minimum.
DIY-friendly paths that reduce risk: complete solar kits with pre-engineered BOMs, DIY solar kits, and ground-mounts like the racking and mounting options that keep you off the roof entirely. Our solar installation guide page has the planning worksheets.
Incentives, Financing, and the 2026 Landscape
The incentive picture shifted materially with the 2025 budget reconciliation legislation. As of early 2026, the residential clean energy credit (Section 25D) has been terminated for expenditures after December 31, 2025, while commercial and third-party-owned residential structures under Sections 48E/48 retain credit pathways with new deadlines and domestic-content rules. State and utility incentives — SRECs, rebates, net metering successors — vary enormously and change annually. Check our solar incentives by state tracker before you price a project, and model the payback with the solar ROI calculator. For the policy detail, our 2026 tariff and policy update tracks the current rules.
| Financing Path | Upfront Cost | Who Owns Incentives | Best For |
|---|---|---|---|
| Cash purchase | Full system cost | You | Best lifetime ROI; simple ownership |
| Solar loan | $0–low down | You | Ownership with payment spread; watch dealer fees (can add 10–30% to principal) |
| Lease / PPA | $0 | Third party | No-maintenance option; lower savings; read escalator clauses carefully |
Battery-Ready and Backup Considerations

Even if you're not installing storage on day one, design for it: choose a hybrid or storage-ready inverter, leave wall space and conduit paths, and size the critical-loads plan early. When you're ready, our solar backup power systems guide, battery sizing calculator, and solar battery inventory take it from there. Wondering whether an array alone can carry a house? Can solar panels power a whole house answers that with real numbers.
String Sizing: The Voltage Math That Protects Your Inverter
String sizing errors kill inverters in January. Modules produce higher voltage as temperature drops, and exceeding the inverter's max input voltage on a cold morning is a non-warranty death. The calculation, per NEC 690.7, uses the module's open-circuit voltage (Voc) corrected for the site's record low temperature:
- Find Voc and its temperature coefficient on the module datasheet (typically −0.25% to −0.30% per °C).
- Apply the record-low correction. At −10°C design temp with a −0.28%/°C coefficient and 25°C STC reference: correction = 1 + (25 − (−10)) × 0.0028 = 1.098 — roughly 10% voltage gain.
- Max modules per string = inverter max input voltage ÷ corrected Voc. For a 600V inverter limit and a module with 49.5V STC Voc: corrected Voc ≈ 54.4V → 11 modules maximum (598V), not the 12 that fit at STC.
- Min modules per string = enough to keep the MPPT window fed on hot afternoons when module voltage sags. Too few and the string drops out of MPPT range every summer day at 2 p.m.
Current side: string short-circuit current (Isc) × 1.56 (the 1.25 × 1.25 factors of 690.8) sets conductor and OCP sizing. Modern 450W modules run 13–14A Isc, so a single string lands at 20–22A of circuit ampacity — fine on 10 AWG PV wire, but parallel strings into one input need the combiner math redone. Full walkthrough in solar panel wiring basics.
Roof-Specific Attachment Methods
| Roof Type | Attachment Method | Leak Risk Profile | Notes From the Field |
|---|---|---|---|
| Asphalt shingle | Flashed standoffs lagged to rafters | Low when flashed correctly | Hit rafters, not sheathing; butyl under every flashing; avoid brittle cold-weather shingle work |
| Standing-seam metal | Seam clamps (no penetrations) | Lowest of any roof type | Verify clamp-to-seam compatibility; some seams need set-screw torque verification |
| Concrete/clay tile | Tile hooks or tile-replacement flashings | Moderate — broken tiles are the real cost | Budget 5–10% spare tiles; walk the valleys, never the crowns |
| Flat membrane (TPO/EPDM) | Ballasted racking or attached with membrane boots | Ballast: none; attached: depends on boot detail | Ballast needs a structural letter for dead load; wind edge zones drive ballast weight up fast |
| Corrugated metal (ag buildings) | Through-bolted with butyl and EPDM washers | Moderate | Overdriven screws deform the washer and leak in year two — torque by feel, not by impact driver |
The Mistakes That Cost Our Customers Money
Patterns from a decade of supply-side damage reports:
- Mixing connector brands. "MC4-compatible" is not MC4. Cross-mated connectors from different manufacturers are a known arc-fault and fire pathway, and most AHJs now specifically check. Buy matched pairs from one manufacturer — Staubli is the reference standard.
- Clamping outside the zones. Every module datasheet specifies clamping ranges on the frame. Clamp at the wrong spot and you void the warranty and invite microcracks that show up as hotspot degradation in year four.
- Wire management as an afterthought. PV wire touching shingles abrades through in a few seasons of thermal cycling. Every inch clipped to rail, service loops above the roof surface.
- Skipping rapid shutdown verification. NEC 690.12 requires conductors inside the array boundary to drop to 30V within 30 seconds. Push the button during commissioning and measure — don't assume the MLPE did its job.
- Energizing before PTO. Utilities have cut service over it. Wait for permission to operate.
- No production baseline. Log the first month's kWh against the model. A string wired with reversed polarity or a failed optimizer is invisible without a baseline, and we've seen systems run at 80% for years before anyone checked.
Roof Mount vs Ground Mount: An Honest Comparison
| Factor | Roof Mount | Ground Mount |
|---|---|---|
| Installed cost per watt | Baseline (lowest) | +$0.25–$0.75/W (structure, trenching, concrete) |
| Orientation/tilt | Fixed by roof | Optimal tilt and azimuth, adjustable options |
| Roof dependency | Tied to roof age and condition | None — roof can fail independently |
| Maintenance access | Ladder/fall protection required | Walk-up access; easier cleaning and snow removal |
| Land requirement | None | ~100 sq ft per kW plus setbacks |
| Snow/shade performance | Roof obstructions unavoidable | Sited for zero shade; steeper winter tilt possible |
| Permitting | Building + electrical | Adds zoning/setback review in many jurisdictions |
Ground mounts make sense when the roof is shaded, old, structurally marginal, or small relative to the load — and when land is available. They also run cooler (better airflow), which buys back 2–4% of production versus a hot roof deck. Our ground-mount hardware lives in racking and mounting, and DIY-friendly ground structures pair well with off-grid cabin kits.
What a Good Installation Contract Actually Contains
Whether you hire or DIY, the paperwork patterns predict the outcome. A solid contract specifies: exact module and inverter models (not "or equivalent" without consent), expected annual production with the modeling tool named, warranty responsibilities split between workmanship (installer, 10 years is the quality marker) and equipment (manufacturer), who owns permitting and interconnection paperwork, a payment schedule tied to milestones with no more than 10–20% down, and a completion definition that includes passed inspection and utility PTO — not "panels on roof." If a bid won't put the production estimate in writing, ask why. The estimate is a model, and models miss, but refusing to commit to any number means nobody ran one.
Ownership Over 30 Years: Maintenance, Monitoring, and Degradation
A solar array is the lowest-maintenance power plant you can bolt to a building, but "low" isn't "zero." The ownership calendar that keeps systems at spec:
- Monthly: glance at monitoring. Production within 10–15% of the model's seasonal expectation means all is well; a step-change drop means something failed and the meter is running on the missed kWh.
- Annually: visual check of roof penetrations, wire management, and junction boxes; verify monitoring communication; review the utility true-up against expectations. In dusty or pollen-heavy regions, a cleaning when soiling visibly accumulates — rain handles it in most climates, and most cleaning schedules are oversold.
- Every 5 years: torque-check accessible electrical connections, inspect conduit and fittings, re-seal any flashing showing age, and IR-scan the inverter and disconnects under load if you have access to a camera.
- Degradation expectations: quality N-type modules degrade roughly 0.4–0.5% per year after a first-year light-induced drop — a 2026 array should still produce 88–90% of day-one output in 2046. Budget inverter replacement once in the 30-year window (string/hybrid inverters carry 10–12 year warranties; micros typically 25).
The single highest-value ownership habit costs nothing: keep the monitoring connected and look at it. We've watched systems lose 20% of production for two years to a failed optimizer or a tripped string because nobody checked the app — the hardware was under warranty the whole time, and the lost kWh were not. Set a calendar reminder; the thirty seconds a month is the cheapest insurance the system has. Pair the habit with one annual ritual: on the same day each year, export the past 12 months of production and compare against the installer's model and last year's number. Slow, steady decline of about half a percent is the modules aging normally; a sudden step down is hardware, and hardware under warranty is free to fix if you catch it.
And keep the paperwork. Permit sign-offs, interconnection agreement, commissioning reports, serial-number list, and the production model the installer ran. Warranty claims move at the speed of your documentation, and a system sold with the house someday transfers better with a complete folder. Buyers and their inspectors ask for exactly that file, and having it answers their questions before the negotiation starts. If your installer didn't hand you a commissioning packet at closeout, ask for it now — string voltages at startup, insulation resistance readings, and the inverter's first-day configuration are the baseline every future service tech will want.
Frequently Asked Questions
How many panels does a house need? Annual kWh ÷ local production ratio ÷ module watts. For 12,000 kWh/yr at 1,400 kWh/kW with 450W modules: about 19–20 panels.
Can I DIY a solar install? Possible for experienced DIYers, but permits, utility interconnection, and NEC 690/705 compliance are non-negotiable. Many DIYers self-install the array and hire an electrician for the AC tie-in.
How long does installation take? 1–3 days on the roof; 4–12 weeks total once permitting and the utility queue are included.
What is the 120% rule? NEC 705.12 caps solar backfeed at 120% of busbar rating minus the main breaker — 40A of PV on a standard 200A/200A panel.
Is the federal tax credit still available? The residential 25D credit ended after December 31, 2025. Commercial 48/48E pathways remain with deadlines. Verify current state programs before pricing.
Should I re-roof first? If the roof has under 10–15 years of life, yes — array removal and reinstall runs $1,500–$3,000+.
Shop Related Products
- Solar panels — all wattages
- Solar kits and complete systems
- Solar inverters
- Racking and mounting
- Solar batteries and storage
Need pricing or availability on anything in this guide?
Portlandia Electric Supply dropships direct from the manufacturer — most items Ship Direct with lead times stated up front, no surprises.
Get a quote from PESBulk, pallet and contractor pricing available.